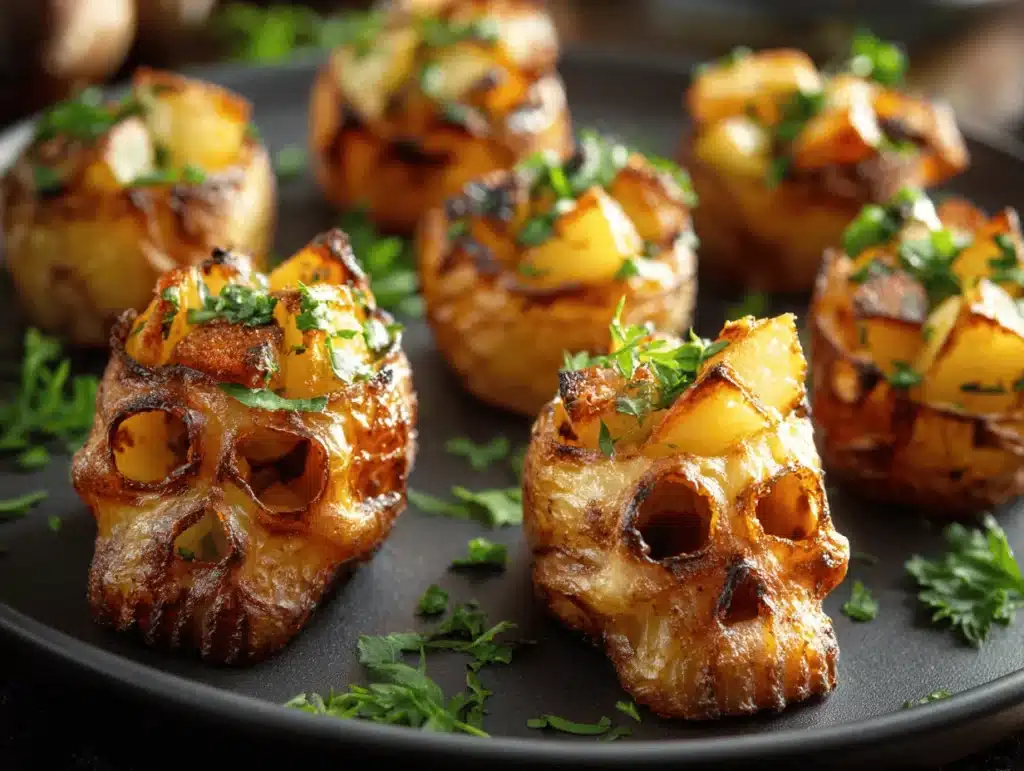
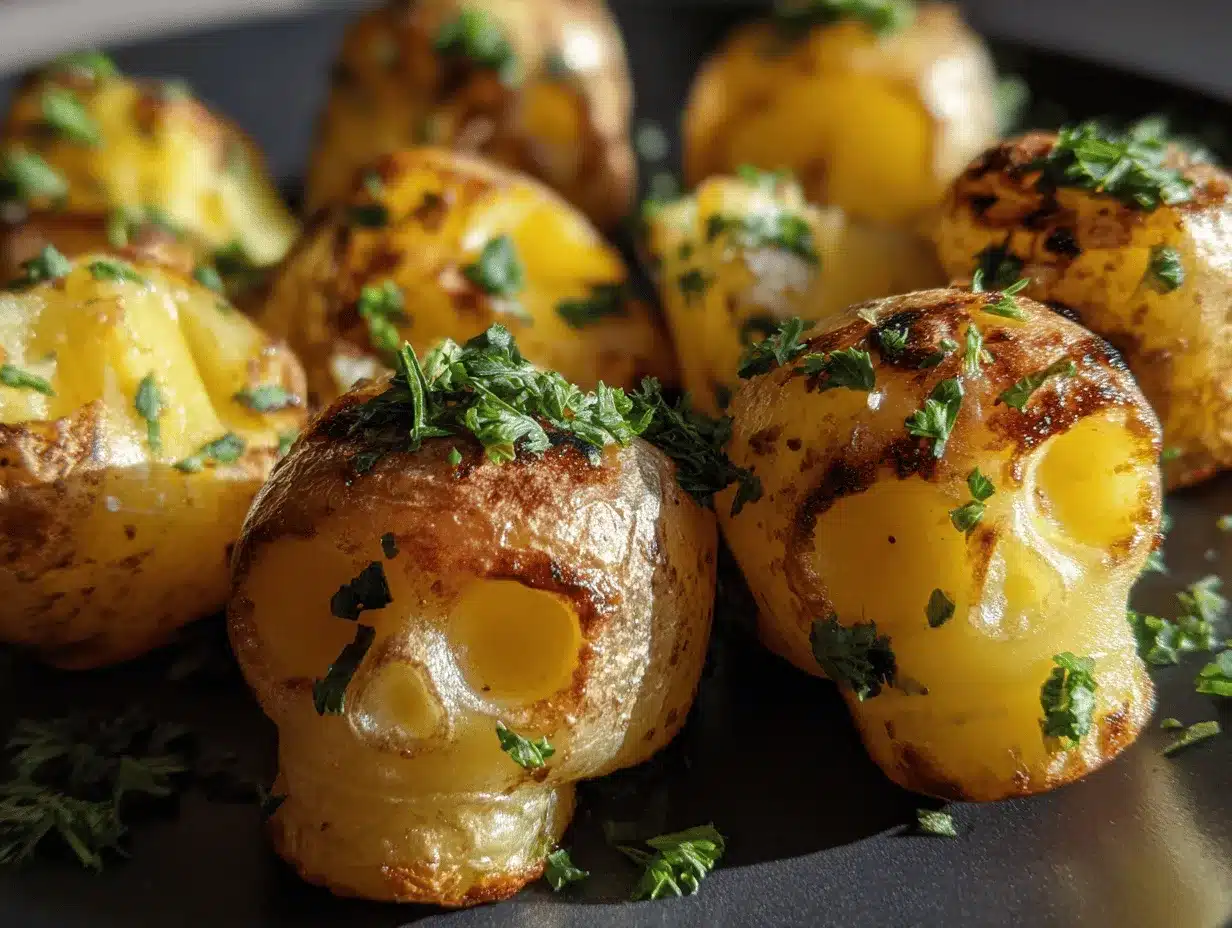
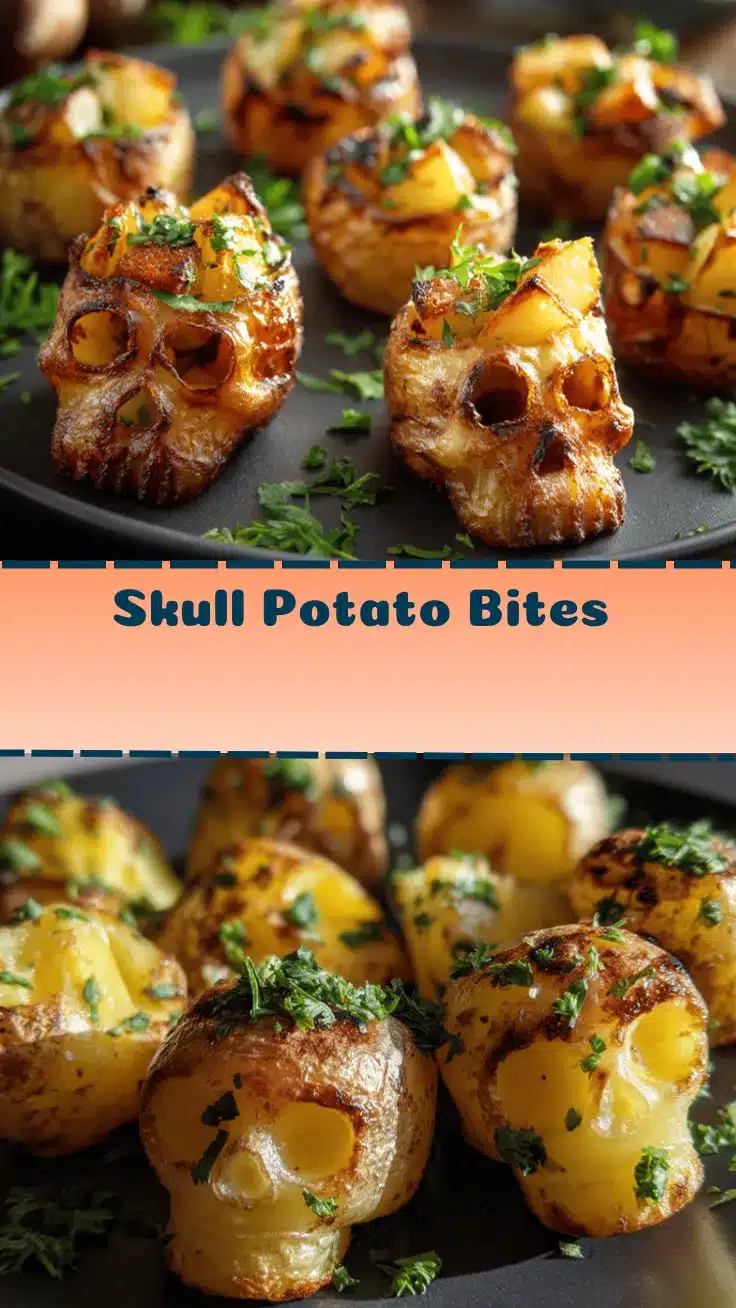
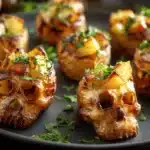
Crunchy on the outside, creamy on the inside, and yes, shaped like tiny skulls—these Skull Potato Bites are hands-down my new favorite Halloween party snack. Picture this: the oven’s warmth fills your kitchen while the scent of roasted potatoes mingles with gooey cheese and a hint of garlic. You glance over at your friends or family gathering around, and someone inevitably squeals, “Are those skulls?!” That’s honestly the best part—seeing their faces light up before they even take a bite.
I stumbled on this idea when my kid wanted something “creepy but not gross” for their Halloween sleepover. You know, the kind of treat that feels festive but still tastes like real food. After a few trial runs (and a lot of laughs at skulls that looked more like potatoes with hats), I finally nailed the texture and shape using a silicone skull mold. These Skull Potato Bites aren’t just a novelty—they’re packed with flavor, easy to customize, and surprisingly simple to make.
What I love most about this Skull Potato Bites recipe is how it brings everyone together at Halloween parties. It’s great for kids, adults, picky eaters, and anyone who’s a fan of potatoes (which is basically everyone, right?). Plus, if you’re short on time or patience, the ingredients are super flexible and forgiving. Whether you’re a seasoned home cook or just someone looking to jazz up your party spread, these potato bites will steal the show—and possibly a few hearts.
As someone who’s hosted more Halloween parties than I care to admit, I can say these Skull Potato Bites have officially earned their spot on my must-make list. I’ve tested, tweaked, and tasted this recipe over a dozen times, so you can trust it’s party-proof and kid-approved. Let’s jump in!
Why You’ll Love This Skull Potato Bites Recipe
- Party-Perfect Presentation: These skull-shaped potato bites are the ultimate Halloween conversation starter. They look spooky but taste comforting—kind of the best of both worlds.
- Quick & Easy: Ready in under 45 minutes (including prep), which means you can whip them up last minute without stress.
- Simple Ingredients: No fancy shopping trips required. You’ll only need basic staples—potatoes, cheese, and a few pantry items.
- Crowd-Pleaser: Kids can’t get enough, and adults will appreciate the crispy edges and cheesy filling. They disappear fast, so consider making a double batch!
- Customizable: Whether you want vegetarian, vegan, or gluten-free, this recipe adapts easily. The base is forgiving, making swaps easy.
- Next-Level Flavor: Thanks to a mix of melty cheese, garlic powder, and a dash of smoked paprika, every bite delivers comfort and a little kick.
What sets this Skull Potato Bites recipe apart is the texture—crispy golden edges and a soft, cheesy potato center. The secret? Using Yukon Gold potatoes for their creamy texture and blending them with just the right amount of cheese. And honestly, the silicone skull mold makes the whole process fun (and way less intimidating than it sounds).
After making these for several years, I can confidently say they’re the kind of snack people remember. There’s something magical about passing around a tray of edible skulls at a party and watching everyone reach for seconds. It’s not just about the look; the flavor is seriously good. If you want to serve something creepy but delicious (and not overloaded with sugar or artificial stuff), this is your go-to.
Whether you’re throwing a big bash or just having a cozy family movie night, these Skull Potato Bites are a fun way to celebrate the spooky season. And hey, if you’re feeling crafty, you can even give each skull a different “expression” with toppings. That’s Halloween spirit, right?
Ingredients Needed for Skull Potato Bites
This recipe uses simple, wholesome ingredients to deliver bold flavor and a satisfying, creamy texture—no need for complicated shopping or specialty items. Here’s what you’ll need:
- For the Potato Mixture:
- Yukon Gold potatoes (1 ½ pounds / 680g), peeled and diced (these are creamy and mash well)
- Unsalted butter (3 tablespoons / 42g), melted (adds richness)
- Whole milk (¼ cup / 60ml) (for creaminess; use dairy-free milk if preferred)
- Shredded cheddar cheese (1 cup / 113g) (substitute dairy-free cheese as needed)
- Parmesan cheese, grated (¼ cup / 25g) (optional; adds a savory kick)
- Garlic powder (1 teaspoon / 3g) (for depth of flavor)
- Smoked paprika (½ teaspoon / 1g) (optional; for a hint of smokiness)
- Salt (¾ teaspoon / 4g) (adjust to taste)
- Black pepper (½ teaspoon / 1g) (freshly cracked for best flavor)
- Chives or green onions, finely chopped (2 tablespoons / 8g) (optional; for color and tang)
- For the Skull Mold:
- Nonstick cooking spray or oil (for coating the molds)
- For Decoration (Optional):
- Black olive slices (for “eyes” or facial features)
- Thinly sliced red bell pepper or pimentos (for creepy smiles)
Ingredient Notes:
- You can use russet potatoes if that’s what you have, but Yukon Golds are best for a creamy texture.
- Substitute vegan butter and cheese if you need a dairy-free version.
- Want it gluten-free? All ingredients are naturally gluten-free, but double-check your cheese labels.
- I prefer Kerrygold butter for extra flavor, and Cabot cheddar for melting, but use whatever you’ve got.
Substitutions:
- Swap cheddar for mozzarella for a milder flavor.
- Add cooked bacon bits for a smoky twist (or use veggie bacon).
- Replace chives with parsley if you’re out.
Honestly, don’t stress if you’re missing one ingredient—this recipe is pretty forgiving. The key is a tasty potato base and a well-greased skull mold!
Equipment Needed
- Silicone Skull Mold: Essential for shaping the potato bites. These are easy to find online or at craft stores during Halloween (I got mine on Amazon for under $10).
- Large Saucepan: For boiling the potatoes. Any sturdy pot works.
- Potato Masher or Ricer: For smooth, lump-free potatoes. If you don’t have one, a sturdy fork does the trick.
- Mixing Bowl: To combine the potato mixture.
- Spatula or Spoon: For mixing and filling the molds.
- Baking Sheet: To support the silicone mold in the oven (makes handling easier).
- Nonstick Spray or Brush: For coating the mold—trust me, don’t skip this!
Equipment Tips: If your silicone mold is flimsy, place it on a sturdy baking sheet for stability. I’ve tried metal molds, but silicone is way easier to clean and pop the bites out of. If you don’t have a skull mold, you can use any mini muffin mold for regular bites—just add spooky decorations on top.
Maintenance tip: Wash molds by hand with warm water to keep them from picking up flavors or stains. Budget-friendly molds work fine, just make sure they’re oven-safe!
Preparation Method
- Boil the Potatoes: Bring a large saucepan of salted water to a boil. Add 1 ½ pounds (680g) peeled and diced Yukon Gold potatoes. Cook for 12-15 minutes until fork-tender—don’t undercook or the mash will be lumpy.
- Drain & Mash: Drain potatoes well and return to the pot. Mash with a potato masher or ricer until smooth. If you see lumps, keep mashing—nobody wants a chunky skull!
- Add Mix-Ins: Stir in 3 tablespoons (42g) melted butter, ¼ cup (60ml) milk, 1 cup (113g) shredded cheddar cheese, ¼ cup (25g) Parmesan, 1 teaspoon (3g) garlic powder, ½ teaspoon (1g) smoked paprika, ¾ teaspoon (4g) salt, and ½ teaspoon (1g) pepper. Mix until creamy and uniform. If the mixture feels too dry, add a splash more milk.
- Prep the Mold: Lightly spray or brush the skull mold cavities with nonstick spray or oil. Make sure every nook is coated—otherwise the bites will stick and lose their shape.
- Fill the Molds: Spoon potato mixture into each skull cavity, pressing firmly so the mixture picks up the details. Fill to the top and smooth out. I use a small spoon and my fingers for precision (don’t worry, it’s messy but fun).
- Bake: Place the filled mold on a baking sheet. Bake in a preheated oven at 375°F (190°C) for 22-25 minutes, until the tops are golden and slightly crisp. If you like extra crunch, bake for up to 30 minutes—but check early to avoid burning.
- Cool & Unmold: Let the bites rest in the mold for 5 minutes after baking. Carefully invert or pop out each skull (silicone molds make this easy—just gently push from the bottom). If any stick, run a thin spatula or knife around the edges.
- Decorate (Optional): Use black olive slices for eyes and thin strips of red pepper for mouths. Press them in while the bites are still warm so they stick. Warning: Don’t go overboard—sometimes less is creepier!
- Serve: Arrange on a platter and serve warm. If making ahead, reheat in the oven for 5-8 minutes at 350°F (175°C) to refresh the texture.
Personal Tips: For extra-creamy centers, blend the potato mixture briefly with a hand mixer. If you want more flavor, toss in chopped herbs or a pinch of cayenne. I learned the hard way not to overfill the molds—otherwise, the skull details get lost. And yes, taste the mix before baking to adjust seasoning!
Cooking Tips & Techniques
- Getting the Texture Right: Use Yukon Gold potatoes for a creamy mash. Overcooked potatoes get watery, so test with a fork and drain thoroughly.
- Mold Mastery: Press the potato mixture firmly into each skull cavity. If it’s too loose, the skulls won’t hold their shape. Don’t be shy—pat them down!
- Cheese Choices: Cheddar melts well and gives a nice sharpness, but you can blend in mozzarella for extra stretch. Mixing cheeses is honestly the secret to a gooey center.
- Timing & Multitasking: While the potatoes are boiling, prep your cheese, chop chives, and spray the molds. Saves time and keeps you organized during party prep.
- Common Mistakes: Undercooked potatoes make for chunky bites. Also, skipping the nonstick spray is a rookie move—trust me, you’ll regret it when skulls stick!
- Lessons Learned: The first time I made these, I rushed the unmolding step and lost a few skulls to breakage. Let them cool for at least 5 minutes—patience pays off!
- Consistency is Key: Taste the potato mixture before baking. Sometimes potatoes need more salt than you think. If you’re making a big batch, bake on the middle rack for even browning.
Honestly, don’t stress about perfection. Even if a skull comes out a bit lopsided, it just adds to the Halloween vibe. The kids always fight over the “funny” ones!
Variations & Adaptations
- Vegan Skull Potato Bites: Use plant-based butter, dairy-free milk, and vegan cheese. Skip out on Parmesan or use a vegan alternative. The texture stays creamy, and the flavor’s still great!
- Loaded Potato Skulls: Mix in ¼ cup (30g) crumbled cooked bacon and a handful of chopped green onions before molding. Top with a dab of sour cream after baking for “zombie” skulls.
- Spicy Version: Add ½ teaspoon cayenne pepper or diced jalapeños to the potato mixture. Top with a dot of sriracha for “bloody” skulls.
Differing Cooking Methods:
- If you don’t have an oven, these can be cooked in an air fryer. Set to 360°F (182°C) and cook for 15-18 minutes.
- Want crunchier bites? Sprinkle the tops with breadcrumbs before baking.
Allergen Substitutions:
- For dairy allergies, use vegan butter and cheese.
- All ingredients are gluten-free, but always check packaged cheese for hidden wheat.
My personal favorite twist? Stir in 1 tablespoon of finely chopped rosemary for an earthy, autumn vibe. I tried it last year, and it got rave reviews even from the “I hate herbs” crowd!
Serving & Storage Suggestions
Serve Skull Potato Bites warm for the best texture—they’re creamy inside and crispy outside right out of the oven. Arrange them on a Halloween-themed platter with olive “eyes” and pepper “smiles” for maximum Pinterest-worthy effect.
- Serving Temperature: Warm is best, but room temp works for parties. If you’re serving a crowd, keep them on a warmed tray or under foil.
- Presentation Tips: Pair with a tangy dipping sauce (ranch, spicy ketchup, or garlic aioli). They look amazing on dark plates or with spooky napkins.
- Complementary Dishes: Serve alongside sliders, veggie trays, or a festive punch. They’re a fun side for chili or stew, too.
- Storage Instructions: Cool leftovers fully, then store in an airtight container in the refrigerator for up to 3 days.
- Freezer Friendly: Flash freeze extras on a baking sheet, then transfer to a freezer bag. Reheat straight from frozen at 350°F (175°C) for 10-12 minutes.
- Reheating Tips: Warm in the oven to restore crispness—microwaving makes them a bit soggy.
- Flavor Notes: Flavors deepen overnight. If you make them ahead, reheat just before serving for fresh-out-of-the-oven taste.
If you’re prepping for a big party, make the potato mixture a day ahead and bake fresh. Let’s face it—time savers matter when you’ve got costumes to wrangle!
Nutritional Information & Benefits
Estimated Nutrition Per Skull Potato Bite (serves 12):
- Calories: 90
- Carbohydrates: 8g
- Protein: 3g
- Fat: 5g
- Fiber: 1g
- Sodium: 140mg
Health Benefits: Yukon Gold potatoes are packed with potassium and vitamin C, while cheese adds calcium and protein. Chives supply a boost of antioxidants.
Dietary Considerations: Naturally gluten-free and easy to make vegetarian or vegan. Contains dairy and may include egg if using certain cheeses (always check labels).
Wellness Perspective: As someone who tries to balance fun foods with wholesome ingredients, I love how these Skull Potato Bites sneak in real veggies and simple flavors—no weird additives, just classic comfort.
Conclusion
There’s something irresistibly fun—and just a bit spooky—about biting into a cheesy, golden skull at your Halloween bash. These Skull Potato Bites aren’t just a party trick; they’re genuinely tasty, easy to make, and always a hit with kids and adults. Plus, they’re versatile enough to fit almost any dietary need or party theme.
Customize them with your favorite cheeses, spices, or toppings—really make them your own. I keep coming back to this recipe because it’s reliable, festive, and lets me flex a little creative muscle in the kitchen. If you try these, I’d love to hear your twists or see your party pics!
Let me know in the comments if you make these Skull Potato Bites, or tag me on social—your creepy creations deserve a spotlight. Happy Halloween, and may your party snacks be just the right amount of weird and delicious!
FAQs
How do I keep Skull Potato Bites from sticking to the mold?
Always coat the mold generously with nonstick spray or oil. Let the bites cool for 5 minutes before unmolding, and gently push from the bottom if using silicone molds.
Can I prepare Skull Potato Bites ahead of time?
Absolutely! Prep the potato mixture a day ahead and bake just before serving. Leftovers reheat well in the oven for crispness.
Are Skull Potato Bites gluten-free?
Yes, all main ingredients are naturally gluten-free. Double-check your cheese and seasoning labels just to be sure.
Can I make these without a skull mold?
Definitely. Use mini muffin tins for bite-sized rounds, and decorate with olive “eyes” or bell pepper “smiles” for a Halloween touch.
What dipping sauces go well with Skull Potato Bites?
Try ranch, spicy ketchup, garlic aioli, or even a chipotle mayo. They’re great plain, too, but a sauce really brings out the flavors.
Pin This Recipe!
Skull Potato Bites
- Total Time: 40 minutes
- Yield: 12 skull bites 1x
Description
Crunchy on the outside, creamy on the inside, and shaped like tiny skulls, these Skull Potato Bites are a festive and delicious Halloween party snack. Easy to make and customizable for different diets, they’re sure to be a hit with kids and adults alike.
Ingredients
- 1 1/2 pounds Yukon Gold potatoes, peeled and diced
- 3 tablespoons unsalted butter, melted
- 1/4 cup whole milk
- 1 cup shredded cheddar cheese
- 1/4 cup grated Parmesan cheese (optional)
- 1 teaspoon garlic powder
- 1/2 teaspoon smoked paprika (optional)
- 3/4 teaspoon salt
- 1/2 teaspoon black pepper
- 2 tablespoons chives or green onions, finely chopped (optional)
- Nonstick cooking spray or oil (for coating the molds)
- Black olive slices (for decoration, optional)
- Thinly sliced red bell pepper or pimentos (for decoration, optional)
Instructions
- Preheat oven to 375°F (190°C).
- Bring a large saucepan of salted water to a boil. Add peeled and diced potatoes and cook for 12-15 minutes until fork-tender.
- Drain potatoes well and return to the pot. Mash with a potato masher or ricer until smooth.
- Stir in melted butter, milk, cheddar cheese, Parmesan (if using), garlic powder, smoked paprika, salt, pepper, and chives or green onions. Mix until creamy and uniform. Add a splash more milk if mixture is too dry.
- Lightly spray or brush the skull mold cavities with nonstick spray or oil, coating every nook.
- Spoon potato mixture into each skull cavity, pressing firmly to pick up the details. Fill to the top and smooth out.
- Place the filled mold on a baking sheet. Bake for 22-25 minutes, until tops are golden and slightly crisp. For extra crunch, bake up to 30 minutes, checking early to avoid burning.
- Let bites rest in the mold for 5 minutes after baking. Carefully invert or pop out each skull. If any stick, run a thin spatula or knife around the edges.
- Decorate with black olive slices for eyes and thin strips of red pepper for mouths while bites are still warm, if desired.
- Arrange on a platter and serve warm. To reheat, bake in the oven for 5-8 minutes at 350°F (175°C).
Notes
For vegan bites, use plant-based butter, dairy-free milk, and vegan cheese. All ingredients are naturally gluten-free, but check cheese labels. You can use mini muffin tins if you don’t have a skull mold. Taste the potato mixture before baking to adjust seasoning. For extra-creamy centers, blend the mixture briefly with a hand mixer. Flavors deepen overnight; reheat just before serving for best texture.
- Prep Time: 15 minutes
- Cook Time: 25 minutes
- Category: Appetizer
- Cuisine: American
Nutrition
- Serving Size: 1 skull bite
- Calories: 90
- Sodium: 140
- Fat: 5
- Carbohydrates: 8
- Fiber: 1
- Protein: 3
Keywords: Halloween, potato bites, party snack, skull, kid-friendly, gluten-free, vegetarian, easy, spooky, cheese, oven-baked