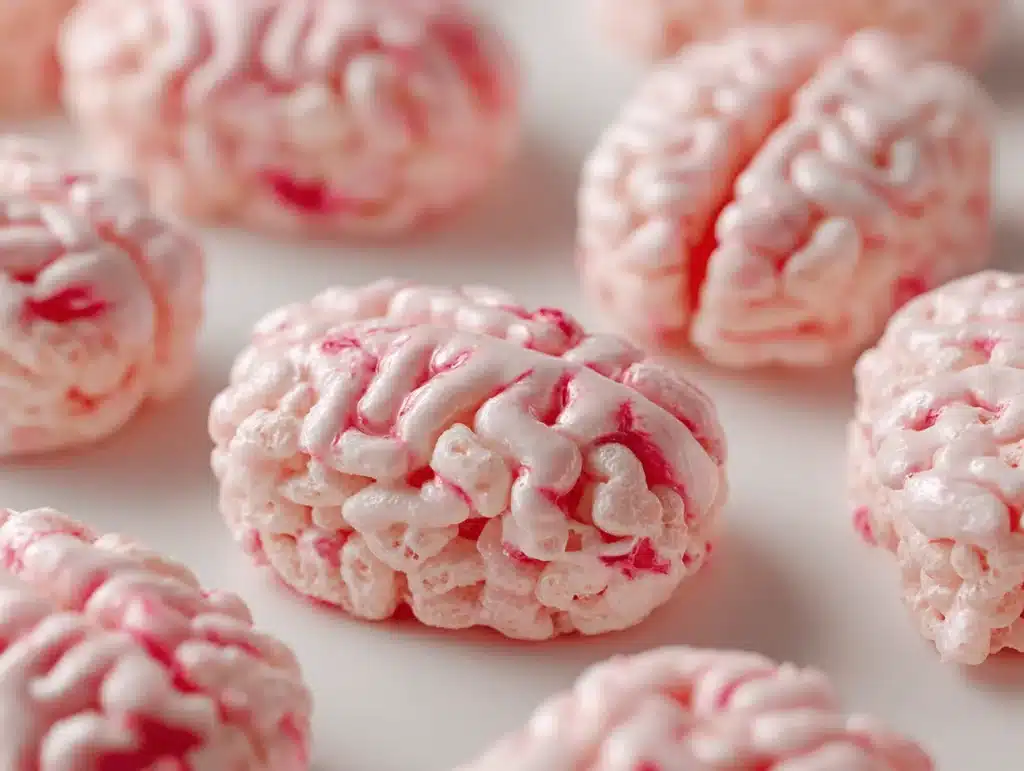
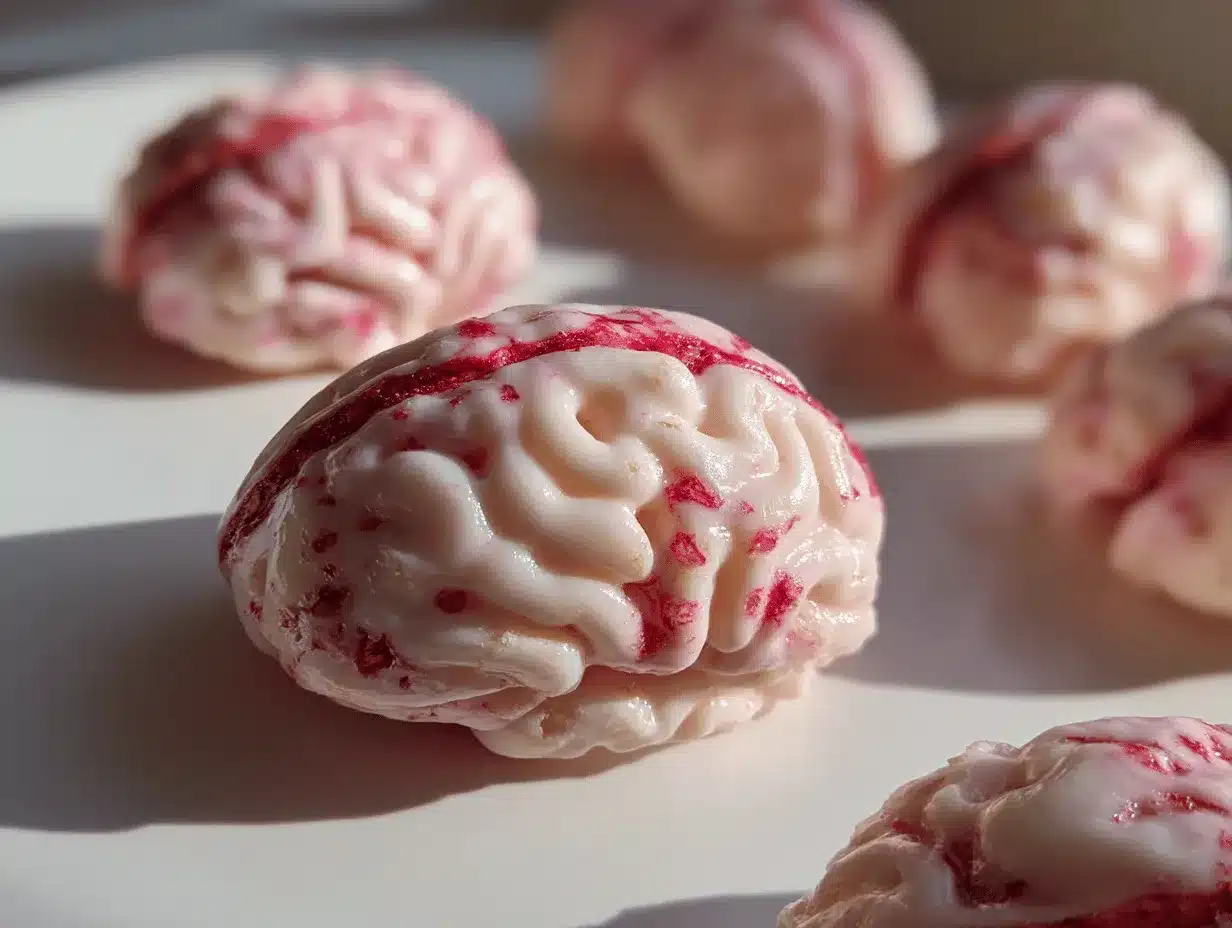
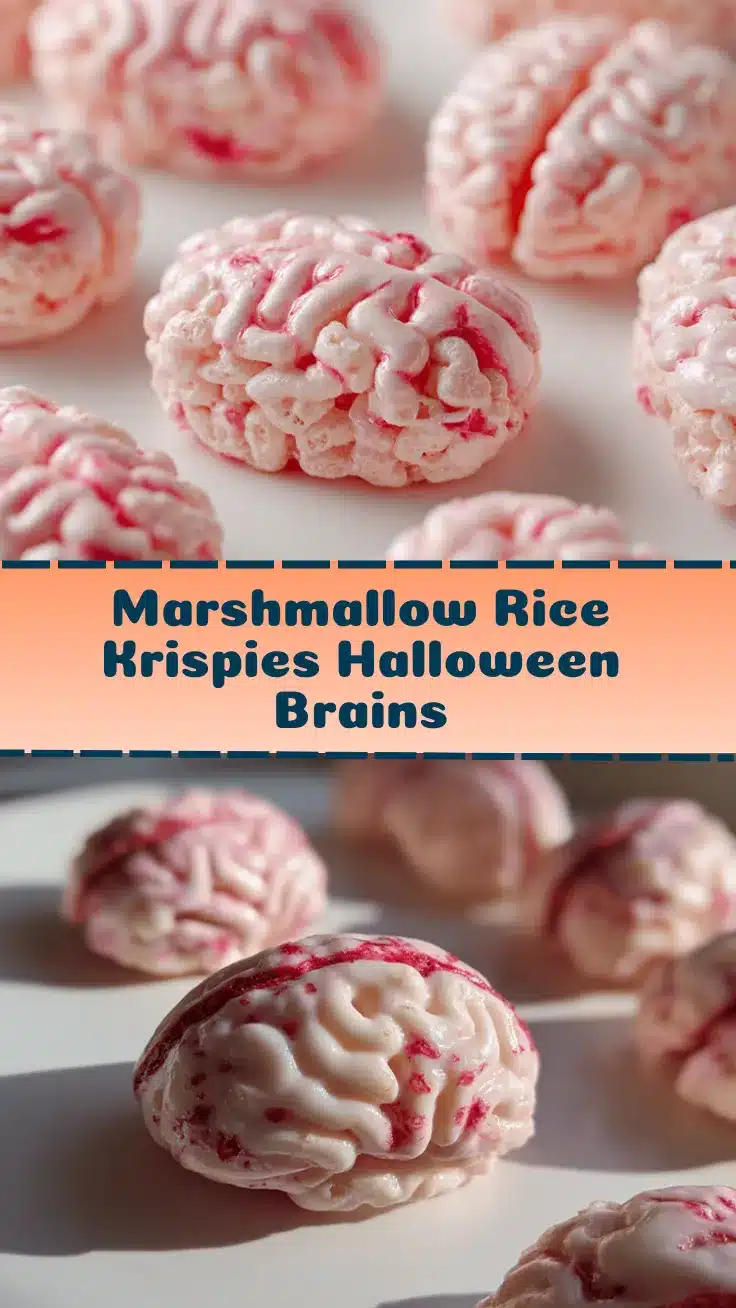
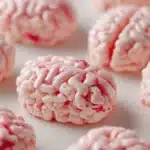
Sticky fingers, mischievous giggles, and a tray full of terrifyingly tasty Marshmallow Rice Krispies Halloween Brains—honestly, that’s my kind of party! The first time I made these, my kitchen looked like a mad scientist’s lab (and my kids went absolutely wild). Imagine biting into a gooey, marshmallow-packed Rice Krispies treat that’s shaped like a brain, dyed a creepy reddish-pink, and oozing with “bloody” cherry jam. It’s weird, it’s wonderful—and it’s the ultimate Halloween showstopper.
Let’s face it, Halloween treats are usually all about the fun factor, but these Marshmallow Rice Krispies Halloween Brains actually taste incredible. The sweet marshmallow, the crispy cereal crunch, and that surprise jam filling—every bite is pure childhood nostalgia, with a spooky twist. I’ve tested this recipe more times than I care to admit (okay, maybe I just love marshmallows a little too much). Whether you’re throwing a monster bash or just want to impress your little goblins at home, this is the recipe that transforms snack time into a haunted adventure!
If you’re searching for an easy, crowd-pleasing Halloween party treat, you honestly can’t go wrong with Marshmallow Rice Krispies Halloween Brains. It’s not just the look—it’s the taste, the simplicity, and the giggles that come with each gooey bite. As a mom, food blogger, and someone who takes Halloween way too seriously, I can promise you: these brains are always a hit. Ready to make some spooky magic? Let’s jump in!
Why You’ll Love This Recipe
After years of Halloween parties and dozens of batches, I can confidently say Marshmallow Rice Krispies Halloween Brains are more than just a novelty treat—they’re a legit favorite! Here’s why I’m obsessed (and why you will be too):
- Quick & Easy: You’ll have a full batch whipped up in under 30 minutes—no baking, just some simple stovetop magic.
- Simple Ingredients: Rice Krispies, marshmallows, butter, and a splash of food coloring. That’s it! Most of these are probably already hanging out in your pantry.
- Perfect for Parties: These brains are creepy, quirky, and totally Instagram-worthy—ideal for Halloween gatherings, classroom parties, or even a zombie movie night.
- Crowd-Pleaser: Whether you’ve got picky eaters, sugar-loving teens, or adults who appreciate a good theme, these treats always get a reaction (and usually disappear fast).
- Unbelievably Delicious: The combo of gooey marshmallow and crunchy cereal is classic, but with a jammy surprise center, it’s next-level yummy.
What sets this recipe apart? First, I blend the marshmallows and butter until super smooth before adding the cereal—this makes the brains extra chewy and soft. Second, I use cherry or raspberry jam for a “bloody” effect that’s creepy but also adds a tangy pop of flavor (trust me, it’s the secret weapon). I’ve played around with coloring techniques, fillings, and even different cereals, but this version always wins.
This isn’t just a treat—it’s an experience. Watching kids (and adults!) react to the spooky appearance, then fall in love with the sweet, marshmallowy taste is half the fun. So if you’re looking for a Halloween recipe that’s easy, memorable, and totally delicious, Marshmallow Rice Krispies Halloween Brains are the way to go!
Ingredients Needed
This recipe keeps things simple and fun—no fancy ingredients, just the classics with a spooky twist. Here’s what you’ll need:
- For the Brains:
- 6 cups (160g) Rice Krispies cereal (or any crisped rice cereal—store brand works too!)
- 4 cups (200g) mini marshmallows (I like Jet-Puffed for meltability)
- 3 tbsp (45g) unsalted butter (adds richness; salted works in a pinch)
- Red gel food coloring (for that brainy hue; liquid food coloring works but is less vibrant)
- Pink gel food coloring (optional, for layered color depth)
- 1/2 cup (120g) cherry or raspberry jam (for the “bloody” filling—seedless works best)
- For Decoration:
- Extra jam (for drizzling on top, optional but highly recommended)
- Edible candy eyes (adds a fun, extra-creepy vibe)
- Black decorating gel (to add “brain veins” if you’re feeling artistic)
Ingredient notes:
- Butter: You can use vegan butter for a dairy-free version. Coconut oil works but changes the flavor slightly.
- Marshmallows: If you only have large marshmallows, just chop them up (they’ll melt fine).
- Cereal: Want gluten-free? Use certified gluten-free brown rice cereal.
- Jam: Strawberry jam also works—pick your favorite “bloody” shade!
- Food coloring: Gel is more intense and won’t water down the mix. If you’re nervous about artificial colors, look for natural vegetable-based dyes.
I’ve experimented with tossing in mini chocolate chips and even chopped dried cherries for extra flavor, but honestly, the classic combo above is hard to beat. If you’re short on marshmallows, you can add a splash of corn syrup to help with stickiness. And if you want less sugar, try swapping half the marshmallows for creamy peanut butter (it’s a little weird, but surprisingly tasty!).
Equipment Needed
Here’s the quick rundown of kitchen tools for Marshmallow Rice Krispies Halloween Brains—no fancy gadgets required!
- Large nonstick saucepan (for melting butter and marshmallows; nonstick helps with cleanup)
- Wooden spoon or heatproof spatula (sturdy enough to mix the sticky cereal)
- Mixing bowl (big enough for the cereal and gooey mixture)
- Baking sheet or tray (for shaping and chilling the brains)
- Wax paper or parchment paper (makes shaping and cleanup easier)
- Disposable gloves (optional, but so helpful for forming brains without sticky hands)
- Small spoon or melon baller (for adding the jam filling)
- Piping bag or zip-top bag (if you want to pipe “veins” or add detail with decorating gel)
If you don’t have a nonstick pan, just butter your regular saucepan generously—trust me, marshmallow is notorious for sticking. I’ve used both metal and silicone spatulas; silicone is easier to clean! For budget-friendly options, grab parchment paper from the dollar store and use a regular spoon for shaping. Clean-up tip: soak your sticky tools in warm, soapy water right after you’re done—otherwise you’ll be scrubbing for days.
Preparation Method
-
Melt the butter and marshmallows:
Add 3 tbsp (45g) unsalted butter to a large nonstick saucepan over medium heat. Let it melt, then pour in 4 cups (200g) mini marshmallows. Stir constantly until the marshmallows are completely melted and the mixture is glossy—about 4 minutes. Watch for any browning; keep the heat gentle!
Tip: If the marshmallows seem stubborn, lower the heat. A burnt marshmallow ruins the batch. -
Add food coloring:
Remove the pan from heat. Drop in red gel food coloring—start with a few drops and add pink for dimension. Stir until the color is evenly distributed. The mixture should look like a vivid, slightly creepy pinkish-red.
Note: Color intensifies as the mix cools, so don’t overdo it at first. -
Mix in the cereal:
Pour 6 cups (160g) Rice Krispies cereal into a large mixing bowl. Scrape the colored marshmallow mixture over the cereal. Stir quickly and thoroughly until all the cereal is coated and sticky.
Warning: Work fast—the mixture stiffens up as it cools! -
Shape the brains:
Line a baking sheet with wax or parchment paper. With gloved hands (or slightly greased bare hands), scoop out about 1/2 cup (40g) of the mixture. Flatten gently into a disk. Spoon 2 teaspoons (10g) cherry or raspberry jam into the center. Fold the edges over the jam, shaping into an oval “brain” and pinching to seal. Repeat until all mixture is used.
Sensory cue: The brains should feel soft, slightly tacky, and hold their shape. -
Add details:
Use a butter knife or toothpick to gently carve “brain wrinkles” on top. Drizzle extra jam for a gory effect, or pipe black decorating gel for veins. Add candy eyes if you want to go extra spooky!
Efficiency tip: Decorate all brains at once—it gets messy, but it’s faster. -
Chill and serve:
Place tray in the fridge for at least 20 minutes to help them firm up. Serve chilled or at room temperature.
Troubleshooting: If brains are too soft, chill longer. If too stiff, add a touch more melted butter next time.
I’ve had batches get a little too sticky or fall apart—usually from adding too much jam or not mixing fast enough. If this happens, just press the mixture together more firmly and chill a bit longer. The great thing is, even “ugly” brains are delicious (and let’s face it, real brains aren’t supposed to be perfect!).
Cooking Tips & Techniques
Here’s where years of sticky fingers and Halloween party mishaps come in handy! These tricks will save you time, mess, and maybe even your sanity:
- Low and slow: Melt marshmallows gently; high heat makes them hard and chewy.
- Color control: Gel food coloring is your friend—use a toothpick for precise drops. Too much red turns brownish, so layer pink for a brainy look.
- Shaping hack: Disposable gloves lightly sprayed with cooking oil make shaping brains so much easier (and less sticky).
- Jam placement: Don’t overfill—just a teaspoon or two. Too much jam and your brains will “bleed out” all over the tray.
- Decoration shortcut: If you’re pressed for time, just drizzle jam and skip candy eyes. The look is still spooky!
- Consistency check: If the mixture gets too stiff, microwave for 10 seconds to soften before shaping.
I’ve had batches turn rock-hard (too high heat) and others melt into puddles (too much jam). The trick? Test one brain first—if it holds up, shape the rest. And multitasking helps: melt the butter while gathering ingredients, prep your tray while mixing, and decorate while the brains are still a little soft. Most important, don’t stress about perfection. Lumpy, uneven brains are creepier anyway!
Variations & Adaptations
Want to switch things up or accommodate dietary needs? Here are my favorite ways to make these Marshmallow Rice Krispies Halloween Brains your own:
- Gluten-Free: Use certified gluten-free rice cereal and check that your marshmallows don’t contain hidden gluten.
- Dairy-Free: Swap the butter for vegan margarine or coconut oil. The flavor shifts a little, but it totally works.
- Nutty Twist: Add 1/4 cup (30g) chopped almonds or walnuts for texture (great if you want “brain matter” texture!).
- Peanut Butter Brains: Mix 1/4 cup (60g) creamy peanut butter with the melted marshmallows for a nutty version. It’s a hit with older kids and adults.
- Flavor Fun: Use orange food coloring and apricot jam for “zombie brains,” or green coloring and lemon curd for “alien brains.”
For oven-free gatherings, skip chilling—just serve at room temp. If you want a crunchier bite, mix in a handful of mini pretzels. Allergies? Sub sunflower seed spread for nut butters. One year, I made a batch with strawberry jelly and neon green dye—my kids declared them “Frankenstein brains.” It was weird, but they loved it!
Serving & Storage Suggestions
Want your spooky brains to really shine? Try these serving and storage tips:
- Serving temperature: Chill for 20-30 minutes, then serve slightly cool or at room temp. They’re firmer chilled, but gooier at room temp.
- Presentation: Arrange on a black tray with fake cobwebs or plastic spiders for that haunted vibe. Add a drizzle of jam right before guests arrive for extra drama.
- Pairings: Serve with spooky punch, apple cider, or hot cocoa. These brains are also fun alongside Halloween cupcakes or fruit skewers.
- Storage: Store in an airtight container at room temp for up to 2 days. For longer storage, refrigerate for up to 5 days.
- Freezing: Wrap individually in wax paper, then seal in a freezer bag. Freeze up to 1 month. Thaw at room temp before serving.
- Reheating: If you want them gooey, microwave for 10 seconds. Just don’t overdo it—they melt fast!
- Flavor notes: The jam flavor intensifies over time, so if you love the fruity “bloody” effect, make them a day ahead.
I’ve found these treats hold up well for parties, but they do get softer the longer they sit out. If you have leftovers, pop them in the fridge—snack attack solved!
Nutritional Information & Benefits
Here’s a quick rundown on what you’re biting into with these Marshmallow Rice Krispies Halloween Brains:
- Estimated per brain:
- Calories: ~120
- Fat: ~2g
- Carbs: ~26g
- Sugar: ~14g
- Protein: ~1g
- Key ingredients:
- Rice cereal is low in fat and gluten-free if you choose the right brand.
- Marshmallows add sweetness; jam brings vitamin C and a fruity punch.
- Dietary notes: These treats are nut-free as written, but you can adapt for dairy-free, gluten-free, or vegan diets easily.
- Allergens: Dairy (butter), possible gluten (cereal), and food dye. Always check labels if allergies are a concern.
Honestly, these aren’t health food, but as a party treat, they’re lower in fat and free from tree nuts unless you add them in. I love that you can tweak the recipe for most dietary needs—always a win at big gatherings!
Conclusion
Marshmallow Rice Krispies Halloween Brains are the ultimate spooky treat—easy, crowd-pleasing, and just creepy enough to get a giggle (or a shriek). Whether you shape them for a party, a classroom, or a cozy family movie night, they bring out the best kind of Halloween spirit.
Don’t be afraid to get creative—add your favorite flavors, experiment with decorations, and make them as messy as you want. That’s half the fun! I honestly look forward to making these every October (and sometimes in the middle of summer, just because my kids beg for them).
If you try this recipe, let me know in the comments what wild variations you come up with! Share with your fellow spooky snack-lovers, pin it for later, and tag me when you serve up your own batch of brains. Happy haunting, and happy snacking!
FAQs
How far ahead can I make Marshmallow Rice Krispies Halloween Brains?
You can make them up to 2 days ahead and store in an airtight container. For best texture, chill them and let them come to room temp before serving.
Can I use other cereals for this recipe?
Yes! Try Cocoa Krispies for “chocolate brains” or fruity cereal for a wild, multicolor effect. Just keep the proportions the same.
What’s the best way to get the brains to hold their shape?
Work quickly while the mixture is warm, and chill the finished brains for at least 20 minutes. Using gloved or greased hands helps a ton!
Can I make these vegan?
Absolutely! Use vegan marshmallows and plant-based butter. Just know they may be a bit stickier, so chill well before serving.
How can I make the brains look extra realistic?
Use a toothpick to carve deep “wrinkles,” drizzle extra jam for a bloody effect, and add candy eyes or black gel veins for that extra creepy factor!
Pin This Recipe!
Marshmallow Rice Krispies Halloween Brains
- Total Time: 30 minutes
- Yield: 12 brains 1x
Description
These spooky Marshmallow Rice Krispies Halloween Brains are gooey, marshmallow-packed treats shaped like brains, dyed a creepy reddish-pink, and oozing with ‘bloody’ cherry jam. Perfect for Halloween parties, they’re easy to make, fun to decorate, and always a crowd-pleaser.
Ingredients
- 6 cups Rice Krispies cereal (or any crisped rice cereal)
- 4 cups mini marshmallows
- 3 tablespoons unsalted butter
- Red gel food coloring
- Pink gel food coloring (optional)
- 1/2 cup cherry or raspberry jam (seedless preferred)
- Extra jam for drizzling (optional)
- Edible candy eyes (optional)
- Black decorating gel (optional, for veins)
Instructions
- Add butter to a large nonstick saucepan over medium heat and melt.
- Pour in mini marshmallows and stir constantly until melted and glossy, about 4 minutes.
- Remove from heat and add red gel food coloring (and pink, if desired). Stir until evenly colored.
- Pour Rice Krispies cereal into a large mixing bowl. Scrape colored marshmallow mixture over cereal and stir quickly until all cereal is coated.
- Line a baking sheet with wax or parchment paper. With gloved or greased hands, scoop about 1/2 cup of mixture, flatten into a disk, and spoon 2 teaspoons jam into the center. Fold edges over jam, shape into an oval ‘brain,’ and pinch to seal. Repeat until all mixture is used.
- Use a butter knife or toothpick to carve ‘brain wrinkles’ on top. Decorate with extra jam, black gel, and candy eyes as desired.
- Chill tray in the fridge for at least 20 minutes to firm up. Serve chilled or at room temperature.
Notes
Use gel food coloring for vibrant color without watering down the mixture. Disposable gloves sprayed with cooking oil make shaping easier. Don’t overfill with jam or brains may fall apart. For gluten-free, use certified gluten-free rice cereal. Vegan marshmallows and plant-based butter work for a vegan version. Chill well for best texture.
- Prep Time: 10 minutes
- Cook Time: 5 minutes
- Category: Dessert
- Cuisine: American
Nutrition
- Serving Size: 1 brain treat
- Calories: 120
- Sugar: 14
- Sodium: 60
- Fat: 2
- Saturated Fat: 1
- Carbohydrates: 26
- Protein: 1
Keywords: Halloween, Rice Krispies, marshmallow, spooky treats, party snacks, kid-friendly, brains, jam filling, easy dessert