There’s something about the smell of sizzling ground beef mixed with melted cheddar that instantly transports me to childhood Halloween parties — you know, the ones where you could smell caramel apples and pumpkin guts in the air! I still remember the first time I made cheeseburger skulls for my kids. It was a blustery October night, and honestly, I was just trying to make dinner fun (and sneak in some protein). I’d stumbled across a skull-shaped baking mold online and thought, “Why not stuff it with cheese and burger?” That’s how this cheeseburger skulls recipe was born, and now it’s a staple in our house every October.
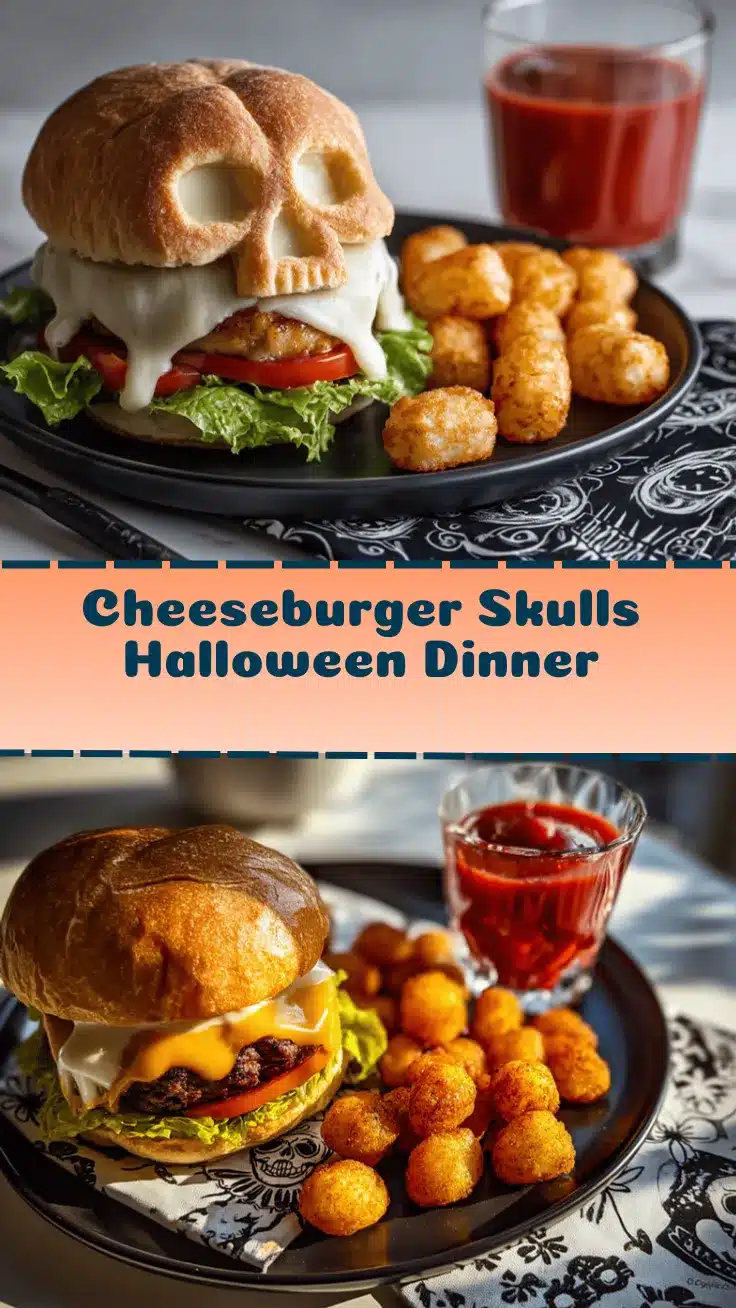
If you’ve never tried making cheeseburger skulls, you’re in for a treat. They look spooky enough to delight little monsters at the table, but they taste just like your favorite juicy burger, with gooey cheese hiding inside. The best part? These cheesy Halloween dinner skulls are surprisingly easy, and you don’t need fancy ingredients or skills. As someone who’s tested this recipe more times than I care to admit — tweaking the filling, playing with different cheeses, and even sneaking in veggies — I can honestly say it’s foolproof and always a hit.
Whether you’re prepping a family dinner before trick-or-treating, throwing a Halloween bash, or just want to make mealtime memorable without an epic mess, cheeseburger skulls deliver. They’re high in protein, customizable, and perfect for picky eaters. Plus, they’re just plain fun. If you’re looking for an easy Halloween dinner for kids or a creative way to serve cheeseburgers, this recipe will become a new favorite. Let’s get spooky with dinner!
Why You’ll Love This Cheeseburger Skulls Recipe
Let’s face it — the spooky season deserves something a little more memorable than plain old pizza or boxed mac and cheese. Over the years, I’ve tested dozens of Halloween dinners, and this one always comes out on top. Here’s why you’ll love making cheeseburger skulls:
- Quick & Easy: Ready in under 45 minutes, including prep and baking. Perfect for busy parents or when you need a hassle-free dinner before heading out for trick-or-treating.
- Simple Ingredients: No weird stuff here — just ground beef, cheese, and a few pantry staples. You probably have everything you need right now.
- Perfect for Halloween Parties: These cheeseburger skulls look creepy in the best way, making them a showstopper for potlucks, school gatherings, or cozy family nights.
- Crowd-Pleaser: I’ve served these to kids, teens, and adults — trust me, everyone loves them. My picky eater even asks for seconds!
- Unbelievably Delicious: The combo of seasoned beef and gooey cheddar inside a golden “skull” shell is comfort food at its finest. You get that classic cheeseburger taste with a Halloween twist.
What makes this cheeseburger skulls recipe different? I always blend the meat filling with a splash of ketchup and mustard for that authentic burger flavor, and I use pre-shredded cheese for extra meltiness. You can sneak in diced onions or pickles if you’re feeling adventurous — or leave them out for a classic taste. The skull molds make everything look pro, but the recipe works even if you shape them by hand (a bit messier, but still fun)! When I make these, I always think of how food can bring a little magic to the table — especially when you’re busy and just need dinner to make everyone smile.
Honestly, cheeseburger skulls are more than just a meal. They turn dinner into an event. Whether you’re trying to impress guests or just want to create new memories with your family, these spooky burgers are sure to do the trick.
Ingredients Needed for Cheeseburger Skulls
This cheeseburger skulls recipe relies on classic, wholesome ingredients that build layers of flavor and texture. I love that you can tweak the filling to suit your taste buds — and use whatever you have on hand. Here’s what you’ll need:
- For the burger filling:
- Ground beef – 1 lb (450g), 80/20 is best for juiciness (substitute ground turkey or chicken for lighter version)
- Shredded cheddar cheese – 1 cup (115g), or use Colby Jack for a milder flavor
- Yellow onion – 1 small, finely diced (optional, adds sweetness and texture)
- Ketchup – 2 tbsp (30ml), for classic burger taste
- Yellow mustard – 1 tbsp (15ml), for tang
- Worcestershire sauce – 1 tsp (5ml), brings out savory notes
- Salt – 1/2 tsp (2.5g), or to taste
- Black pepper – 1/4 tsp (1g)
- Garlic powder – 1/2 tsp (2.5g), optional
- Dill pickle – 1/4 cup (30g), chopped (optional, for burger flavor)
- For the crust (skull shell):
- Refrigerated pizza dough – 1 can (13.8 oz/390g), or homemade dough if you prefer (crescent roll dough also works for a buttery shell)
- Egg – 1 large, beaten (for egg wash, gives a golden finish)
- For garnish and serving:
- Sesame seeds – 1 tbsp (optional, sprinkle on top for “bun” effect)
- Extra cheddar cheese – 1/4 cup (for melting on top, optional)
- Chopped parsley or chives – for a pop of color
- Ketchup, mustard, pickles – for dipping and serving
If you’re missing a few things, no worries! I’ve made these with dairy-free cheese and gluten-free pizza dough, and they turn out great. For leaner or vegetarian versions, swap in ground turkey or plant-based meat. I personally love using Sargento shredded cheddar because it melts perfectly, but any brand works. The pizza dough is forgiving — just make sure it’s not super cold when you’re shaping it. In summer, you can add chopped tomatoes or even fresh basil to the filling for a twist. The point is, this cheeseburger skulls recipe adapts to what you have on hand!
Equipment Needed
- Skull-shaped baking mold (silicone or metal, 6-cavity) — this is the secret to those perfect spooky shapes! If you don’t have one, use muffin tins or shape by hand.
- Mixing bowls (at least two) — one for the filling, one for the dough.
- Wooden spoon or spatula — for mixing ground beef and seasonings.
- Small skillet — to brown the onion and beef mixture (nonstick works best).
- Pastry brush — for egg wash (can use the back of a spoon if you don’t have one).
- Baking sheet — if using muffin tins or hand-shaping the skulls.
- Knife and cutting board — for chopping onions, pickles, and herbs.
- Measuring cups and spoons — for accuracy (but a regular coffee mug works in a pinch for the cheese).
If you’re using a silicone skull mold, I recommend placing it on a baking sheet for stability. Metal molds will give a crisper finish, but silicone makes cleanup easier. I got my skull mold on Amazon for under $15, and I’ve used it for everything from brownies to meatloaf! If you don’t want to invest, muffin tins really do work — just press the dough up the sides and add a little “face” with olives or cheese. When cleaning the molds, soak in warm soapy water to avoid stuck-on cheese. For budget-friendly options, thrift stores often have fun Halloween pans around September.
Preparation Method: Step-by-Step for Cheeseburger Skulls
- Prep the Filling (5 minutes): In a medium skillet over medium heat, add 1 tbsp oil and sauté the diced onion until translucent (about 2 minutes). Add the ground beef, breaking it up with a spoon. Cook until just browned, about 5-6 minutes. Drain excess fat if needed.
- Season the Meat (2 minutes): Stir in ketchup, mustard, Worcestershire sauce, salt, pepper, garlic powder, and chopped pickles. Mix well and cook another minute. Remove from heat and let cool for 3-4 minutes — this helps the cheese melt less during assembly.
- Mix in the Cheese (1 minute): Add shredded cheddar to the cooled beef mixture and stir until evenly combined. The cheese should look evenly distributed — not clumpy or stringy.
- Prep the Dough (3 minutes): Roll out pizza dough on a lightly floured surface to 1/4 inch (6mm) thickness. If using crescent roll dough, pinch seams together.
- Cut and Shape Dough (5 minutes): Cut dough into 6 equal pieces. Drape each piece into a cavity of the skull mold, pressing gently to cover the sides and bottom. (If using muffin tins, press into each cup and up the sides.) Leave enough overhang to seal the tops.
- Fill the Skulls (5 minutes): Spoon about 1/3 cup (60g) of meat mixture into each dough-lined cavity. Don’t overfill — leave a little space for the dough to close.
- Seal and Decorate (3 minutes): Fold dough over the filling, pinching edges to seal. Brush tops with beaten egg for shine, and sprinkle sesame seeds or extra cheese if desired.
- Bake (20-25 minutes): Place mold (on baking sheet if silicone) in a preheated 375°F (190°C) oven. Bake until golden brown and dough is cooked through, about 20-25 minutes. The tops should be firm and slightly puffed.
- Cool and Remove (5 minutes): Let the skulls cool in the mold for 5 minutes before gently popping them out. If any cheese leaks, that’s normal — just scoop the crispy bits and tuck them back inside!
- Serve (1 minute): Arrange cheeseburger skulls on a platter, garnish with parsley or chives, and serve with dipping sauces.
Troubleshooting: If the dough tears, patch with extra scraps. If the filling is too wet, add more cheese. You’ll know they’re done when the tops are golden and the sides pull away from the mold. My personal tip: Let the kids help with stuffing the skulls — it gets messy but makes dinner even more fun!
Cooking Tips & Techniques
Over the years, I’ve picked up a few tricks when making cheeseburger skulls. If you want consistent, spooky results, keep these tips in mind:
- Don’t overstuff: Too much filling can burst the dough and make the skulls look more like blobs. Stick to about 1/3 cup per skull.
- Drain the beef: If your ground beef is extra fatty, drain well after browning. Otherwise, the dough can get soggy.
- Cool the filling: Hot meat will melt the cheese too fast and can make sealing tricky. Let it sit a few minutes before assembly.
- Egg wash is magic: It gives a glossy finish and helps toppings stick. I once skipped it and my skulls looked a little sad!
- Use parchment paper: If shaping by hand, line your baking sheet for easy cleanup.
- Keep dough covered: Pizza dough dries out fast — work with one piece at a time and keep the rest under a towel.
- Test for doneness: If you’re unsure, lift a skull gently; the base should be firm and not doughy.
Common mistakes? Overfilling is a biggie. I used to cram in too much beef and cheese, but less is more for structure. Another lesson — don’t forget the seasoning! Bland filling = bland skulls. For multitasking, prep the filling while the oven heats and have your toppings ready to go. Consistency is all about measuring and not rushing the bake time. Trust me, letting them cool for five full minutes makes them easier to unmold and keeps the skull shapes intact.
Variations & Adaptations
The beauty of cheeseburger skulls is how easy they are to customize. Whether you’re cooking for allergies, picky eaters, or just want to try something new, here are a few favorite twists:
- Gluten-Free: Use gluten-free pizza dough (Udi’s or Schär works well). The skulls bake up just as golden and spooky!
- Vegetarian: Swap ground beef for plant-based crumbles (like Beyond Beef). Add extra veggies — bell peppers, mushrooms, or spinach — for more color.
- Spicy Skull Surprise: Add diced jalapeños to the filling and a sprinkle of pepper jack on top for a kick.
- Breakfast Version: Fill with scrambled eggs, breakfast sausage, and sharp cheddar — perfect for Halloween morning.
- Picky Eater Friendly: Leave out onions and pickles, and stick to plain beef and cheese. Sometimes simple is best.
For cooking methods, you can air-fry mini skulls (just reduce baking time to 12-15 minutes at 350°F/175°C). I once made a batch with barbecue sauce instead of ketchup/mustard, and it turned out smoky and delicious. My personal favorite? The breakfast version — it’s a hit for brunch and keeps kids full until trick-or-treating!
Serving & Storage Suggestions
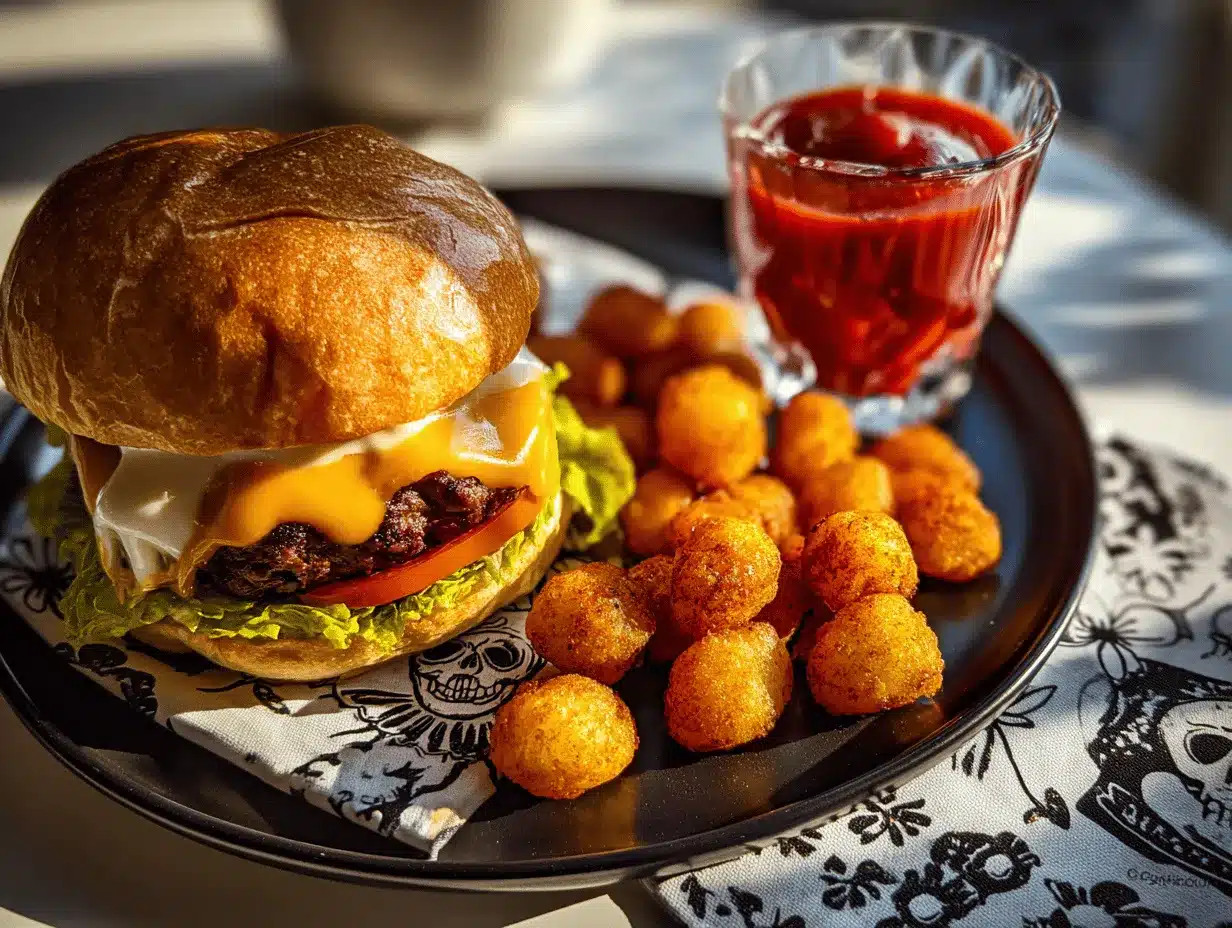
Cheeseburger skulls are best served warm, straight out of the oven. I like to arrange them on a Halloween-themed platter, sprinkle fresh herbs on top, and set out bowls of ketchup and mustard for dipping. If you’re hosting a party, these pair perfectly with baked sweet potato fries, a green salad, or even pumpkin soup for a full spooky spread.
For storage, cool the skulls completely before placing them in an airtight container. They’ll keep in the fridge for up to 3 days. To freeze, wrap individually in foil, then store in a freezer bag — they’ll last up to 2 months. When reheating, pop in the oven at 350°F (175°C) for 10 minutes (or microwave for 60 seconds, but the dough stays crisper in the oven). I’ve found the flavors get even better after a day, as the cheese and beef meld together. Just don’t forget to reheat gently to avoid tough dough.
Tip: If you want to prep ahead, assemble skulls and refrigerate (unbaked) up to 24 hours. Bake just before serving for maximum freshness.
Nutritional Information & Benefits
Each cheeseburger skull packs about 320 calories, 18g protein, 22g fat, and 18g carbs (using standard pizza dough and beef). They’re a great source of protein and calcium thanks to the cheese and beef, and you can boost fiber by sneaking in diced veggies. If you choose lean ground turkey or low-fat cheese, the calorie count drops even more.
This recipe can be adjusted for gluten-free, low-carb, or dairy-free diets — just swap the dough and cheese for suitable versions. Allergens to watch for: wheat, dairy, and eggs. As someone who’s always juggling nutrition for my family, I love that these cheeseburger skulls are filling and kid-approved, with just enough spooky fun to get everyone excited about dinner.
Conclusion: Make Cheeseburger Skulls Your Halloween Tradition
To me, cheeseburger skulls aren’t just an easy Halloween dinner for kids — they’re a way to turn a regular night into something special. The flavor is pure comfort food, the texture is spot-on, and the presentation is guaranteed to get giggles and “Wows!” at the table. Whether you stick to the classic version or try one of the fun variations, this recipe is forgiving and fun.
I hope you’ll make these cheeseburger skulls a new tradition in your family. Tweak the filling, play with toppings, and share your spooky creations. If you have a favorite twist or a kitchen fail story, I’d love to hear it — drop a comment below or tag me on social media! Let’s keep the Halloween spirit alive, one delicious skull at a time.
Happy haunting, and happy cooking!
FAQs: Cheeseburger Skulls Recipe
Can I make cheeseburger skulls without a skull-shaped mold?
Absolutely! Use muffin tins and shape the dough to create a rounded “skull” look. Decorate with olives or cheese for eyes.
Can I prepare cheeseburger skulls ahead of time?
Yes — assemble and refrigerate (unbaked) up to 24 hours before baking. Bake fresh for best texture.
What kind of cheese works best for the filling?
Cheddar melts well and gives classic flavor, but Colby Jack, mozzarella, or dairy-free shreds work too.
How do I make cheeseburger skulls gluten-free?
Swap the pizza dough for a gluten-free brand (like Udi’s). Everything else stays the same!
Do cheeseburger skulls freeze well?
They freeze great! Wrap in foil and freeze up to 2 months. Reheat in the oven at 350°F (175°C) for 10 minutes.
Pin This Recipe!
Cheeseburger Skulls Recipe Easy Halloween Dinner for Kids
- Total Time: 40 minutes
- Yield: 6 skulls 1x
Description
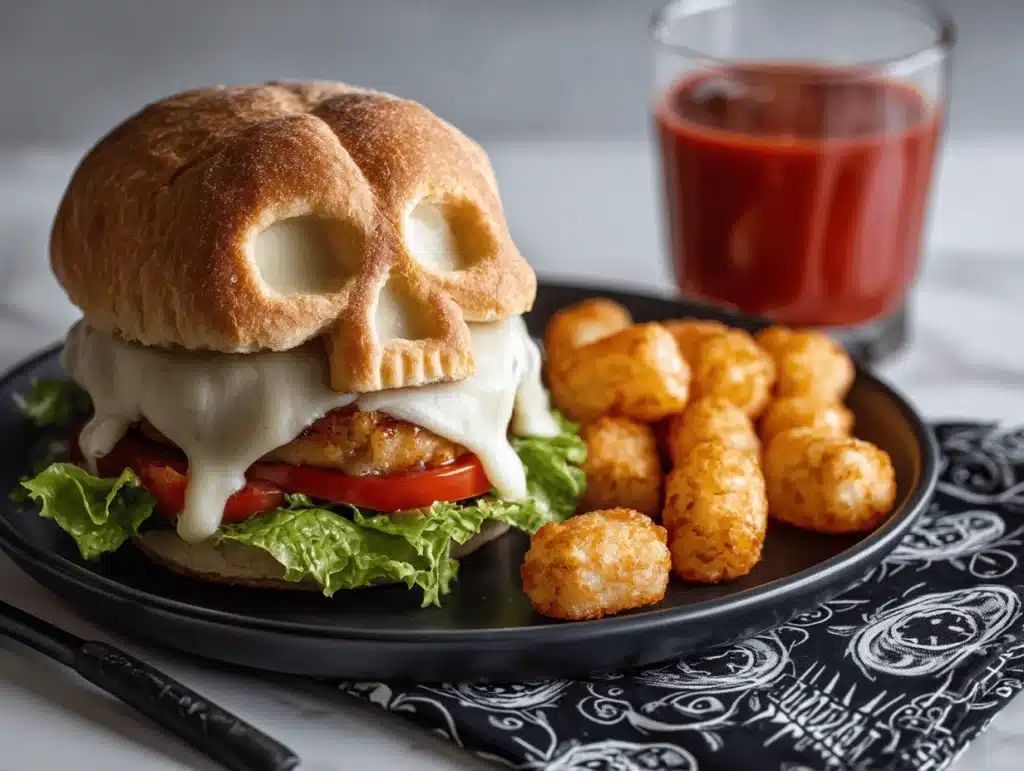
Cheeseburger skulls are a fun and spooky Halloween dinner that kids love! Juicy ground beef, gooey cheddar cheese, and classic burger flavors are wrapped in golden pizza dough and baked in skull-shaped molds for a festive, protein-packed meal.
Ingredients
- 1 lb ground beef (80/20 for juiciness, or substitute ground turkey/chicken)
- 1 cup shredded cheddar cheese (or Colby Jack)
- 1 small yellow onion, finely diced (optional)
- 2 tbsp ketchup
- 1 tbsp yellow mustard
- 1 tsp Worcestershire sauce
- 1/2 tsp salt
- 1/4 tsp black pepper
- 1/2 tsp garlic powder (optional)
- 1/4 cup dill pickle, chopped (optional)
- 1 can refrigerated pizza dough (13.8 oz), or homemade/crescent roll dough
- 1 large egg, beaten (for egg wash)
- 1 tbsp sesame seeds (optional, for garnish)
- 1/4 cup extra cheddar cheese (optional, for topping)
- Chopped parsley or chives (for garnish)
- Ketchup, mustard, pickles (for serving/dipping)
Instructions
- Preheat oven to 375°F (190°C).
- In a medium skillet over medium heat, add 1 tbsp oil and sauté diced onion until translucent (about 2 minutes).
- Add ground beef, breaking it up with a spoon. Cook until just browned, about 5-6 minutes. Drain excess fat if needed.
- Stir in ketchup, mustard, Worcestershire sauce, salt, pepper, garlic powder, and chopped pickles. Mix well and cook another minute. Remove from heat and let cool for 3-4 minutes.
- Add shredded cheddar to the cooled beef mixture and stir until evenly combined.
- Roll out pizza dough on a lightly floured surface to 1/4 inch thickness. If using crescent roll dough, pinch seams together.
- Cut dough into 6 equal pieces. Drape each piece into a cavity of the skull mold, pressing gently to cover the sides and bottom. Leave enough overhang to seal the tops.
- Spoon about 1/3 cup of meat mixture into each dough-lined cavity. Don’t overfill.
- Fold dough over the filling, pinching edges to seal. Brush tops with beaten egg and sprinkle sesame seeds or extra cheese if desired.
- Place mold (on baking sheet if silicone) in preheated oven. Bake until golden brown and dough is cooked through, about 20-25 minutes.
- Let the skulls cool in the mold for 5 minutes before gently popping them out.
- Arrange cheeseburger skulls on a platter, garnish with parsley or chives, and serve with dipping sauces.
Notes
Don’t overstuff the skulls to prevent bursting. Drain beef well to avoid soggy dough. Cool filling before assembly for easier sealing. Use parchment paper for easy cleanup if shaping by hand. Gluten-free and vegetarian adaptations work well. Skulls freeze and reheat beautifully.
- Prep Time: 15 minutes
- Cook Time: 25 minutes
- Category: Main Course
- Cuisine: American
Nutrition
- Serving Size: 1 skull
- Calories: 320
- Sugar: 3
- Sodium: 650
- Fat: 22
- Saturated Fat: 10
- Carbohydrates: 18
- Fiber: 1
- Protein: 18
Keywords: cheeseburger skulls, Halloween dinner, kid-friendly, spooky recipes, ground beef, pizza dough, easy Halloween meal, party food, Halloween party, stuffed skulls