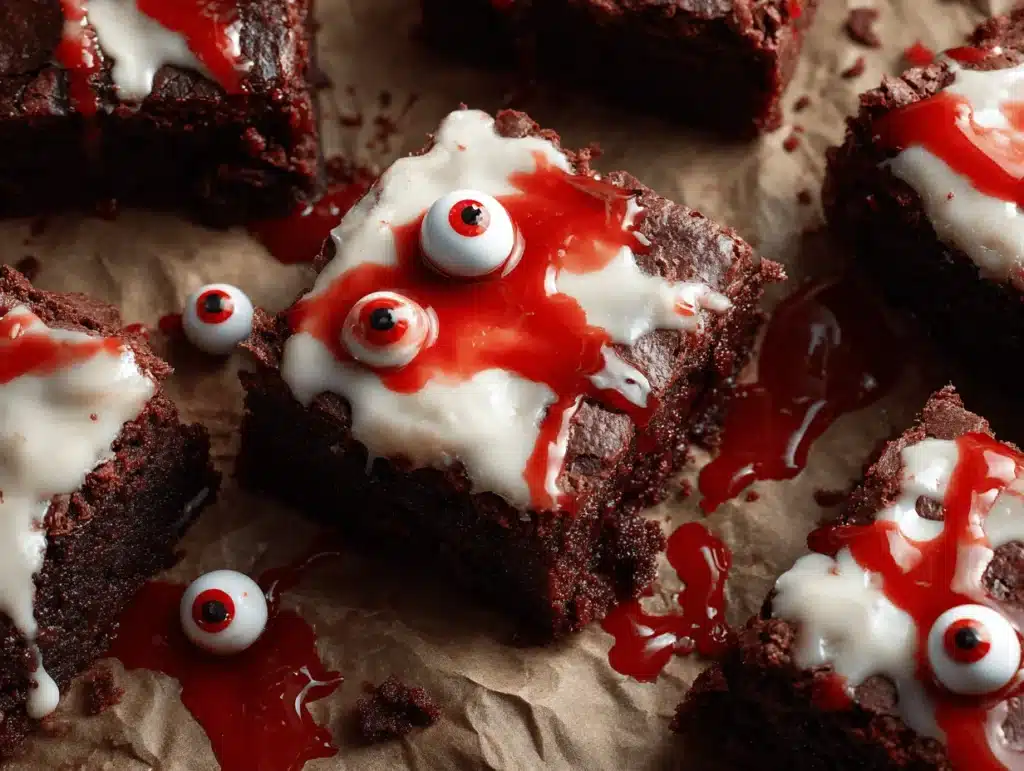
Sticky chocolate, gooey centers, and a shock of spooky candy eyes—honestly, eyeball brownies are the kind of Halloween treat that makes you grin just looking at them. I can still remember my first batch: I was elbow-deep in cocoa powder, my kitchen smelled like a bakery, and my youngest dared me to make “the creepiest dessert ever.” Challenge accepted! These eyeball brownies are now a tradition for our annual Halloween bash, and they’ve become famous with my kids’ friends—there’s always a scramble to grab the biggest, weirdest eyeball.
But let’s face it, Halloween desserts sometimes get a little too complicated. So I set out to create a recipe for eyeball brownies that’s easy, reliable, and (most importantly) delicious. The result? Fudgy brownies topped with white chocolate, candy eyes, and colored gel—every bite is a mix of rich chocolate and playful sweetness. If you’re after a treat that gets everyone talking (and snapping pics for Pinterest), this is it. Whether you’re baking for little goblins, spooky sleepovers, or a grown-up costume party, these eyeball brownies always steal the show.
I’ve tested this recipe more times than I care to admit (at least a dozen, if we’re counting!), and each batch has been a hit. The best part? You don’t need fancy baking skills or hard-to-find ingredients. You’ll get a dessert that’s equal parts fun and crave-worthy, with just the right amount of Halloween flair. So if you’re searching for an eyeball brownies recipe that’s easy, festive, and guaranteed to delight kids and adults alike—stick around. You’re going to want this one in your party rotation!
Why You’ll Love This Recipe
- Quick & Easy: These eyeball brownies come together in under an hour. No complicated steps, no fancy equipment—just mix, bake, decorate, and you’re done. Perfect for last-minute Halloween plans or busy parents juggling a million things.
- Simple Ingredients: You probably have most of these ingredients in your pantry already. No need for a special grocery run, unless you’re picking up candy eyes or colored gel for decorating (my secret weapon for max spookiness!).
- Perfect for Parties: Whether it’s a classroom treat, neighborhood bash, or just a family movie night, these brownies always stand out. Kids love the creepy-cute look, and adults can’t resist the fudgy centers.
- Crowd-Pleaser: I’ve never met a kid who didn’t freak out (in a good way!) over these eyeball brownies. They’re the first dessert to disappear from the table every single year.
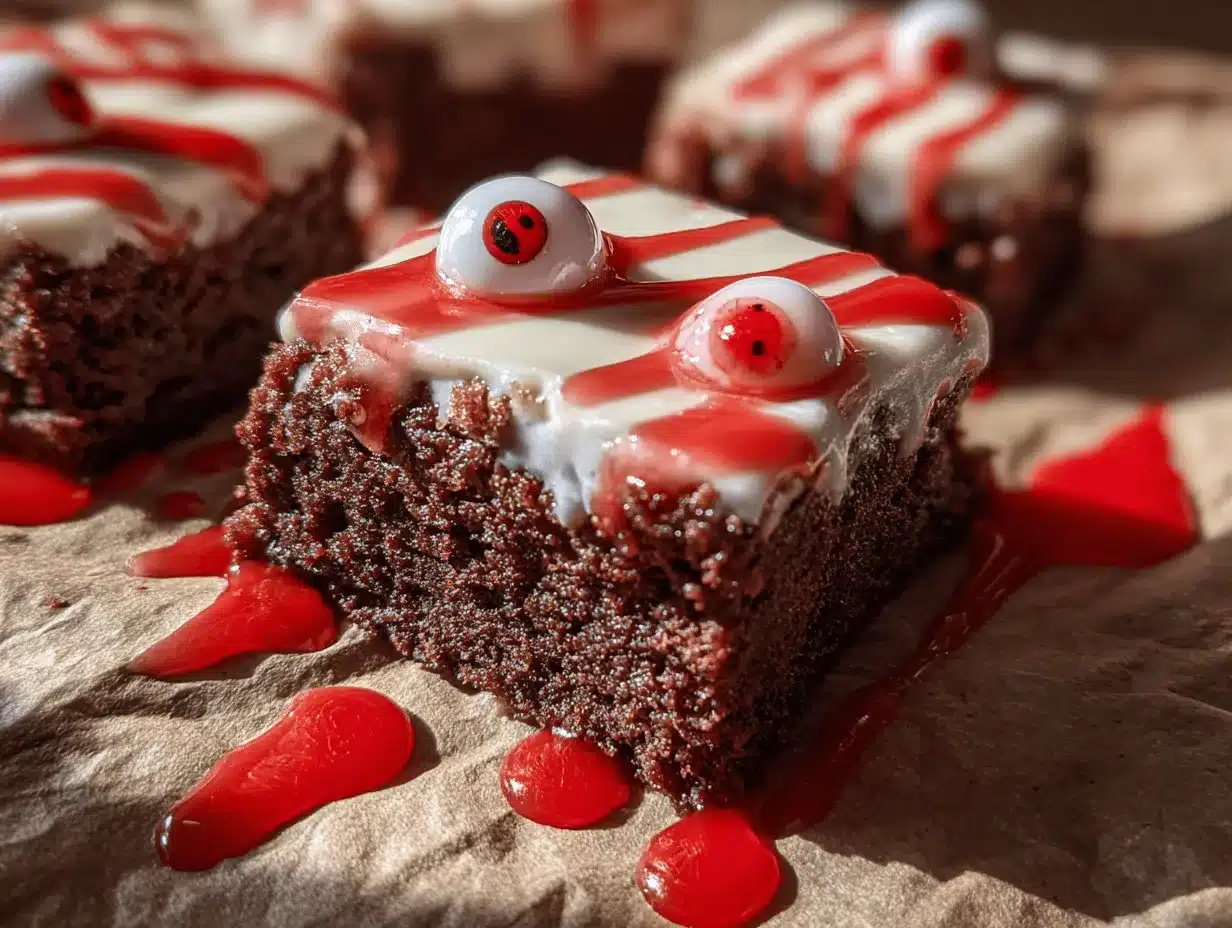
- Unbelievably Delicious: Don’t let the playful look fool you—these brownies are major comfort food. Ultra-chocolatey, chewy at the edges, soft in the middle, and topped with sweet white chocolate and candy.
What makes my eyeball brownies recipe different? I use melted butter and real cocoa powder for the richest flavor, and I don’t skimp on the toppings. The candy eyes are set in creamy white chocolate, with a drizzle of colored gel that makes them pop (the effect is seriously Pinterest-worthy!). I also keep the decorating simple so kids can join in—no stress, just fun.
Honestly, these brownies are more than just a treat—they’re a memory-maker. The look on my kids’ faces when they see a tray full of “monster eyes” is priceless. It’s comfort food with a twist, and it’s just spooky enough for Halloween without being scary. If you want a recipe that’s fun, foolproof, and totally Instagrammable, you’ll love these eyeball brownies as much as we do!
Ingredients Needed
This eyeball brownies recipe uses classic, easy-to-find ingredients to deliver bold chocolate flavor and a playful finish. Most are pantry staples, but I’ll give you a few tips on where to snag the fun stuff, too!
- For the Brownie Base:
- 1/2 cup (115g) unsalted butter, melted (adds richness)
- 1 cup (200g) granulated sugar
- 2 large eggs, room temperature
- 1 tsp vanilla extract (go with pure vanilla for best flavor)
- 1/3 cup (40g) unsweetened cocoa powder (I like Ghirardelli or Hershey’s)
- 1/2 cup (65g) all-purpose flour
- 1/4 tsp salt
- 1/4 tsp baking powder
- For the Eyeball Topping:
- 3/4 cup (130g) white chocolate chips (or chopped white chocolate)
- 24-30 candy eyeballs (Wilton is easy to find at most craft stores)
- Colored decorating gel (red, green, blue, or black for “bloodshot” or monster eyes)
- Optional: Sprinkles, edible glitter, or colored sugar for extra pizzazz
Ingredient Notes & Swaps:
If you need these brownies to be gluten-free, swap the all-purpose flour for your favorite gluten-free blend (I’ve had good luck with Cup4Cup). For dairy-free, swap the butter with vegan spread and use dairy-free chocolate chips. If you can’t find candy eyes, you can make little circles with white icing and dot with black gel—it’s a fun DIY project for kids!
Don’t forget: the better your cocoa powder, the richer your brownies. I always use the best I can afford (never hurts to splurge for Halloween!). And if you want a thicker brownie, double the recipe and use a 9×13-inch pan.
Seasonal twist? Add a pinch of cinnamon or pumpkin spice to the batter for a little autumn warmth. Or toss in some mini chocolate chips for extra decadence. You can even swap the white chocolate for colored candy melts—green “zombie” eyes are always a hit!
Equipment Needed
- 8×8-inch (20x20cm) square baking pan (I prefer metal for crisp edges, but glass works too)
- Mixing bowls (at least two—one for the brownie batter, one for melting chocolate)
- Whisk and spatula (a silicone spatula makes spreading easy)
- Measuring cups and spoons (accuracy matters with brownies!)
- Microwave-safe bowl or double boiler (for melting white chocolate)
- Toothpicks or small offset spatula (for swirling gel on the eyeballs)
- Parchment paper (helps lift brownies out neatly)
If you don’t have a square pan, use a round cake pan and slice into wedges—each wedge can get an “eyeball” in the center for a monster pizza vibe! For melting chocolate, a microwave works in short bursts, but a double boiler gives more control if you’re prone to burning chocolate (been there, ruined that!).
Budget tip: You can find candy eyes and colored gel at most dollar stores around Halloween. If you’re baking a huge batch, buy parchment paper in bulk—it keeps cleanup easy and prevents sticking.
Maintenance tip: Wash mixing bowls right after using to avoid stubborn cocoa stains. Metal pans last longer if you avoid scrubbing with steel wool.
Preparation Method
- Preheat & Prep: Set your oven to 350°F (175°C). Line an 8×8-inch pan with parchment paper—leave some overhang on the sides for easy brownie removal. Spray lightly with nonstick spray if you’re worried about sticking.
- Mix Wet Ingredients: In a large bowl, whisk together 1/2 cup (115g) melted butter and 1 cup (200g) sugar until glossy. Beat in 2 eggs, one at a time, then stir in 1 tsp vanilla extract. The batter should look thick and shiny.
- Add Dry Ingredients: Sift together 1/3 cup (40g) cocoa powder, 1/2 cup (65g) flour, 1/4 tsp salt, and 1/4 tsp baking powder. Gradually fold into the wet mixture with a spatula—don’t overmix! Stop when no dry streaks remain (batter will be thick).
- Pour & Bake: Spread batter evenly into your prepared pan. Bake for 22-26 minutes, until a toothpick comes out with moist crumbs (not wet batter). The edges should be slightly firm, and the center a bit gooey—classic brownie vibes.
- Cool Completely: Let brownies cool in the pan for 10 minutes, then lift them out using the parchment overhang. Transfer to a wire rack and cool fully (at least 30 minutes—white chocolate melts if the brownies are hot!).
- Melt White Chocolate: Place 3/4 cup (130g) white chocolate chips in a microwave-safe bowl. Microwave in 15-second bursts, stirring each time, until smooth. Or use a double boiler for more control. If chocolate seizes, add 1 tsp coconut oil to loosen.
- Decorate Eyeballs: Slice cooled brownies into 16 squares. Spoon a blob of melted white chocolate onto the center of each brownie (about 1 tsp per brownie). Quickly press a candy eyeball into the center before the chocolate sets.
- Add Spooky Details: Using colored decorating gel, draw squiggly “veins” or rings around the eyes. Use toothpicks to drag the gel outward for a bloodshot look, or swirl colors for monster vibes. Add sprinkles or edible glitter if you want extra sparkle.
- Set & Serve: Allow decorated brownies to set for 10-15 minutes, so the chocolate firms up. Serve on a platter for max party effect!
Troubleshooting Tips:
If brownies come out dry, reduce the bake time by 2-3 minutes next round. If white chocolate won’t melt smoothly, double-check your bowl is dry (water causes seizing!). For stubborn candy eyes, dab a tiny bit of extra chocolate underneath to “glue” them in place.
Personal Tips:
I like to bake brownies the night before and decorate the morning of the party—less stress, better set chocolate. If you’re short on time, use a boxed brownie mix (just follow the decorating steps!).
Cooking Tips & Techniques
There’s a little art to making eyeball brownies look just right. Here’s what I’ve learned (sometimes the hard way!):
- Don’t Overbake: The difference between fudgy and cakey brownies is just a couple minutes. Start checking at the 20-minute mark, especially if your oven runs hot. I once forgot and ended up with “eyeball brownie bricks”—still edible, but not party-worthy.
- Room Temperature Eggs: Using eggs at room temp helps the batter blend smoothly and bake evenly. If you forget, just let them sit in warm water for a few minutes.
- White Chocolate Melting: White chocolate can be finicky. Make sure your bowl is bone dry—any water and you’ll get a grainy mess. Stir between microwave bursts, and don’t rush it.
- Press Candy Eyes Quickly: Candy eyes need to go on while the chocolate is still soft. If you wait too long, they won’t stick. I set up an “assembly line” to keep things moving.
- Let Kids Decorate: Decorating is half the fun! Hand out toothpicks and colored gels, and let everyone make their own monster creations. Sure, things get a little messy—but that’s Halloween!
- Consistency Tips: For perfectly cut brownies, chill them briefly before slicing. Wipe your knife between each cut for crisp edges (trust me, it makes a difference for those Pinterest pics).
If your brownies stick to the pan, try lining with parchment and greasing it lightly. For extra gooeyness, add a tablespoon of chocolate chips to the batter. And here’s a trick: if your white chocolate gets too thick, stir in a splash of coconut oil.
Timing tip: Start melting white chocolate while brownies are cooling—it saves time and keeps the decorating process smooth. Honestly, multitasking is the key to a relaxed kitchen (especially with kids bouncing around!).
Variations & Adaptations
Want to switch things up? Eyeball brownies are super flexible! Here are a few riffs I’ve tried or seen at parties:
- Gluten-Free: Use a 1:1 gluten-free flour blend. Cup4Cup and King Arthur both work well. I’ve made gluten-free eyeball brownies for a friend’s kid, and no one could tell the difference.
- Vegan Option: Swap butter for vegan margarine, eggs for flaxseed “eggs” (1 tbsp flaxseed + 2.5 tbsp water per egg), and use dairy-free chocolate chips. Candy eyes are usually not vegan, but you can make DIY eyes with vegan icing gel.
- Flavor Twists: Add 1/2 tsp peppermint extract to the batter for minty monster brownies. Or swirl caramel into the batter before baking for oozy, “monster slime” centers.
- Different Cooking Methods: Bake in mini muffin tins for bite-sized eyeball brownie “pops.” Or use a sheet pan for thinner, crispier brownies if you prefer edges over centers.
- Allergen Substitutions: For nut allergies, double-check all toppings (some candy eyes are made in nut facilities). Swap white chocolate for colored candy melts if dairy is an issue.
One year, I tried a “zombie” theme with green candy melts and black gel—kids went nuts for them. You can also add orange M&Ms around the eyes for a jack-o’-lantern vibe. Let your imagination run wild—these brownies are a blank canvas for Halloween creativity!
Serving & Storage Suggestions
Serving:
Eyeball brownies are best served at room temperature, stacked on a platter for that “monster mash” look. I like to arrange them with the eyes facing up—kids always squeal when they see a tray full of staring eyeballs! If you want to be extra festive, add candy spiders or gummy worms around the plate.
Pairings:
Serve alongside cold milk, hot cocoa, or apple cider for a cozy Halloween treat. For parties, I’ll set out a bowl of popcorn and apple slices for a sweet-and-salty spread. (Trust me, brownies and cider are a match made in spooky heaven.)
Storage:
Store leftovers in an airtight container at room temp for up to 3 days. If you need to make them ahead, refrigerate for up to a week—just let them come to room temperature before serving so the white chocolate softens. You can also freeze undecorated brownies for up to 2 months; thaw and decorate just before your party.
Reheating:
Microwave individual brownies for 10 seconds to revive the gooey texture. Don’t heat decorated brownies too much or the candy eyes may melt. Flavors develop overnight, so if you’re planning ahead, the brownies will taste richer the next day!
Nutritional Information & Benefits
Here’s a quick look at what you’re getting with each eyeball brownie (based on a batch cut into 16 squares):
- Calories: ~180 per piece
- Fat: ~8g
- Protein: ~2g
- Carbs: ~25g
- Sugar: ~18g
Health Benefits & Dietary Notes:
Cocoa powder is a source of antioxidants and adds deep flavor without tons of fat. These brownies can be made gluten-free or dairy-free with simple swaps (see above). Just be mindful—these are a fun treat, not an everyday snack!
Potential allergens include wheat, dairy, and eggs. Candy eyes may contain gelatin or food dyes; check labels if you’re baking for kids with sensitivities.
Honestly, I think of these as a happiness booster—sometimes, a little chocolate and a big smile are good for the soul.
Conclusion
If you’re looking for a Halloween dessert that’s equal parts fun and delicious, this eyeball brownies recipe is it. They’re easy to make, endlessly customizable, and guaranteed to get laughs (and maybe a few shrieks!) at any party. Plus, you get all the comfort of rich, fudgy brownies with a festive twist—what’s not to love?
Don’t be afraid to make these your own. Swap flavors, change up the decorations, or let the kids run wild with colored gels and sprinkles. The best part of Halloween baking is the creativity, and these brownies are the perfect canvas for all your spooky ideas.
I make these every year, and honestly, they never get old. I hope they become a tradition in your house too! If you try them, let me know in the comments—share your monster creations, party pics, or any wild variations you come up with. Happy haunting, and happy baking!
FAQs
How do I keep candy eyes from melting or sliding off?
Press candy eyes into the white chocolate while it’s still soft, then let brownies sit until the chocolate sets. If eyes slide, add a dab of extra melted chocolate underneath as “glue.”
Can I make eyeball brownies ahead of time?
Absolutely! Bake and decorate up to 24 hours in advance. Store in an airtight container at room temperature, or refrigerate for longer storage and bring to room temp before serving.
What if I can’t find candy eyes?
No problem—make DIY eyes with white icing and black gel, or use mini marshmallows with a dot of chocolate. It’s a fun project for kids, and works in a pinch!
How do I cut brownies cleanly for party presentation?
Chill brownies briefly after baking, then use a sharp knife wiped clean between cuts. This gives crisp edges and keeps your eyeballs looking perfect for photos.
Can I use a boxed brownie mix?
Yes! Just prepare according to package directions, then follow the decorating steps for the eyeball effect. It’s an easy shortcut if you’re short on time.
Pin This Recipe!
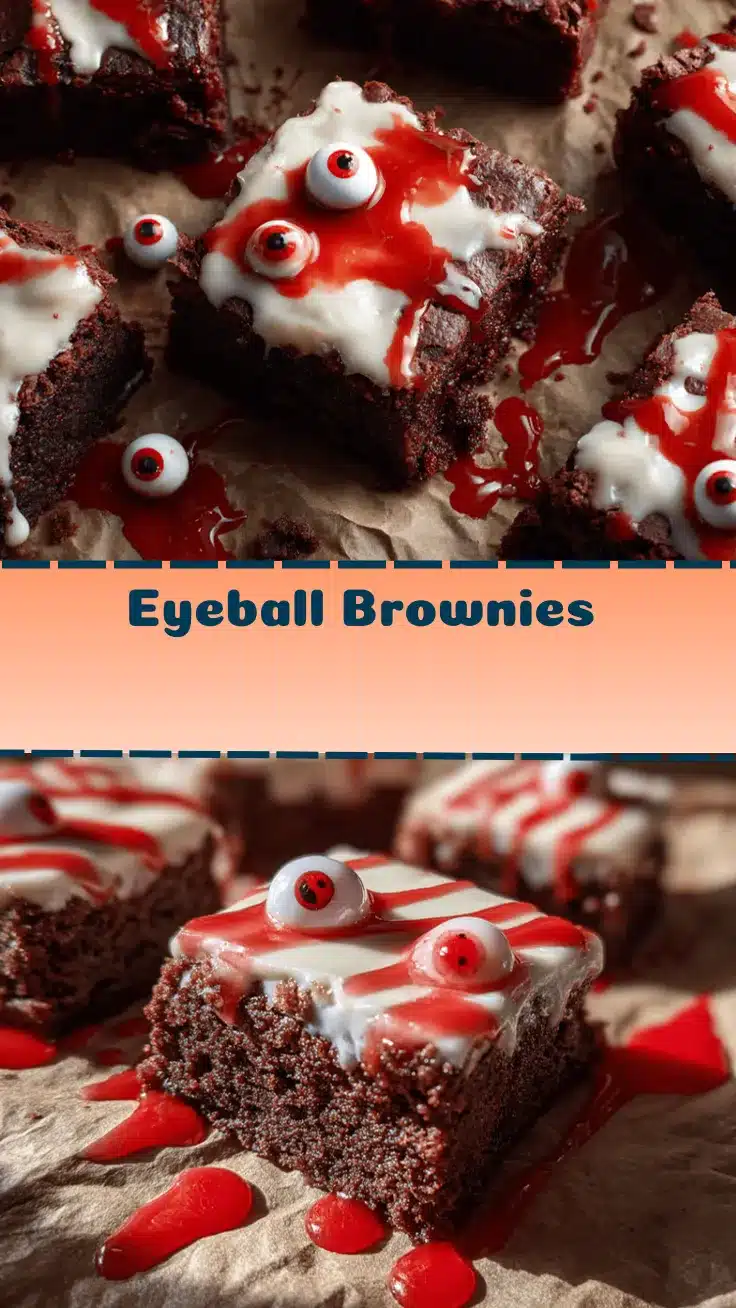
Eyeball Brownies Recipe – Easy Halloween Party Treats Kids Love
- Total Time: 50 minutes
- Yield: 16 brownies 1x
Description
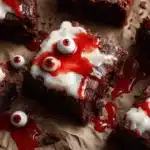
Fudgy, chocolatey brownies topped with spooky candy eyes and colored gel make these Eyeball Brownies the ultimate Halloween party treat. Quick to make, fun to decorate, and loved by kids and adults alike!
Ingredients
- 1/2 cup (115g) unsalted butter, melted
- 1 cup (200g) granulated sugar
- 2 large eggs, room temperature
- 1 tsp vanilla extract
- 1/3 cup (40g) unsweetened cocoa powder
- 1/2 cup (65g) all-purpose flour
- 1/4 tsp salt
- 1/4 tsp baking powder
- 3/4 cup (130g) white chocolate chips or chopped white chocolate
- 24–30 candy eyeballs
- Colored decorating gel (red, green, blue, or black)
- Optional: Sprinkles, edible glitter, or colored sugar
Instructions
- Preheat oven to 350°F (175°C). Line an 8×8-inch pan with parchment paper, leaving overhang for easy removal. Lightly spray with nonstick spray if desired.
- In a large bowl, whisk together melted butter and sugar until glossy. Beat in eggs, one at a time, then stir in vanilla extract.
- Sift together cocoa powder, flour, salt, and baking powder. Gradually fold into wet mixture with a spatula until no dry streaks remain. Do not overmix.
- Spread batter evenly into prepared pan. Bake for 22-26 minutes, until a toothpick comes out with moist crumbs (not wet batter). Edges should be firm, center slightly gooey.
- Let brownies cool in pan for 10 minutes, then lift out using parchment. Transfer to wire rack and cool completely (at least 30 minutes).
- Melt white chocolate chips in a microwave-safe bowl in 15-second bursts, stirring each time, until smooth. Alternatively, use a double boiler. If chocolate seizes, add 1 tsp coconut oil.
- Slice cooled brownies into 16 squares. Spoon about 1 tsp melted white chocolate onto the center of each brownie. Quickly press a candy eyeball into the center before chocolate sets.
- Decorate with colored gel, drawing squiggly veins or rings around the eyes. Use toothpicks to drag gel outward for a bloodshot look, or swirl colors for monster vibes. Add sprinkles or edible glitter if desired.
- Allow decorated brownies to set for 10-15 minutes so chocolate firms up. Serve on a platter.
Notes
For gluten-free brownies, substitute all-purpose flour with a 1:1 gluten-free blend. For dairy-free, use vegan butter and dairy-free chocolate chips. Decorate with DIY eyes if candy eyes aren’t available. Chill brownies before slicing for clean edges. Let kids help with decorating for extra fun.
- Prep Time: 15 minutes
- Cook Time: 25 minutes
- Category: Dessert
- Cuisine: American
Nutrition
- Serving Size: 1 brownie (1/16 of recipe)
- Calories: 180
- Sugar: 18
- Sodium: 70
- Fat: 8
- Saturated Fat: 5
- Carbohydrates: 25
- Fiber: 1
- Protein: 2
Keywords: Halloween, brownies, eyeball brownies, party treats, kid-friendly, chocolate, spooky dessert, easy brownies, Halloween dessert, Halloween baking