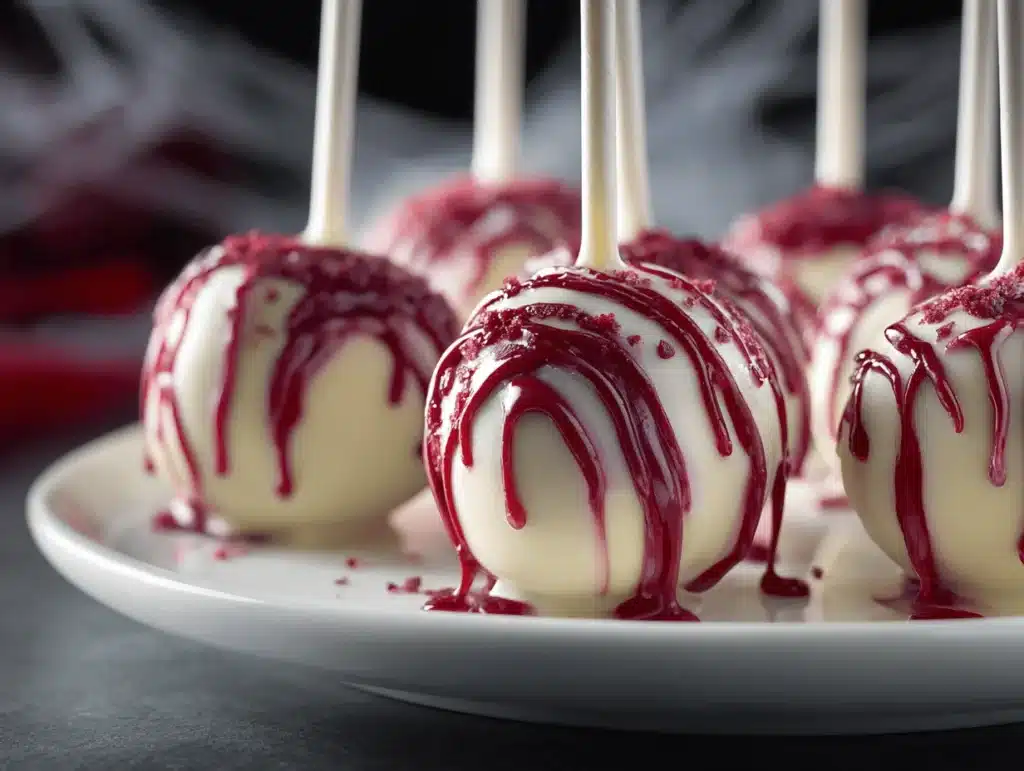
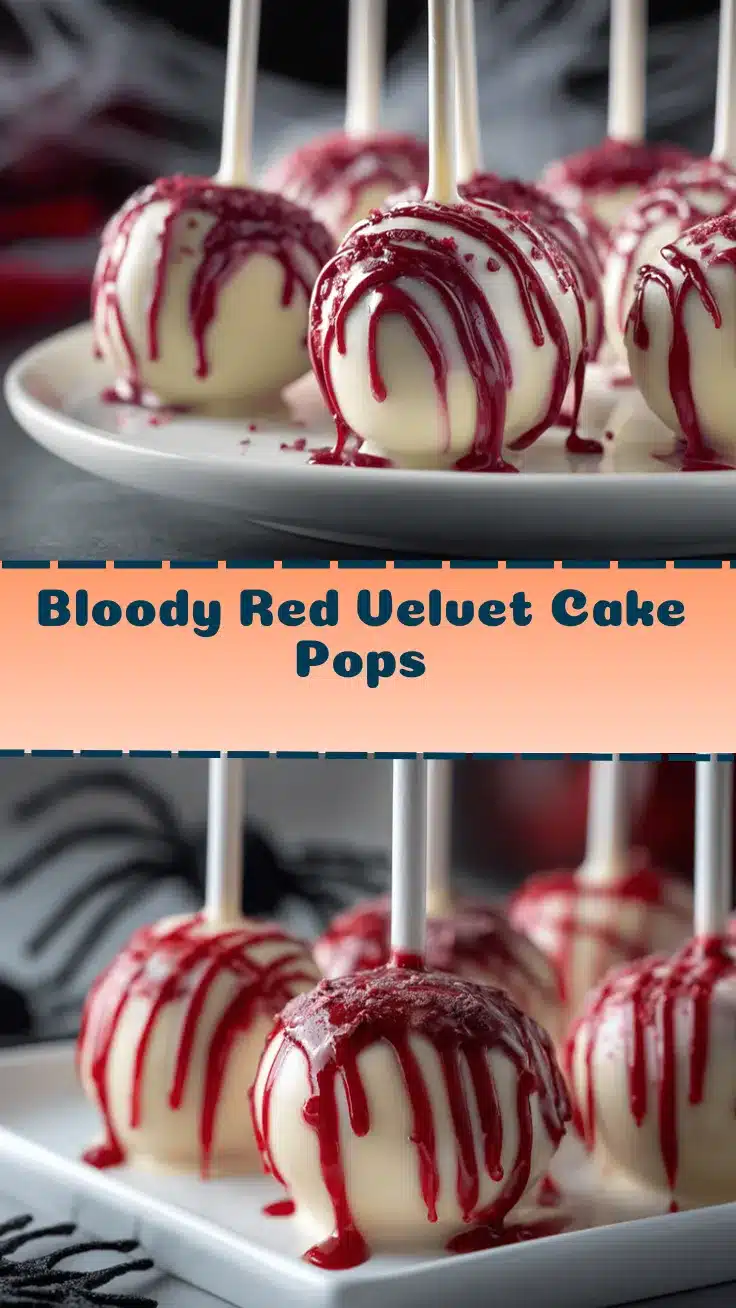
Sticky crimson icing dripping down smooth chocolatey spheres—honestly, these Bloody Red Velvet Cake Pops might be the most fun I’ve ever had in the kitchen. I still remember the first time I made them for a Halloween bash; my niece shrieked with delight (and a little bit of horror) when she saw the “blood” glaze oozing over each pop. There’s something about red velvet—rich, velvety, and dramatic—that just begs for a creepy twist, and when you add spooky decorations, these cake pops become the ultimate party treat.
Halloween is my absolute favorite excuse to get creative with desserts, and this recipe is my secret weapon for any gathering. Whether it’s a monster mash at home or a classroom celebration, these bloody cake pops always steal the show. They’re easy to hold, perfect for kids (and adults who love finger food), and—let’s face it—everyone loves a good red velvet cake. I’ve tested dozens of cake pop combos, but this one always comes out on top thanks to its bold color and playful “bloody” drizzle. If you want a treat that’s equal parts delicious and eye-catching, red velvet cake pops are the way to go.
I’ve baked these more times than I can count, tweaking the cream cheese ratio, experimenting with different bloody glazes, and even letting the kids help with the spooky decorations. Each batch brings back memories of sticky fingers, wild laughter, and that unmistakable smell of fresh cake. So, if you’re looking for the perfect Halloween treat that’s easy to make, outrageously fun, and guaranteed to get people talking, you’re in the right spot. The irresistible Bloody Red Velvet Cake Pops recipe is about to become your new party favorite!
Why You’ll Love This Bloody Red Velvet Cake Pops Recipe
- Quick & Easy: These cake pops come together in under 90 minutes, which means you can whip up a spooky batch even if you’re short on time.
- Simple Ingredients: Nothing fancy, just classic cake mix, cream cheese, and candy melts—you know, the stuff you probably already have tucked away in your pantry.
- Perfect for Halloween Parties: Whether it’s a classroom event, neighborhood gathering, or a cozy movie night, these cake pops are always a hit.
- Crowd-Pleaser: Kids love the “bloody” drizzle, and adults can’t resist the rich, velvety flavor. They always disappear fast!
- Unbelievably Delicious: The red velvet cake is moist and decadent, with a creamy tang from the filling and a sweet crunch from the candy coating. Seriously, it’s hard to eat just one.
This recipe stands out because I blend the cake with real cream cheese, not just frosting from a can. That little tweak makes the pops extra creamy and gives them a little grown-up sophistication without losing the fun. I also use a homemade “bloody” glaze that’s way more dramatic (and tastier!) than anything store-bought.
Let’s be honest: most Halloween treats look great but taste average. These cake pops break the curse—they’re as addictive as any bakery treat, but you get to control the flavor and the spook factor! It’s the kind of recipe you’ll want to make again, not just for October, but for any time you need a wow-worthy dessert.
After dozens of batches, I can say with total confidence—these Bloody Red Velvet Cake Pops are a game-changer. They make people smile, gasp, and come back for seconds. If you want a treat that’s equal parts eye-catching and finger-licking good, this is the recipe to bookmark.
Ingredients Needed for Bloody Red Velvet Cake Pops
This recipe uses simple, wholesome ingredients to deliver bold flavor and dramatic presentation—without a ton of fuss. Most of these are pantry staples, and you can swap a few things if needed.
- For the Cake:
- 1 box red velvet cake mix (about 15.25 oz / 432 g)
- 3 large eggs (room temperature)
- 1 cup (240 ml) buttermilk (adds moisture and tang)
- 1/2 cup (120 ml) vegetable oil
- For the Filling:
- 4 oz (115 g) cream cheese (softened to room temperature)
- 1/4 cup (30 g) powdered sugar
- 1/4 tsp vanilla extract
- For the Coating:
- 12 oz (340 g) white candy melts (or white chocolate chips)
- 2 oz (56 g) red candy melts (for the “bloody” drizzle)
- 1 tsp coconut oil (optional; for thinning the melts)
- For Decoration:
- Edible red gel or piping gel (for extra blood effect—Wilton and Americolor are great)
- Halloween-themed sprinkles (optional)
- Lollipop sticks (about 24, sturdy for dipping)
Ingredient Notes & Substitutions:
- If you’re out of buttermilk, mix 1 cup milk with 1 tbsp vinegar and let it sit for 5 minutes.
- Dairy-free? Use vegan cream cheese and coconut milk for the cake mix.
- Want gluten-free cake pops? Swap in your favorite GF red velvet cake mix and check all decorations for gluten.
- Red candy melts are best for the blood effect, but you can use white melts tinted with red gel food coloring if needed.
- Lollipop sticks work best, but you can use sturdy paper straws or wooden skewers if needed.
I’ve tried a few different brands for candy melts, and honestly, Wilton and Ghirardelli always give the smoothest coating. If you want to get extra fancy, a little edible shimmer dust makes the “blood” pop even more. Just a tip from years of Halloween baking—don’t skimp on the red food color, or your pops might look pink instead of scary!
Equipment Needed
- Mixing Bowls: Two medium bowls for cake batter and cream cheese blend.
- Electric Mixer: Hand mixer or stand mixer to whip up the batter and filling (whisk works in a pinch, but arm workout alert!).
- Baking Pan: 9×13-inch (23×33 cm) pan for baking the cake layer.
- Wire Rack: For cooling the cake before crumbling.
- Sheet Pan: Lined with parchment or wax paper for chilling the pops.
- Lollipop Sticks: At least 24, sturdy enough for dipping and holding.
- Microwave-Safe Bowls: For melting candy melts (glass bowls work best for even heating).
- Small Spoons or Piping Bags: For drizzling the “blood” glaze.
- Styrofoam Block or Cake Pop Stand: For standing pops upright to set (egg cartons work in a pinch!).
If you don’t have a cake pop stand, poke holes in a sturdy cardboard box or use an upturned colander. For budget-friendly options, grab lollipop sticks from the dollar store—they’re just as sturdy as the fancy ones. After a few Halloween parties, I realized a wire rack is key for cooling, and parchment paper keeps cleanup easy. For melting candy melts, microwave in short bursts and stir often—trust me, burnt chocolate is a real mood killer.
How to Make Bloody Red Velvet Cake Pops: Step-by-Step Preparation
-
Prepare the Red Velvet Cake:
Preheat your oven to 350°F (175°C). Grease a 9×13-inch (23×33 cm) baking pan—use butter for best results.
In a mixing bowl, combine 1 box of red velvet cake mix, 3 large eggs, 1 cup (240 ml) buttermilk, and 1/2 cup (120 ml) vegetable oil. Mix with an electric mixer on medium until smooth, about 2 minutes.
Pour batter into the pan and bake for 25–30 minutes, or until a toothpick inserted in the center comes out clean. Cool on a wire rack for 20–30 minutes. (Don’t rush—warm cake makes mushy pops.)
-
Crumble the Cake:
Once the cake is fully cooled, break it up into fine crumbs in a large bowl. Use clean hands or a fork. It should look like bright red sand—kind of satisfying!
-
Make the Cream Cheese Filling:
In a separate bowl, beat 4 oz (115 g) softened cream cheese, 1/4 cup (30 g) powdered sugar, and 1/4 tsp vanilla extract until smooth and creamy.
-
Combine Cake and Filling:
Add the cream cheese mixture to the cake crumbs. Mix with your hands until evenly combined. It should feel like soft, moldable dough. If it’s too dry, add a tablespoon more cream cheese. Too sticky? Add a few tablespoons of cake crumbs.
-
Shape the Cake Balls:
Roll dough into 1-inch (2.5 cm) balls—about the size of a ping pong ball. Place on a parchment-lined sheet pan. You’ll get about 24 pops.
Chill in the fridge for 30 minutes, or freeze for 15 minutes. Cold pops are easier to coat!
-
Insert Lollipop Sticks:
Melt a tiny bit of white candy melts (about 2 tbsp) and dip the tip of each stick in it before inserting into each cake ball. This helps keep them secure.
-
Coat the Cake Pops:
Melt the rest of the white candy melts (12 oz / 340 g) in a microwave-safe bowl, stirring every 30 seconds. Add 1 tsp coconut oil if too thick.
Dip each cake pop into the melted coating, swirling to cover evenly. Gently tap off excess. Place upright in a stand or block to set—about 10 minutes.
-
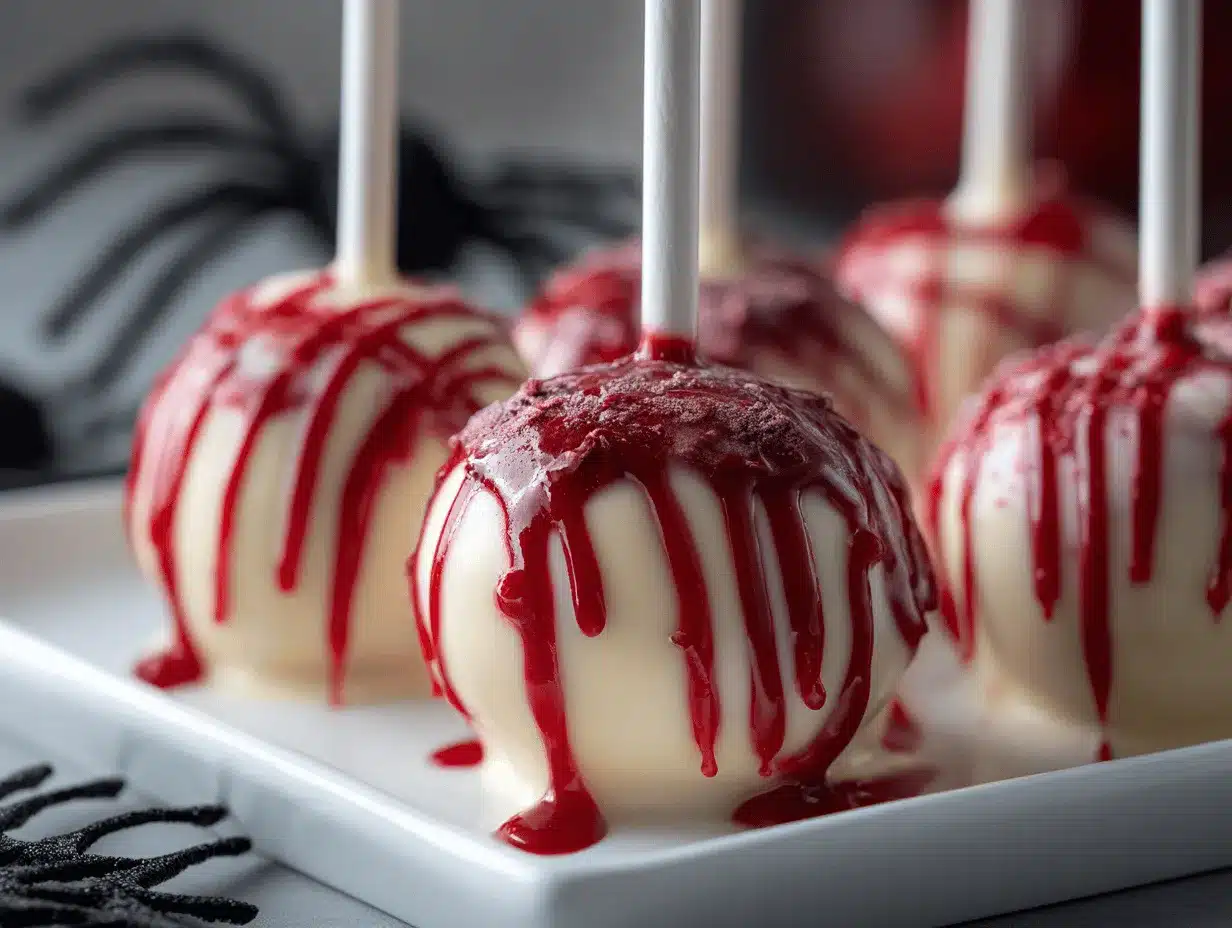
Add the Bloody Red Drizzle:
Melt 2 oz (56 g) red candy melts. Use a small spoon or piping bag to drizzle over each pop, letting it drip for a “bloody” effect. Add edible red gel for extra ooze. (Don’t worry about perfection—it looks creepier when messy!)
-
Decorate:
Sprinkle with Halloween toppings, edible glitter, or more gel blood. Let pops set completely at room temp (about 20 minutes) or pop in the fridge for 10 minutes.
-
Serve and Enjoy:
Arrange on a spooky platter or poke into a pumpkin for dramatic effect. Watch the kids giggle—and maybe shriek—a little!
Troubleshooting Tips:
- If cake pops crack while coating, your cake balls might be too cold—let them sit out 5 minutes before dipping.
- Bloody drizzle not sticking? Let white coating set, then add drizzle. Too runny? Let candy melts cool a few minutes.
- Cake pops falling off sticks? Use more melted candy melts as “glue” before dipping.
Personal Prep Notes:
I’ve found the key to perfect cake pops is patience and not rushing the chilling or setting steps. The “blood” drizzle is the most fun—kids love helping, and it never has to look perfect. Honestly, some of my best pops are a little lopsided or extra gooey!
Cooking Tips & Techniques for Spooky Cake Pops
Here’s what I’ve learned after many, many batches of cake pops (and a few Halloween disasters):
- Don’t Overmix: When combining cake crumbs and cream cheese, mix just until it’s doughy. Too much mixing makes them dense and tough.
- Chill Is Key: Cold cake balls hold together better and coat smoothly. If you’re in a rush, 15 minutes in the freezer works wonders.
- Right Coating Temperature: Melt candy melts in short bursts and stir often. Overheated coating gets lumpy and hard to work with.
- Use a Stand: A styrofoam block keeps pops upright and pretty while they set. I once tried a mug—total disaster!
- Messy Is Spooky: Don’t stress about perfect drizzle. Halloween is about playful chaos—let some “blood” drip unevenly.
- Let Pops Set: Before adding drizzle or sprinkles, make sure the white coating is firm to the touch. Otherwise, things get sticky fast.
- Practice Multitasking: While cake pops chill, prep your decoration station and melt candy melts. Efficiency makes the process way more fun.
Common Mistakes & How to Fix:
- If pops fall apart, mix in more cake crumbs or chill longer.
- Bubbles or cracks on coating? Dip slowly, and tap gently to remove excess.
- Drizzle too thick? Add a drop of coconut oil and reheat gently.
I’ve had pops slip off sticks, coatings seize, and drizzle run everywhere—and you know what? They still taste amazing. The little imperfections just add to the Halloween vibe!
Variations & Adaptations
Want to switch things up? Here are my favorite ways to customize bloody red velvet cake pops for different tastes and occasions:
- Gluten-Free: Use a gluten-free red velvet cake mix and double-check all decorations. The texture stays moist and rich.
- Dairy-Free: Swap cream cheese for vegan cream cheese, and use plant-based milk in the cake batter.
- Spooky Flavors: Add a teaspoon of instant espresso powder or pumpkin spice to the cake mix for a unique Halloween twist.
- Different Coatings: Try dark chocolate melts for a “black velvet” look, then drizzle with red and purple gels for a witchy vibe.
- Allergen-Friendly: Use sunflower seed butter instead of cream cheese for nut allergies, and check sprinkles for common allergens.
- Personal Favorite: Once, I stuffed each pop with a mini marshmallow before coating—gooey and ghostly when you bite in!
You can also swap the red velvet for chocolate or vanilla cake, and tint the candy melts with green or purple for “monster pops.” Let kids pick their own decorations—googly eyes, candy bones, or edible glitter all work. The possibilities are endless, and honestly, the weird combos are sometimes the best!
Serving & Storage Suggestions
For the most dramatic effect, serve Bloody Red Velvet Cake Pops at room temperature on a spooky platter—black cake stands, pumpkin bowls, or even stuck into a foam skull (if you dare!). They look amazing arranged in clusters, with “blood” drips facing out.
- Serving: Room temperature is best for flavor and texture. If you’re serving outside, keep pops shaded—sun melts the coating fast.
- Pairings: These pops go perfectly with apple cider, hot cocoa, or a fizzy orange punch. For adults, a glass of mulled wine is extra festive.
- Storage: Store in an airtight container at room temp for up to 3 days. For longer storage, pop in the fridge—just let them come to room temp before serving for the best texture.
- Freezing: You can freeze uncoated cake balls for up to a month. Thaw in the fridge, then coat and decorate as usual.
- Reheating: Never microwave coated pops—the candy melts will melt. If you need to soften them, just let them sit out 10–15 minutes.
Honestly, these pops taste even better on day two—the flavors meld, and the cake gets even more tender. Just keep them covered to avoid any Halloween dust bunnies!
Nutritional Information & Benefits
Each Bloody Red Velvet Cake Pop has about 120 calories, 6g fat, 15g carbs, and 2g protein (estimated—actual values may vary with brands and decorations).
Health Benefits: Red velvet cake is surprisingly rich in cocoa, which has antioxidants—okay, maybe not enough to call it a superfood, but every bit counts! Using real cream cheese adds calcium and protein, and you can cut sugar by using less filling or swapping coconut sugar.
Dietary Notes: This recipe can be made gluten-free and dairy-free with simple swaps. Cake pops do contain eggs and dairy unless modified. Always double-check decorations for allergens—some sprinkles contain nuts or gluten.
From a wellness perspective, I see these as an occasional treat—fun to share, easy to portion, and way less sugar than a full slice of cake. Plus, you can sneak in extra protein with Greek yogurt or nut butter if you’re feeling creative. Halloween is all about balance, right?
Conclusion
If you’re hunting for a showstopping Halloween treat, these Bloody Red Velvet Cake Pops are it. They’re bold, spooky, and absolutely delicious—plus, you can customize them for any crowd or dietary need. The recipe is easy enough for beginners, but the result looks (and tastes) like something straight out of a bakery.
I love making these because they always spark joy—whether it’s kids giggling over messy “blood” drizzle or adults sneaking seconds after the party winds down. They’re the perfect mix of playful and comforting, and honestly, I can’t imagine a Halloween without them.
Try this recipe, make it your own, and let me know how your cake pops turn out! I’d love to hear your spooky twists or see your party pics—drop a comment below or share your creations on Pinterest. Happy haunting, and may your Halloween be filled with sweet, sticky, irresistible fun!
FAQs
Can I make Bloody Red Velvet Cake Pops ahead of time?
Absolutely! You can bake and crumble the cake up to 2 days ahead, shape the balls, and chill them. Coat and decorate the day you plan to serve for the best look.
What if I don’t have candy melts?
You can use white chocolate chips with a little coconut oil for coating. For the bloody drizzle, tint some white chocolate with red gel food coloring.
How do I keep the cake pops from falling off the sticks?
Dip each stick in melted candy melts before inserting into the cake ball—it acts like glue and holds everything in place. Chill the pops before coating to keep them sturdy.
Can I freeze the finished cake pops?
You can freeze the uncoated cake balls, but freezing finished, decorated pops isn’t ideal—coating may crack. If you must, wrap tightly and thaw gently in the fridge.
What’s the best way to get that “bloody” effect?
Use red candy melts or edible red gel, and let it drip unevenly. Layering both gives the best spooky look. Don’t stress about perfection—Halloween is all about messy fun!
Pin This Recipe!
Bloody Red Velvet Cake Pops
- Total Time: 1 hour 30 minutes
- Yield: 24 cake pops 1x
Description
These Bloody Red Velvet Cake Pops are the ultimate Halloween treat—moist red velvet cake blended with creamy filling, coated in white chocolate, and finished with a dramatic ‘bloody’ drizzle. Perfect for parties, they’re easy to make, fun to decorate, and guaranteed to wow kids and adults alike.
Ingredients
- 1 box red velvet cake mix (about 15.25 oz)
- 3 large eggs (room temperature)
- 1 cup buttermilk
- 1/2 cup vegetable oil
- 4 oz cream cheese (softened to room temperature)
- 1/4 cup powdered sugar
- 1/4 tsp vanilla extract
- 12 oz white candy melts (or white chocolate chips)
- 2 oz red candy melts (for the ‘bloody’ drizzle)
- 1 tsp coconut oil (optional, for thinning the melts)
- Edible red gel or piping gel (for extra blood effect)
- Halloween-themed sprinkles (optional)
- Lollipop sticks (about 24, sturdy for dipping)
Instructions
- Preheat oven to 350°F (175°C). Grease a 9×13-inch baking pan.
- In a mixing bowl, combine cake mix, eggs, buttermilk, and vegetable oil. Mix with an electric mixer on medium until smooth, about 2 minutes.
- Pour batter into the pan and bake for 25–30 minutes, or until a toothpick inserted in the center comes out clean. Cool on a wire rack for 20–30 minutes.
- Once cooled, crumble the cake into fine crumbs in a large bowl.
- In a separate bowl, beat cream cheese, powdered sugar, and vanilla extract until smooth and creamy.
- Add the cream cheese mixture to the cake crumbs. Mix until evenly combined and dough-like.
- Roll dough into 1-inch balls (about 24). Place on a parchment-lined sheet pan and chill in the fridge for 30 minutes or freeze for 15 minutes.
- Melt a small amount of white candy melts and dip the tip of each lollipop stick before inserting into each cake ball.
- Melt remaining white candy melts in a microwave-safe bowl, stirring every 30 seconds. Add coconut oil if needed for thinning.
- Dip each cake pop into the melted coating, swirling to cover evenly. Tap off excess and place upright in a stand or block to set (about 10 minutes).
- Melt red candy melts. Use a spoon or piping bag to drizzle over each pop for a ‘bloody’ effect. Add edible red gel for extra ooze.
- Decorate with Halloween sprinkles or edible glitter as desired. Let pops set completely at room temperature (about 20 minutes) or refrigerate for 10 minutes.
- Serve on a spooky platter and enjoy!
Notes
Chilling the cake balls before coating is key for smooth dipping. Don’t worry about perfect drizzle—the messy look is spookier! For gluten-free or dairy-free options, use appropriate cake mix and cream cheese substitutes. Store pops in an airtight container at room temperature for up to 3 days, or refrigerate for longer storage.
- Prep Time: 30 minutes
- Cook Time: 30 minutes
- Category: Dessert
- Cuisine: American
Nutrition
- Serving Size: 1 cake pop
- Calories: 120
- Sugar: 10
- Sodium: 120
- Fat: 6
- Saturated Fat: 3
- Carbohydrates: 15
- Fiber: 0.5
- Protein: 2
Keywords: Halloween, cake pops, red velvet, bloody, party treats, spooky dessert, kid-friendly, easy dessert, cream cheese, candy melts