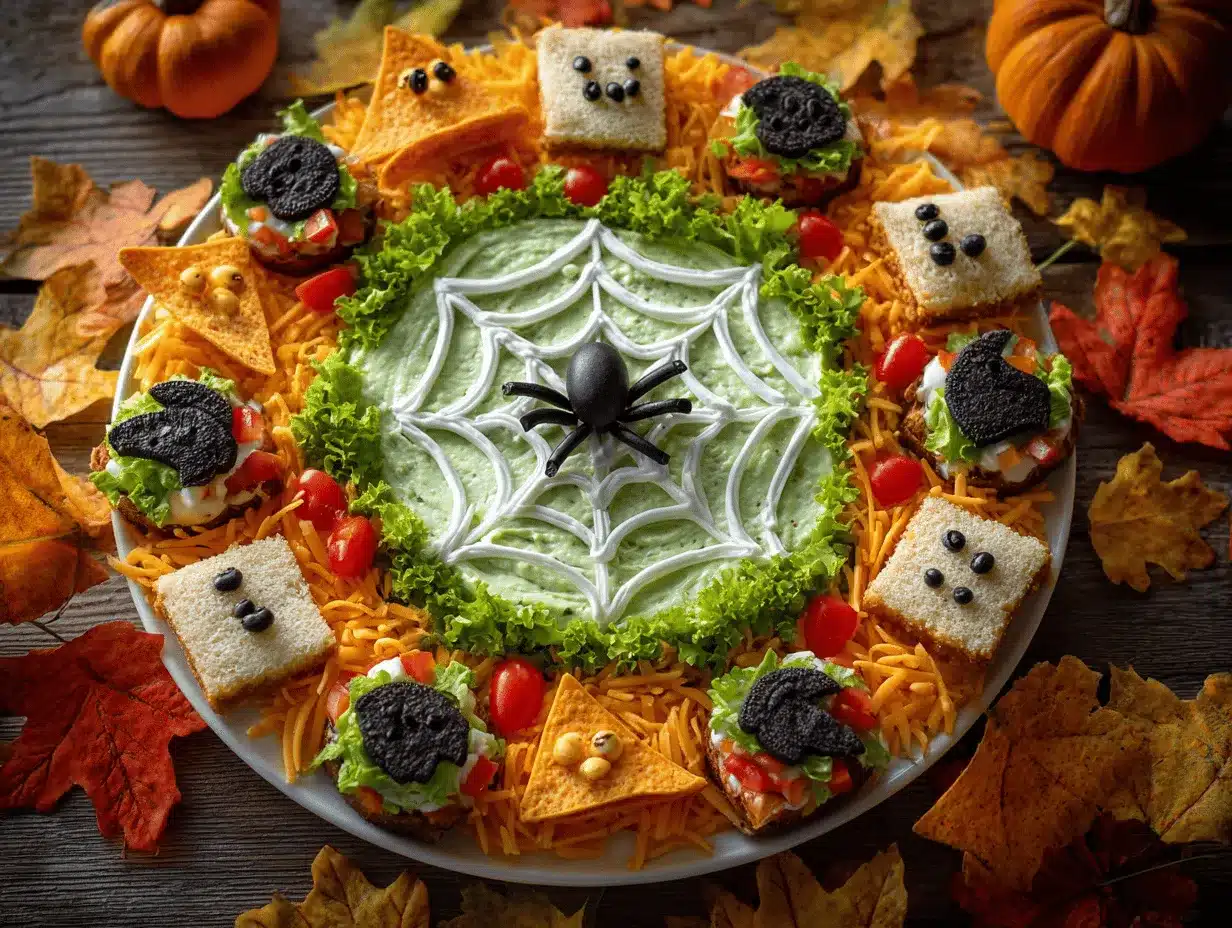
The first time I carved out a bell pepper and stuffed it with dip, I swear it disappeared from the party table faster than my pumpkin-shaped cookies. There’s something ridiculously fun about food that looks back at you – especially when you’re celebrating Halloween! The crunch of a “monster mouth” apple, the gooey cheese stretching from a “mummy” jalapeño, and those olive “eyeballs” peeking out of a hollowed cucumber… it’s the kind of stuff that makes people laugh, snap photos, and sneak a second helping when nobody’s looking. Spooky Halloween party food recipes are a must if you want your gathering to be memorable – and, honestly, they’re way easier than you think.
I started experimenting with hollowed appetizers during a neighborhood costume bash. Everyone brings candy, right? I wanted snacks that were creepy, festive, and, you know, actually tasted good. Over the years, these spooky Halloween party food recipes have become my go-to. They’re perfect for kids who love the gross-out factor, adults who appreciate clever snacks, and anyone who thinks “food art” is a legit reason to celebrate. Whether you’re hosting a haunted house, throwing a last-minute gathering, or just want to surprise your family, these easy hollowed appetizers & snacks will steal the show (and maybe scare a few taste buds along the way).
Let’s face it: you don’t need fancy ingredients or hours in the kitchen. These recipes are all about simple prep, bold flavors, and maximum Halloween vibes. Plus, if you mess up the “faces,” it only makes them look more monstrous! As someone who’s tested these spooky Halloween party food ideas year after year, I promise you’ll love how quick, kid-friendly, and Instagram-worthy they are. Grab your pumpkins (and peppers, and apples…) and let’s get hollowing!
Why You’ll Love These Spooky Halloween Party Food Recipes
- Quick & Easy: Most of these snacks come together in under 30 minutes. You can whip up a whole platter while your cauldron bubbles (or, let’s be real, before your guests arrive).
- Simple Ingredients: No need for a mad scientist’s pantry. We’re talking apples, peppers, cucumbers, cheese – stuff you probably already have.
- Perfect for Halloween Gatherings: From classroom parties to neighborhood trick-or-treat stops, these appetizers fit any spooky scene.
- Crowd-Pleaser: Kids love the creepy faces and gooey fillings. Adults appreciate the fresh flavors and clever presentation.
- Unbelievably Delicious: These aren’t just lookers – they’re packed with flavor. The crunch of fresh veggies, creamy dips, sweet fruit, and savory cheeses hit all the right notes.
What really sets these spooky Halloween party food recipes apart is the “hollowed” technique. Instead of just decorating, you get to create edible containers that double as centerpieces. Stuffed peppers become jack-o’-lanterns. Cucumbers transform into monster boats. Apples morph into sinister mouths. It’s hands-on, a little messy, and so much fun for kids (and adults who never grew up). I still remember my first “Frankenstein” avocado – it looked more like a mutant, but nobody cared once they tasted the zesty filling.
These recipes aren’t just about spooky style, though. They’re healthier than most Halloween treats, easy to customize for allergies, and perfect for picky eaters. Plus, you can make them ahead, so you’re not stuck in the kitchen when you’d rather be showing off your costume. If you want a Halloween spread that’s both Instagram-worthy and totally stress-free, these hollowed appetizers & snacks are your best bet.
Ingredients Needed for Spooky Hollowed Appetizers & Snacks
Here’s what you’ll need to create 15 eye-popping, deliciously spooky Halloween party food recipes. Don’t worry if you don’t have everything – I’ll include swaps and tips along the way.
- Bell Peppers (red, orange, yellow, green): For jack-o’-lantern faces and edible dip bowls. (Look for firm ones – easier to carve!)
- English Cucumbers: Great for “monster boats” and spooky eyeball slices.
- Apples (Granny Smith, Fuji, Gala): Perfect for “monster mouths” and fruity faces. (Granny Smith holds up best.)
- Pumpkins (small, pie pumpkins): For classic Halloween style. (Or swap with squash!)
- Avocados: For “Frankenstein” faces and creamy fillings. (Make sure they’re just ripe – not mushy.)
- Jalapeños: For “mummy” poppers. (Wear gloves – trust me.)
- Cheese (cream cheese, shredded cheddar, mozzarella sticks): For fillings, “bandages,” and gooey textures. (Philadelphia and Tillamook are my faves.)
- Sliced Olives (black and green): For eyes, noses, and creepy decorations.
- Baby Carrots: For “monster teeth” and noses.
- Celery Sticks: For “bone” shapes and edible handles.
- Cherry Tomatoes: For eyeballs, warts, and monster noses.
- Pretzel Sticks: For arms, legs, and edible skeletons.
- Nut Butter (peanut, almond, sunflower): For apple monster mouths. (Use sunflower butter for allergies.)
- Chocolate Chips: For eyes, pupils, and monster faces.
- Mini Marshmallows: For teeth and spooky smiles.
- Fresh Herbs (parsley, cilantro): For “hair” and decoration.
- Ranch Dip, Hummus, Guacamole: For stuffing veggies and peppers.
- Food-Safe Markers (optional): For drawing faces on fruit (especially bananas and marshmallows).
Most of these ingredients are flexible. Don’t have jalapeños? Use mini bell peppers. Need gluten-free? Swap pretzel sticks for gluten-free crackers. Want dairy-free? Use vegan cheese or plant-based dips. I always grab extra olives and cherry tomatoes – you’ll be amazed how many little “eyes” you end up making. For brands, I like Organic Valley cheese, Sabra hummus, and Dave’s Killer pretzel sticks for reliable results. And if you’re shopping last-minute, apples and peppers are usually front and center at the grocery store this time of year.
Equipment Needed
- Sharp Paring Knife: For carving faces into peppers, apples, and pumpkins. (I’ve tried those pumpkin carving kits, but a paring knife works best.)
- Melon Baller or Spoon: For hollowing out veggies and fruits. (Metal spoons are sturdier for big jobs.)
- Cutting Board: For safe slicing and dicing. (I use a plastic board – easier to clean up colorful messes!)
- Toothpicks: For securing eyes, arms, and monster features.
- Piping Bag or Zip-Top Bag (optional): For neat dip stuffing.
- Bowl for Mixing Fillings: Any medium-sized bowl will do.
- Serving Platter: For arranging your spooky snacks.
You don’t need fancy gadgets. If you don’t have a melon baller, a teaspoon works fine for scraping out seeds. For piping, just snip the corner off a zip-top bag – it’s way less cleanup. I’ve used bamboo skewers as toothpick substitutes, and they work in a pinch. Make sure your knives are sharp (and keep an eye on little helpers). If you’re using specialty equipment like food-safe markers, store them separately so they don’t dry out. My cutting board has survived years of Halloween prep – just scrub it with hot water and baking soda afterward to banish any veggie stains.
Preparation Method
- Wash and Prep Your Produce: Rinse all veggies and fruits well. Pat dry so faces are easier to carve. Set up your workspace with a cutting board and your sharp paring knife.
- Carve Out Peppers and Pumpkins: Slice off the top (like a lid) of your bell peppers and pumpkins. Use a melon baller or spoon to scoop out seeds and membranes. For jack-o’-lantern faces, carefully cut triangle eyes and jagged mouths. (If the pepper cracks, patch it with a toothpick – looks even spookier!)
- Hollow Cucumbers and Apples: Slice cucumbers in half lengthwise. Scoop out the center to make “boats.” For apples, slice into quarters, then carve out a wedge for a mouth. Use a paring knife to shape jagged teeth or a monster smile. (Brush cut apples with lemon juice to prevent browning.)
- Hollow and Decorate Avocados: Cut avocados in half, remove the pit, and scoop out a little extra flesh for more filling room. Use olives, herbs, and cheese to create “Frankenstein” faces. (Don’t worry if your avocado looks weird – monsters are supposed to be lumpy!)
- Stuff with Fillings: Spoon ranch dip, hummus, or guacamole into peppers, cucumbers, and avocados. For apple mouths, spread nut butter and press in mini marshmallow “teeth.” Sprinkle shredded cheese into jalapeño halves.
- Assemble Faces and Features: Use sliced olives for eyes, baby carrots for noses, pretzel sticks for arms, and cherry tomatoes for warts or eyeballs. Toothpicks help secure pieces. For extra drama, draw faces with food-safe markers on marshmallows or bananas.
- Bake or Chill as Needed: For jalapeño mummies, wrap with cheese strips and bake at 375°F (190°C) for 15-18 minutes until golden. Most other snacks can be served fresh or chilled for 30 minutes.
- Arrange on Platter: Place your hollowed treats on a large serving tray. Group by color, shape, or monster type. Scatter extra olives, herbs, and pretzels for festive flair.
- Final Touches: Check for loose eyes or arms and secure with toothpicks. Add extra dip bowls if you have leftovers. Snap a photo before the monsters disappear!
Prep time varies, but most snacks take 10-15 minutes each. If your veggies are too soft, refrigerate for 10 minutes before carving. If the fillings seem runny, chill them briefly or add extra cheese. Don’t stress if your faces look crooked – my best monsters always have a weird grin or mismatched eyes. The only real “warning” here: don’t let kids use sharp knives unsupervised (trust me, learned that one the hard way).
Cooking Tips & Techniques
I’ve picked up a few tricks over years of Halloween snacking, so here’s what works best for these spooky hollowed recipes:
- Work in Batches: Set up an “assembly line” with all your fillings, toppings, and tools. It’s faster, and kids love helping choose monster parts.
- Don’t Overfill: Hollowed veggies and fruits can split if too full. Spoon in dip or filling, but leave a little room at the top.
- Chill Before Carving: Softer produce like cucumbers or peppers are easier to shape when cold. Pop them in the fridge for 10 minutes.
- Brush Apples with Lemon Juice: Prevent browning and keep monster mouths looking fresh.
- Use Toothpicks Carefully: Secure eyes, arms, or features, but warn guests (especially kids) before biting in.
- Layer Flavors: For stuffed peppers or cucumbers, add a base of cheese, then top with dip or veggies for more texture.
- Don’t Stress Perfection: Lopsided faces are more fun (and way easier). My first batch of “mummy” jalapeños looked more like bandaged aliens, but everyone loved them.
- Multitask: While you’re baking jalapeños, carve apples and peppers. You’ll have everything ready at once.
- Clean As You Go: Halloween snacks are messy! Keep a bowl nearby for scraps and a damp towel for sticky fingers.
I’ve had my share of hollowed snack fails – peppers that split, dips that leaked, eyes that fell off mid-party. Honestly, the key is to embrace the chaos. If a snack falls apart, scoop it up and call it “monster mash.” If olives roll away, just say the ghosts are playing tricks. That’s the spirit of Halloween!
Variations & Adaptations
- Gluten-Free: Swap pretzel sticks for gluten-free crackers or veggie sticks. Use gluten-free dips for stuffing.
- Vegan/Dairy-Free: Use vegan cheese, plant-based dips, and nut-free butters. Hummus and guacamole are great for stuffing peppers and cucumbers.
- Low-Carb/Keto: Focus on non-starchy veggies like peppers, cucumbers, and avocados. Skip the marshmallows and use cheese eyes instead.
- Seasonal Flavors: For autumn vibes, add pumpkin puree to cream cheese fillings or sprinkle cinnamon on apple monster mouths.
- Spicy Option: Add hot sauce or chopped jalapeños to your dip for a fiery kick.
- Different Cooking Methods: Some hollowed snacks (like jalapeño mummies) can be air-fried for crispiness. Roasted peppers bring out sweetness.
- Personal Twist: One year, I made “witch hat” cucumbers by topping them with tortilla triangles and black olive “buckles.” Huge hit!
Don’t be afraid to experiment with fillings and faces. If someone has allergies, swap ingredients freely. The fun is in the customization – your monsters can be cute, creepy, or downright silly. Trust your instincts and let your creativity run wild!
Serving & Storage Suggestions
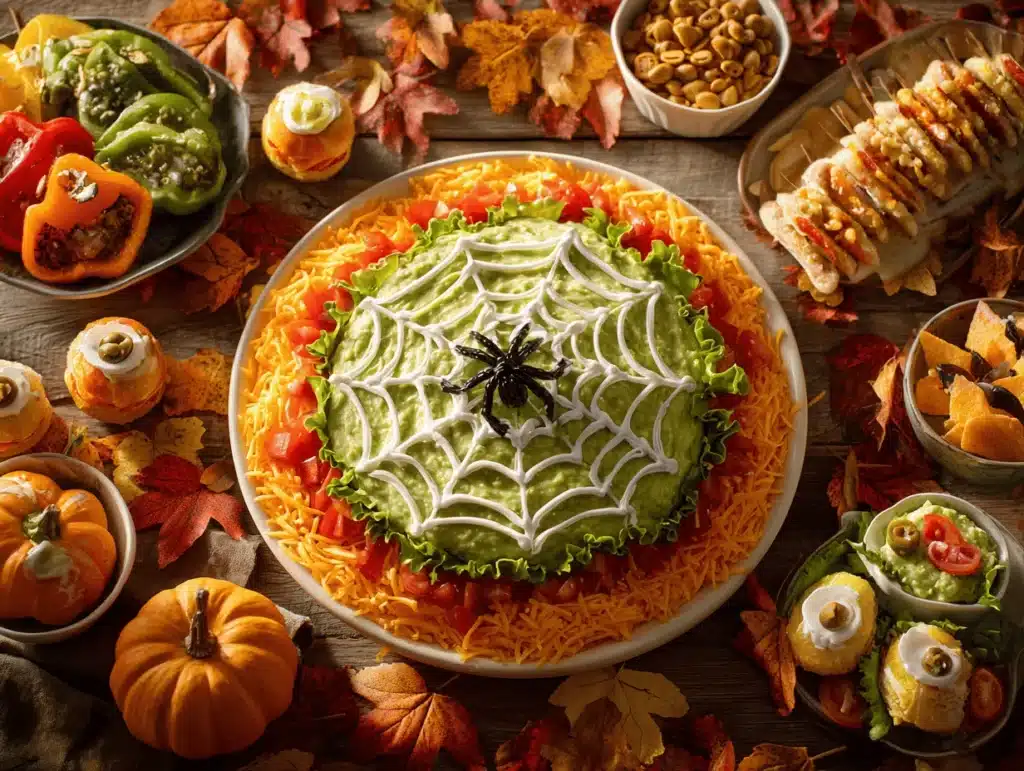
Serve these spooky Halloween party food recipes chilled or at room temperature. I like arranging them on a black platter with a few plastic spiders for extra drama. Pair with punch, cider, or a simple veggie tray for balance.
- Best Served: Fresh, right after assembly for maximum crunch and color.
- Complementary Dishes: Serve alongside chips, crackers, or sliced baguette. Pair with sweet treats like pumpkin cookies or caramel apples for a full spread.
- Storage: Store leftovers in airtight containers in the fridge for up to 2 days. Apples and veggies hold up best; dips may separate but can be stirred.
- Freezer Tips: Most hollowed snacks don’t freeze well (except stuffed peppers and mummies). Freeze baked jalapeño mummies in a single layer for up to 2 weeks.
- Reheating: Warm baked snacks in a 350°F (175°C) oven for 5-8 minutes. Fresh snacks can be served cold – flavors deepen as they chill.
As the flavors blend, stuffed peppers and cucumbers get even tastier. If making ahead, prep faces and fillings separately, then assemble just before serving. Leftover monster parts make great lunchbox surprises!
Nutritional Information & Benefits
Each spooky Halloween party food recipe varies, but here’s a quick rundown:
- Calories: Ranges from 30 (apple monster mouth) to 120 (stuffed pepper) per serving.
- Key Nutrients: Vitamin C from peppers, fiber from apples and cucumbers, healthy fats from avocados, protein from cheese and nut butters.
- Health Benefits: These snacks are lighter than traditional Halloween treats, packed with real veggies and fruit, and easy to make gluten-free, dairy-free, or nut-free.
- Allergens: Watch for dairy (cheese), nuts (butter), and gluten (pretzels). Swap as needed for allergies.
- Wellness Perspective: As a parent, I love that these snacks get kids excited about eating veggies. They’re festive, filling, and seriously better for you than candy corn!
Conclusion
If you’re searching for spooky Halloween party food recipes that actually taste great and bring your table to life, hollowed appetizers and snacks are the answer. They’re creative, quick, and guaranteed to get a reaction – whether it’s laughter, surprise, or just happy munching. You can customize every monster face, swap fillings for allergies, and make each snack your own. Honestly, these recipes are now a Halloween tradition in my house – my kids start asking for “monster mouths” as soon as October hits.
Ready to give it a shot? Try your hand at these easy hollowed snacks, and let your imagination run wild. I’d love to hear about your weirdest, cutest, or creepiest creations – leave a comment with your best monster face or share your party spread. Halloween is all about fun, so don’t worry about perfection. Just carve, stuff, and enjoy every bite. Happy haunting!
FAQs
How far in advance can I make these hollowed appetizers?
You can prep most veggies and fillings a day ahead, but it’s best to assemble faces and stuff snacks on party day for freshness.
What’s the easiest hollowed snack for kids to make?
Apple monster mouths are super simple and safe for little hands. Just slice, spread, and add marshmallow teeth!
Can I use other vegetables for hollowed snacks?
Absolutely! Try zucchini, squash, or even tomatoes. Just adjust the filling to match the flavor and texture.
How do I keep my carved fruits and veggies from browning?
Brush cut surfaces with lemon juice or a little vinegar. Store in airtight containers in the fridge until serving.
What dips work best for stuffing peppers and cucumbers?
Ranch, hummus, guacamole, and cream cheese blends all work well. Thick dips hold up better and won’t leak out.
Pin This Recipe!
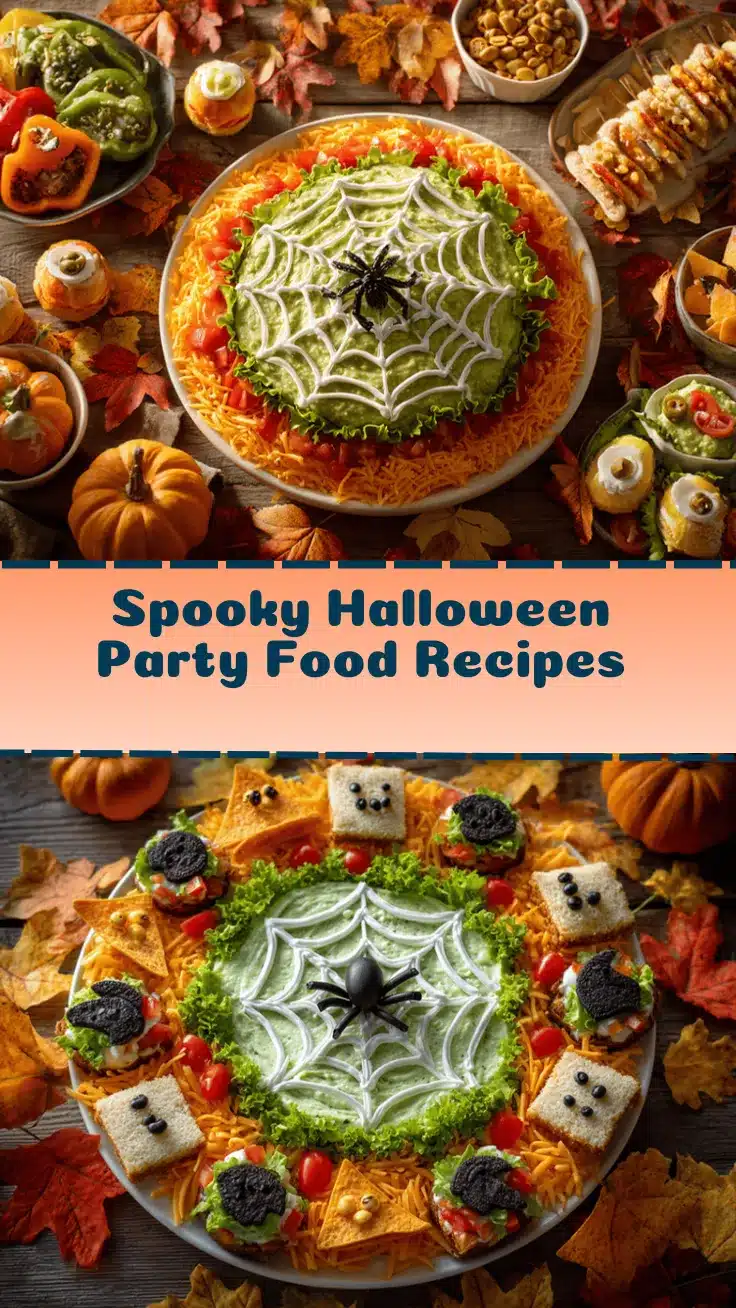

Spooky Halloween Party Food Recipes: 15 Easy Hollowed Appetizers & Snacks
- Total Time: 45 minutes
- Yield: 15 appetizers/snacks (serves 8-12 as party snacks)
Description
These creative, hollowed Halloween appetizers and snacks are quick to make, kid-friendly, and perfect for parties. Carve, stuff, and decorate veggies and fruits for festive treats that are healthier than candy and guaranteed to delight guests.
Ingredients
- Bell Peppers (red, orange, yellow, green)
- English Cucumbers
- Apples (Granny Smith, Fuji, Gala)
- Pumpkins (small, pie pumpkins)
- Avocados
- Jalapeños
- Cheese (cream cheese, shredded cheddar, mozzarella sticks)
- Sliced Olives (black and green)
- Baby Carrots
- Celery Sticks
- Cherry Tomatoes
- Pretzel Sticks
- Nut Butter (peanut, almond, sunflower)
- Chocolate Chips
- Mini Marshmallows
- Fresh Herbs (parsley, cilantro)
- Ranch Dip
- Hummus
- Guacamole
- Food-Safe Markers (optional)
Instructions
- Wash and prep all produce. Rinse veggies and fruits, pat dry, and set up your workspace with a cutting board and sharp paring knife.
- Carve out peppers and pumpkins: Slice off the top, scoop out seeds and membranes, and carve jack-o’-lantern faces.
- Hollow cucumbers and apples: Slice cucumbers in half lengthwise and scoop out the center. For apples, quarter and carve out a wedge for a mouth, shaping teeth or a monster smile. Brush apples with lemon juice to prevent browning.
- Hollow and decorate avocados: Halve, remove pit, scoop extra flesh, and decorate with olives, herbs, and cheese for monster faces.
- Stuff with fillings: Spoon ranch dip, hummus, or guacamole into hollowed veggies. For apple mouths, spread nut butter and press in mini marshmallow teeth. Sprinkle cheese into jalapeño halves.
- Assemble faces and features: Use olives for eyes, carrots for noses, pretzel sticks for arms, cherry tomatoes for warts or eyeballs. Secure with toothpicks. Draw faces with food-safe markers if desired.
- Bake or chill as needed: For jalapeño mummies, wrap with cheese strips and bake at 375°F (190°C) for 15-18 minutes until golden. Other snacks can be served fresh or chilled for 30 minutes.
- Arrange on platter: Place snacks on a serving tray, group by color or monster type, and scatter extra olives, herbs, and pretzels for decoration.
- Final touches: Secure any loose features with toothpicks, add extra dip bowls, and snap a photo before serving.
Notes
Chill produce before carving for easier shaping. Brush apples with lemon juice to prevent browning. Don’t overfill hollowed veggies to avoid splitting. Secure features with toothpicks and warn guests before eating. Adapt fillings and decorations for allergies or dietary needs. Lopsided faces add to the fun!
- Prep Time: 30 minutes
- Cook Time: 15-18 minutes (for baked jalapeño mummies); most snacks served fresh
- Category: Appetizer
- Cuisine: American
Nutrition
- Serving Size: 1 hollowed snack or appetizer
- Calories: 30120
- Sugar: 28
- Sodium: 50250
- Fat: 28
- Saturated Fat: 0.53
- Carbohydrates: 412
- Fiber: 13
- Protein: 14
Keywords: Halloween snacks, hollowed appetizers, party food, kid-friendly, spooky recipes, healthy Halloween, stuffed peppers, monster mouths, jalapeño mummies, veggie snacks