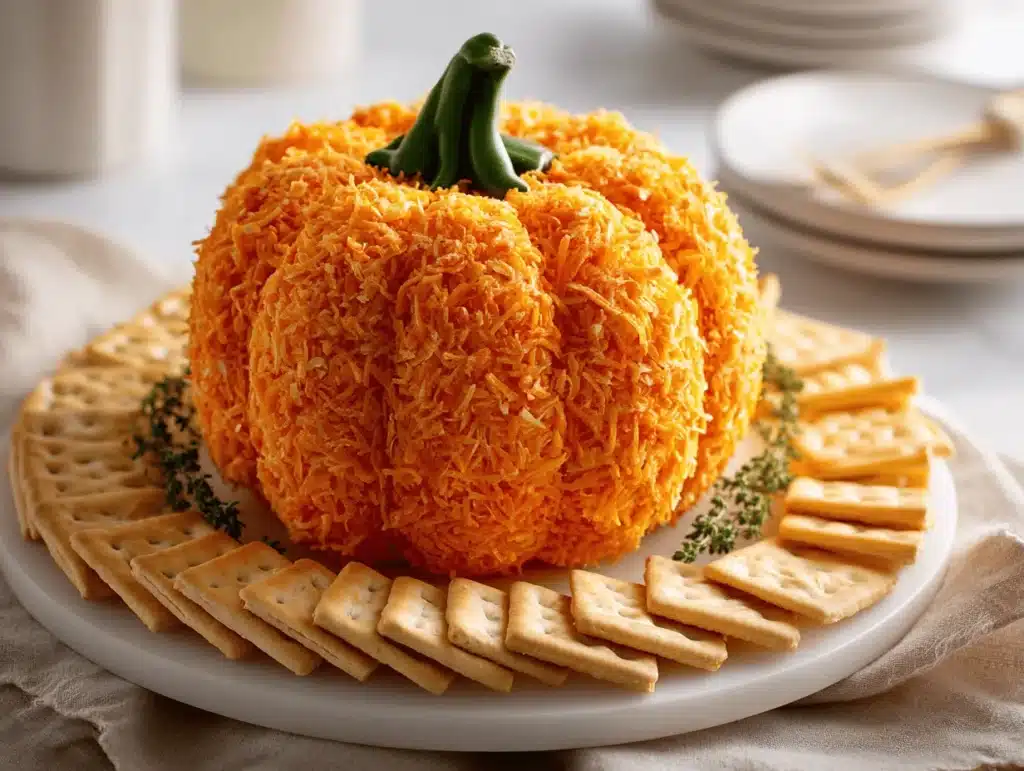
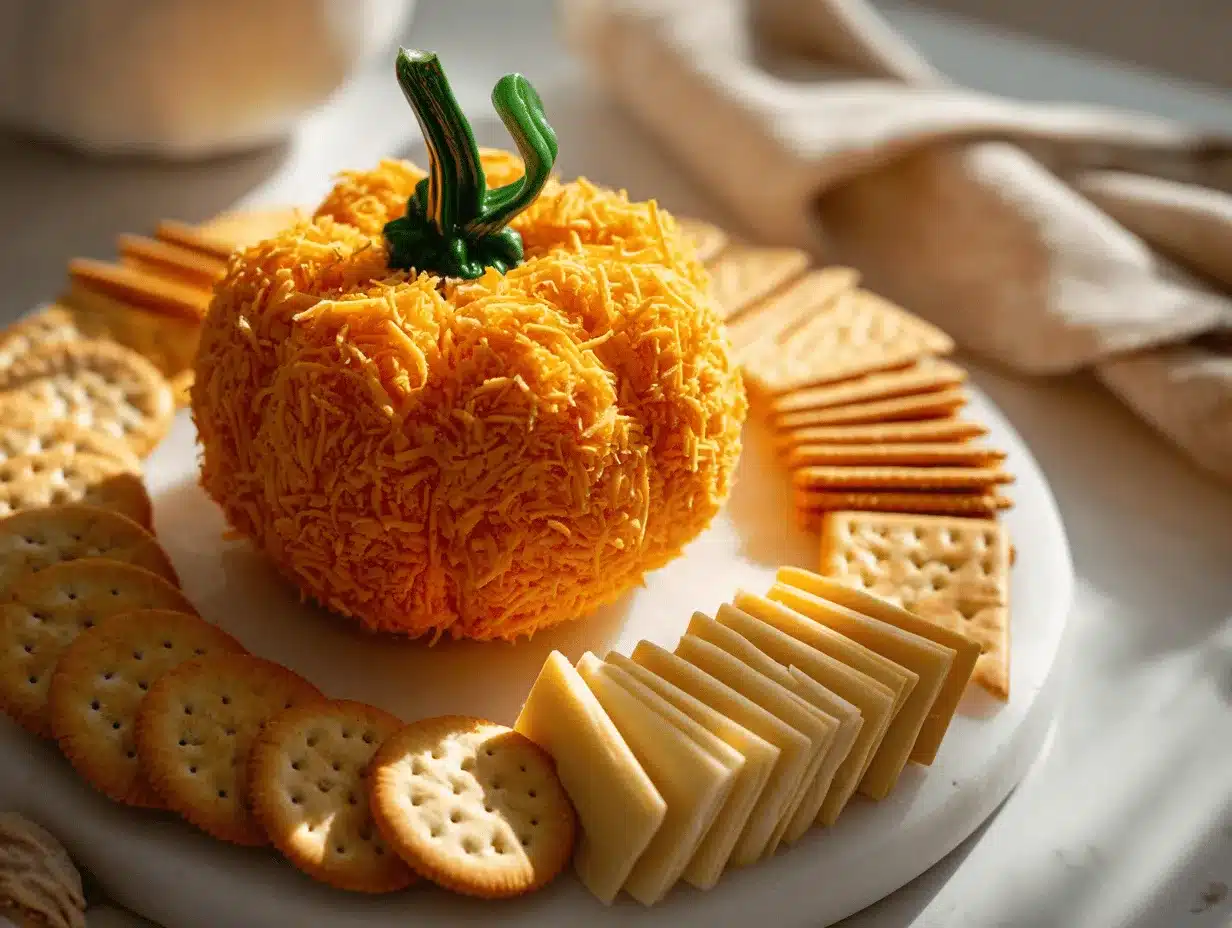
Bright orange, creamy, and shaped like a pumpkin—this cheese ball recipe isn’t just a snack; it’s the star of any Halloween party spread. The first time I brought a pumpkin shaped cheese ball to a friend’s costume bash, people couldn’t stop talking about it. You know that feeling when you walk in with something that looks almost too cute to eat? That’s exactly what happened. The vibrant color, the clever stem on top, and that irresistible blend of savory cheese and crunchy coating had everyone reaching for more.
I first discovered cheese balls in my grandma’s kitchen, but she never made them look like a pumpkin! That twist came later, during my years of hosting Halloween parties (admittedly, I go a little overboard with themed snacks). I wanted something festive yet easy to whip up, and this pumpkin shaped cheese ball recipe totally fits the bill. It’s not just for kids, either—adults love it, especially paired with a glass of wine or cider.
Honestly, what makes this cheese ball recipe so special is how simple it is. You don’t need fancy gadgets or a fridge full of rare ingredients. It comes together fast, and it’s easy to shape, even if you’re not a sculptor. Plus, it’s loaded with flavor—think tangy cream cheese, sharp cheddar, a hint of garlic, and that classic nutty crunch. If you want a Halloween snack that gets people talking (and snacking), this pumpkin shaped cheese ball is your answer.
As someone who’s tested dozens of cheese ball recipes over the years, I can say this one delivers every time. It’s fun, festive, and a total crowd-pleaser. Whether you’re a busy parent, a party planner, or just love Halloween, this is the recipe you’ll want on your table.
Why You’ll Love This Recipe
- Quick & Easy: Comes together in under 20 minutes (plus chilling time), so you can focus on party prep or just relax.
- Simple Ingredients: No need for anything fancy—most of these are probably in your fridge and pantry already.
- Perfect for Halloween Parties: The pumpkin shape is festive and just plain adorable. It’s the snack everyone gravitates to.
- Crowd-Pleaser: Kids love the look, adults love the taste—seriously, there’s never a crumb left.
- Unbelievably Delicious: Tangy, creamy, a little bit smoky, and perfectly crunchy thanks to the coating. It’s the kind of comfort food you want at a fall gathering.
What truly sets this pumpkin shaped cheese ball recipe apart is the technique. Instead of just plopping cheese onto a platter, you roll, chill, and shape it into an actual pumpkin—complete with ridges and a stem. No tricky carving or specialty molds required! I always use a food-safe glove to gently press the sides and create deep grooves, and a real bell pepper stem for that authentic look.
It’s not just a cheese ball—it’s an edible centerpiece. Whether you’re serving it with crackers, pretzels, or sliced veggies, it’ll be the first thing guests reach for. And if you’re like me, you’ll love how easy it is to customize the flavor and toppings. This is one of those recipes you’ll come back to, because it’s just plain fun, and always gets rave reviews.
Honestly, there’s something magical about watching people’s faces light up when they realize the pumpkin is actually cheese. It’s festive, friendly, and totally delicious—a must for your next Halloween bash!
Ingredients Needed
This pumpkin shaped cheese ball recipe uses straightforward, flavor-packed ingredients. They come together for a creamy, zesty, and festive snack that’s perfect for dipping. Here’s what you’ll need:
- Cream Cheese (16 oz / 450 g, softened) – This gives the cheese ball its classic smooth texture. I always use full-fat for richness, but you can swap for lower-fat if you like.
- Sharp Cheddar Cheese (2 cups / 225 g, shredded) – Bold flavor and that gorgeous orange color. I recommend freshly shredding your own for best melt and taste.
- Smoked Paprika (1 tsp) – Adds a subtle smokiness and deep orange hue. If you’ve never tried smoked paprika, give it a go—it’s my secret weapon for cheese balls.
- Garlic Powder (1/2 tsp) – For a gentle kick that balances the creaminess.
- Onion Powder (1/2 tsp) – Just enough to round out the flavors.
- Worcestershire Sauce (1 tsp) – A little goes a long way for umami depth.
- Salt & Black Pepper (to taste) – Start with 1/4 tsp each and adjust after mixing.
- Green Onion (2 tbsp, finely chopped) – For color and a fresh bite. Chives work too!
- Red Bell Pepper (1/3 cup, finely chopped) – Sneaks in a touch of sweetness and crunch. Use orange or yellow bell pepper if you prefer.
- Crushed Nacho Cheese Tortilla Chips (1 cup / 50 g) – This is for the coating, and it makes the pumpkin color pop. I like the classic Doritos, but use your favorite brand.
- Bell Pepper Stem (1, reserved from a whole pepper) – For the “pumpkin” stem. You can use celery or a pretzel stick if you don’t have a bell pepper.
- Crackers, Pretzels, or Veggies (for serving) – Pick your favorites! Wheat crackers, pretzel sticks, carrot coins, cucumber slices—they’re all great dippers.
Ingredient Tips: If you’re making this pumpkin shaped cheese ball for a gluten-free crowd, use gluten-free crackers and swap regular tortilla chips for gluten-free options. Vegan cream cheese and shredded cheese work surprisingly well for a dairy-free version. You can even toss in a little hot sauce or diced jalapeño if you want some heat. The recipe is super flexible—use what you love!
I always look for block cheddar and shred it myself—pre-shredded cheese has anti-caking agents that can make the cheese ball a little dry. And for cream cheese, I’ve had the best results with Philadelphia brand, but store brands work fine too. If you’re out of smoked paprika, regular paprika will do, but you’ll miss that hint of smokiness.
Seasonal note: In fall, I sometimes add a pinch of nutmeg for extra warmth. And if you’re feeling fancy, sprinkle chopped pecans or toasted pumpkin seeds on the outside for crunch. This pumpkin shaped cheese ball recipe is all about making it your own!
Equipment Needed
- Large Mixing Bowl – For combining all the cheesy goodness. Glass or stainless steel works best.
- Hand Mixer or Sturdy Spoon – A hand mixer makes it easy to blend everything until smooth. If you don’t have one, a strong spoon and some elbow grease do the trick.
- Plastic Wrap – Essential for shaping and chilling the cheese ball. You’ll use it to mold the pumpkin shape and keep things neat.
- Baking Sheet or Plate – To hold the cheese ball while it chills and to catch any stray crumbs while coating.
- Food-Safe Gloves (optional) – Great for shaping without getting sticky. I use disposable gloves for easy cleanup.
- Sharp Knife – Handy for chopping veggies and making the pumpkin “grooves.”
- Spatula – For scraping down the bowl and smoothing the cheese mixture.
If you don’t have a hand mixer, don’t worry. I’ve mixed plenty of cheese balls with a good old wooden spoon (and a little patience). You can also use parchment paper instead of plastic wrap if that’s what’s in your drawer. For budget-friendly options, dollar store mixing bowls and spatulas work just fine. Just make sure your cheese is at room temperature to make mixing easier!
If you want to be extra precise with the pumpkin shape, a small offset spatula or butter knife helps create those classic ridges. After the party, just toss everything in the dishwasher (except the plastic wrap, of course).
Preparation Method
- Mix the Cheeses: In a large mixing bowl, add the softened cream cheese (16 oz / 450 g) and shredded sharp cheddar (2 cups / 225 g). Use a hand mixer or sturdy spoon to blend until fully combined and smooth—about 2-3 minutes. The mixture should be thick and creamy, with no lumps. If it looks dry, add a tablespoon of milk or cream.
- Add Flavorings: Sprinkle in smoked paprika (1 tsp), garlic powder (1/2 tsp), onion powder (1/2 tsp), Worcestershire sauce (1 tsp), salt, and black pepper. Mix well. Stir in the chopped green onion and red bell pepper. Taste and adjust seasonings if needed.
- Shape the Cheese Ball: Place a large piece of plastic wrap on your counter. Transfer the cheese mixture onto the center and gather the edges of the plastic wrap to form a ball. Twist tightly and gently press to compact. Chill in the refrigerator for at least 2 hours, or up to overnight. The cheese ball should be firm to the touch.
- Prepare the Coating: Crush nacho cheese tortilla chips (1 cup / 50 g) in a zip-top bag with a rolling pin, or pulse in a food processor until fine. Pour the crumbs onto a plate.
- Shape into a Pumpkin: Unwrap the chilled cheese ball and place it onto the plate with crushed chips. Roll and gently press until fully coated. Using your hands (or a knife), shape into a squat pumpkin form. Use your fingers or a butter knife to create vertical grooves around the sides—don’t stress about perfection! Real pumpkins aren’t perfect either.
- Add the Stem: Insert the reserved bell pepper stem into the top center of the cheese ball for that classic pumpkin look. If you don’t have a stem, use a celery stick or pretzel rod.
- Final Chill (Optional): For best results, chill the finished pumpkin shaped cheese ball for another 30 minutes before serving. This helps set the shape and keeps the coating crisp.
- Serve: Transfer to a serving platter and surround with crackers, pretzels, or veggies. Add a few extra bell pepper strips or parsley leaves for a festive touch.
Troubleshooting: If the cheese ball feels too soft to shape, pop it back in the fridge for another hour. If it cracks while making grooves, smooth it with clean fingers or a spatula. For extra crunch, double-coat with more crushed chips before serving.
Personal Tip: I always make the cheese ball a day ahead—the flavors get even better! And don’t worry about messy grooves; they add character. The first time I tried this, my pumpkin looked a bit lopsided, but everyone loved it anyway.
Cooking Tips & Techniques
Let’s face it—making a pumpkin shaped cheese ball isn’t rocket science, but a few pro tips make it even better. Here’s what I’ve learned from years of cheese ball adventures (and a few party fails along the way):
- Room Temperature Cheese: Always soften your cream cheese before mixing. Cold cheese can be stubborn and lumpy.
- Freshly Shredded Cheddar: The pre-shredded stuff doesn’t melt or blend as smoothly. Grab a block and shred it yourself for the best texture.
- Don’t Rush the Chill: Chilling is key! If you try shaping too soon, the cheese ball will be sticky and hard to handle. I like to make it the night before a party.
- Coating Consistency: Crush your tortilla chips finely for a smooth pumpkin look, but leave a few chunky bits for crunch.
- Groove Creation: Use your fingers or a butter knife to press gentle lines from top to bottom. Don’t worry about symmetry—real pumpkins aren’t perfect!
- Stem Choices: Bell pepper stems look the most authentic, but celery stalks or thick pretzel rods work in a pinch.
- Multitasking: While the cheese ball chills, prep your crackers and veggies, and tidy up. Party snacks should be fun, not stressful!
I’ve made the mistake of skipping the chill time—once, my cheese ball ended up as a cheesy pancake. Lesson learned! Another time, I added too many wet veggies, and things got runny. So stick to the measurements, and drain any juicy ingredients before mixing.
If you want perfectly even grooves, use the edge of a spoon, but honestly, rough ridges look more realistic. And if your coating starts to fall off, just press a bit more gently. This pumpkin shaped cheese ball recipe is forgiving—you can’t really mess it up.
Variations & Adaptations
One of the best things about this pumpkin shaped cheese ball recipe is how easy it is to tweak for different tastes and dietary needs. Here are some fun ways to make it your own:
- Spicy Kick: Add 1-2 tablespoons of finely chopped jalapeños or a dash of hot sauce to the cheese mixture for a little heat. Swap smoked paprika for chipotle powder if you like it smoky-spicy.
- Herb Lovers: Mix in 2 tablespoons of chopped fresh parsley, dill, or chives. This gives a fresh, garden flavor that pairs perfectly with crunchy crackers.
- Seasonal Flavors: For a fall twist, add a pinch of nutmeg and cinnamon to the cheese mix—just a tiny bit for warmth. Top with toasted pumpkin seeds for crunch.
- Gluten-Free: Use gluten-free tortilla chips or crushed nuts for the coating. Serve with gluten-free crackers or veggie sticks.
- Dairy-Free/Vegan: Substitute vegan cream cheese and shredded dairy-free cheddar. It works surprisingly well, and nobody will notice the difference!
- Allergen-Friendly: If you’re avoiding nuts, stick with chips or seeds for the coating. For a nutty crunch, roll the cheese ball in finely chopped pecans or walnuts (only if allergies aren’t a concern).
Last Halloween, I tried a version with smoked gouda, and it was a hit! The smoky flavor was incredible, and the color was even richer. My kids love the spicy jalapeño version, while my mom prefers it loaded with herbs. Don’t be afraid to play around—this pumpkin shaped cheese ball recipe is meant to be fun and flexible.
Serving & Storage Suggestions
Serve your pumpkin shaped cheese ball chilled for the best texture and flavor. Place it at the center of a platter, surrounded by crackers, pretzel sticks, and crisp veggies—think carrot coins, celery sticks, and bell pepper strips. Add a few sprigs of parsley or fresh herbs for a pop of green.
For parties, I like to offer a variety of dips and dippers (ranch, spicy mustard, sliced baguette) alongside the cheese ball. The fun pumpkin shape makes it the centerpiece of any snack table—guests will snap photos for sure!
Storage: Wrap leftovers tightly in plastic wrap and refrigerate for up to 4 days. The flavors actually get better after a day or two! For longer storage, place the wrapped cheese ball in a freezer-safe bag and freeze for up to 1 month. Thaw overnight in the fridge before serving.
Reheating: You don’t want to microwave this cheese ball—it’s meant to be served chilled. If the coating gets a bit soft, just roll it in a fresh batch of crushed chips or nuts before serving again.
Honestly, I’ve found that the flavor deepens as it sits. The garlic and onion notes mellow, and the cheesy richness shines. If you’re prepping ahead for a busy party, this pumpkin shaped cheese ball recipe is your best friend. Just remember to add the stem right before serving for the freshest look!
Nutritional Information & Benefits
This pumpkin shaped cheese ball recipe is packed with protein and calcium, thanks to the cream cheese and cheddar. Each serving (about 2 tablespoons) delivers roughly:
- Calories: 110
- Protein: 3g
- Fat: 9g
- Carbs: 4g
- Fiber: 0.5g
The bell pepper and green onion add a bit of vitamin C and crunch, while the tortilla chip coating provides satisfying texture. If you go with nuts or seeds, you’ll add healthy fats and extra fiber.
This recipe can be made gluten-free and vegetarian with simple swaps. Allergens to watch for: dairy (in cheese), gluten (in some chips), nuts (if using nut coatings). For a lighter version, use reduced-fat cream cheese and skip the chips.
From a wellness perspective, I love that this snack is filling—just a small scoop goes a long way. Paired with lots of veggie dippers, it’s a tasty way to sneak in more nutrients at a party.
Conclusion
If you want a showstopping snack that’s as fun to make as it is to eat, this pumpkin shaped cheese ball recipe is it. Seriously, nothing gets people talking like a bright orange cheese pumpkin on the table! It’s festive, flavorful, and totally customizable.
<pwhether (let’s="" a="" and="" ball="" be="" because="" both="" brings="" cheese="" coatings—make="" conversation,="" delivers="" disappears="" don’t="" fast.
So, grab your cheese, roll up your sleeves, and give this pumpkin shaped cheese ball a try. Drop a comment below if you have questions or your own twist—let’s share those party successes and kitchen mishaps! Happy snacking and happy Halloween!
FAQs
Can I make the pumpkin shaped cheese ball ahead of time?
Absolutely! You can make it up to 2 days in advance. Just wrap tightly in plastic and store in the fridge. Add the coating and stem right before serving for the freshest look.
What can I use if I don’t have smoked paprika?
Regular paprika works fine. If you want a smoky flavor, add a tiny pinch of liquid smoke or chipotle powder instead.
How do I keep the cheese ball from sticking to my hands?
Wear food-safe gloves or use plastic wrap when shaping. Chilling the cheese ball first also makes it easier to handle.
Can I freeze leftovers?
Yes! Wrap the cheese ball tightly in plastic and freeze for up to 1 month. Thaw overnight in the fridge before serving.
What’s the best way to make grooves for the pumpkin look?
Use your fingers, a butter knife, or the edge of a spoon. Don’t worry about perfection—irregular grooves make it look more like a real pumpkin!
Pin This Recipe!
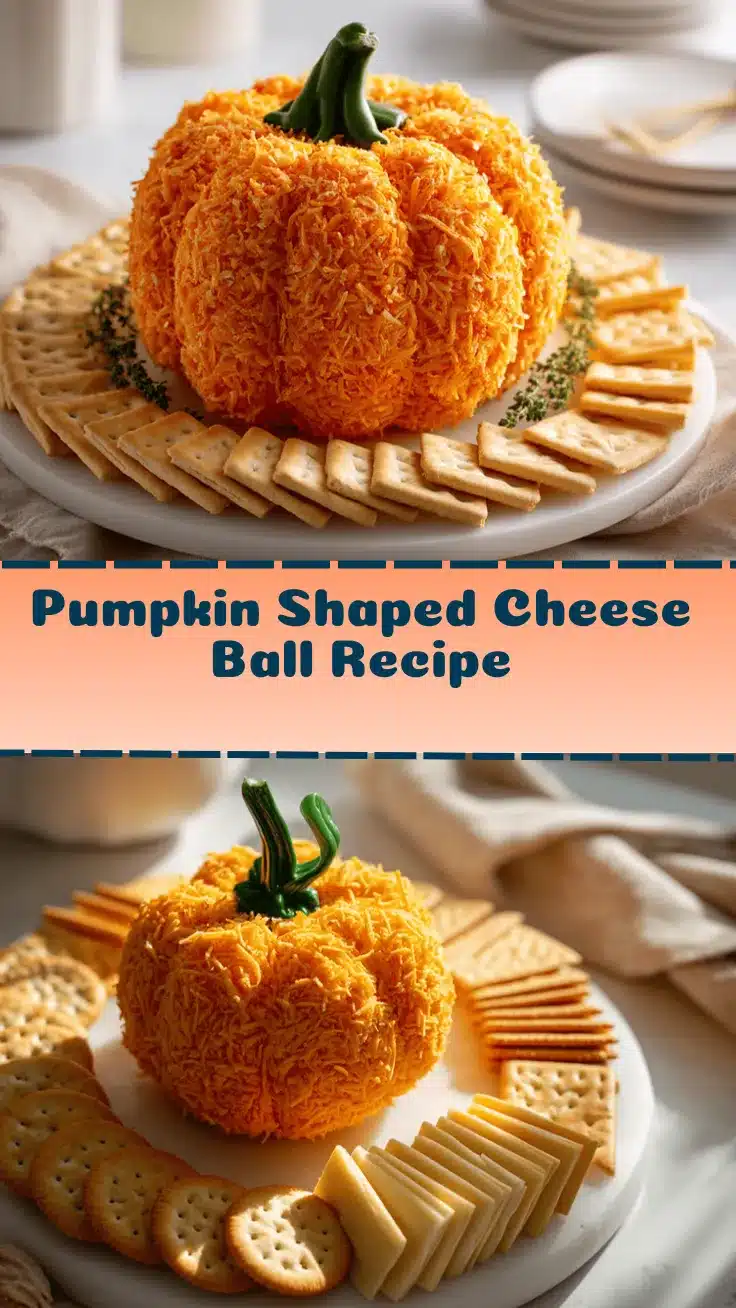
Pumpkin Shaped Cheese Ball Recipe – Easy Halloween Party Snack
- Total Time: 2 hours 15 minutes (includes chilling)
- Yield: 10-12 servings 1x
Description
This festive pumpkin shaped cheese ball is creamy, tangy, and coated in crunchy nacho cheese chips for a vibrant Halloween centerpiece. Quick to prepare and always a crowd-pleaser, it’s perfect for parties and easy to customize for different tastes and diets.
Ingredients
- 16 oz cream cheese, softened
- 2 cups sharp cheddar cheese, shredded
- 1 tsp smoked paprika
- 1/2 tsp garlic powder
- 1/2 tsp onion powder
- 1 tsp Worcestershire sauce
- 1/4 tsp salt (or to taste)
- 1/4 tsp black pepper (or to taste)
- 2 tbsp green onion, finely chopped
- 1/3 cup red bell pepper, finely chopped
- 1 cup crushed nacho cheese tortilla chips (such as Doritos)
- 1 bell pepper stem (reserved from a whole pepper, for decoration)
- Crackers, pretzels, or veggies for serving
Instructions
- In a large mixing bowl, combine softened cream cheese and shredded sharp cheddar. Blend with a hand mixer or sturdy spoon until smooth and creamy, about 2-3 minutes.
- Add smoked paprika, garlic powder, onion powder, Worcestershire sauce, salt, and black pepper. Mix well.
- Stir in chopped green onion and red bell pepper. Taste and adjust seasonings if needed.
- Place a large piece of plastic wrap on the counter. Transfer the cheese mixture to the center, gather the edges, and form into a ball. Twist tightly and gently press to compact. Chill in the refrigerator for at least 2 hours, or up to overnight.
- Crush nacho cheese tortilla chips in a zip-top bag with a rolling pin or pulse in a food processor until fine. Pour crumbs onto a plate.
- Unwrap the chilled cheese ball and roll it in the crushed chips until fully coated. Shape into a squat pumpkin form using your hands or a knife. Create vertical grooves around the sides with fingers or a butter knife.
- Insert the reserved bell pepper stem into the top center for the pumpkin stem. Substitute with celery or a pretzel rod if needed.
- Optional: Chill the finished cheese ball for another 30 minutes to set the shape and keep the coating crisp.
- Transfer to a serving platter and surround with crackers, pretzels, or veggies. Garnish with extra bell pepper strips or parsley leaves if desired.
Notes
For gluten-free, use gluten-free chips and crackers. Make ahead for deeper flavor; add coating and stem just before serving. Double-coat for extra crunch. If mixture is too soft, chill longer. Customize with herbs, spices, or nuts for different flavors. For vegan, use dairy-free cream cheese and cheddar.
- Prep Time: 15 minutes
- Cook Time: 0 minutes
- Category: Appetizer
- Cuisine: American
Nutrition
- Serving Size: About 2 tablespoons per serving
- Calories: 110
- Sugar: 1
- Sodium: 220
- Fat: 9
- Saturated Fat: 5
- Carbohydrates: 4
- Fiber: 0.5
- Protein: 3
Keywords: cheese ball, Halloween snack, pumpkin shaped appetizer, party food, easy cheese ball, festive appetizer, fall recipes, holiday entertaining