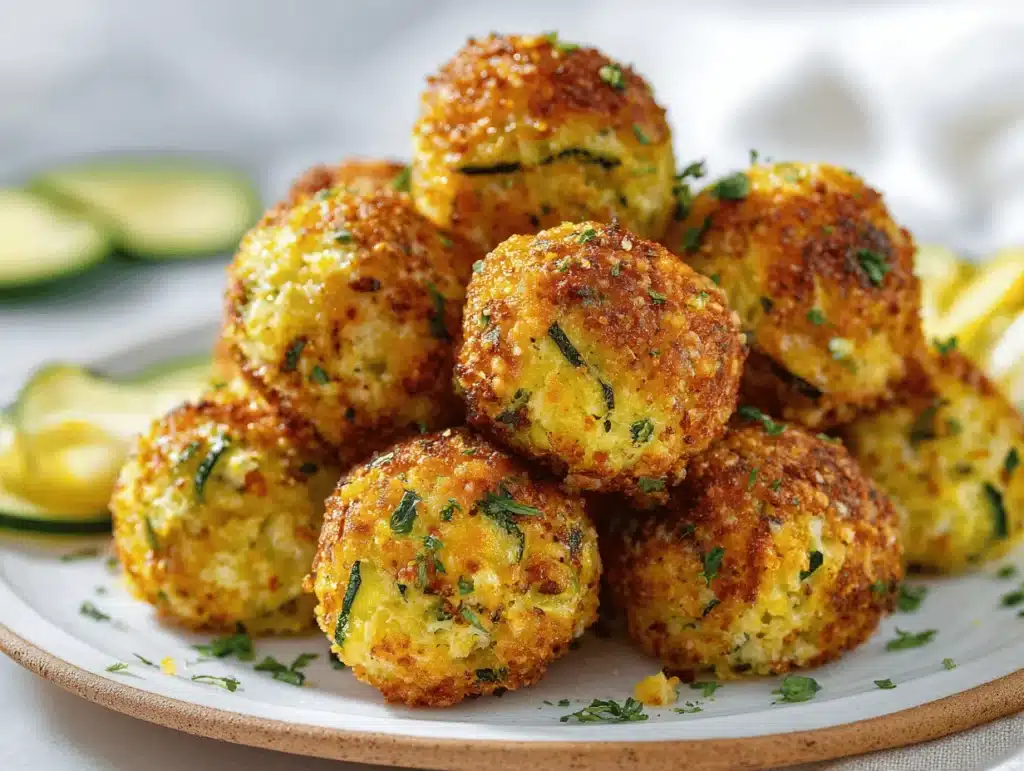
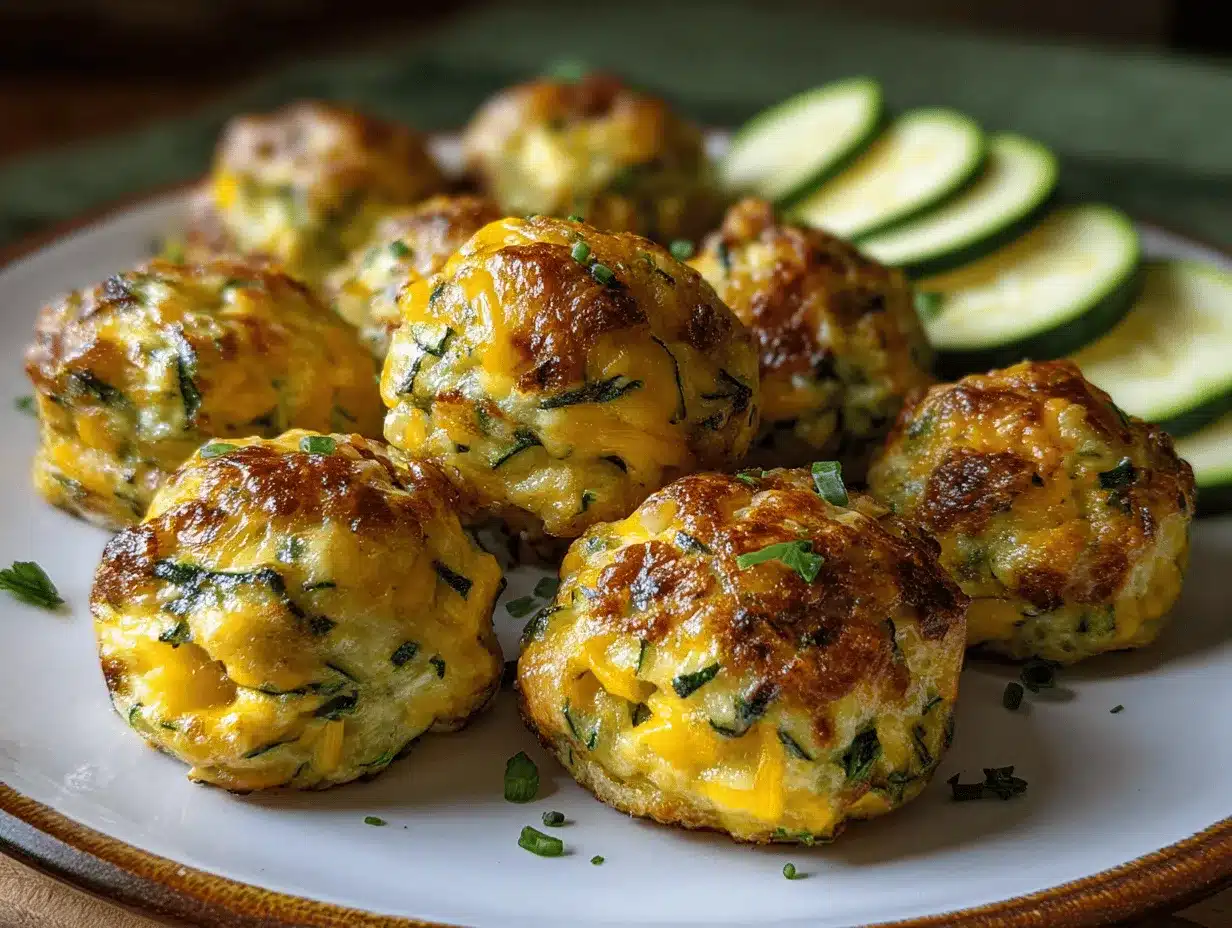
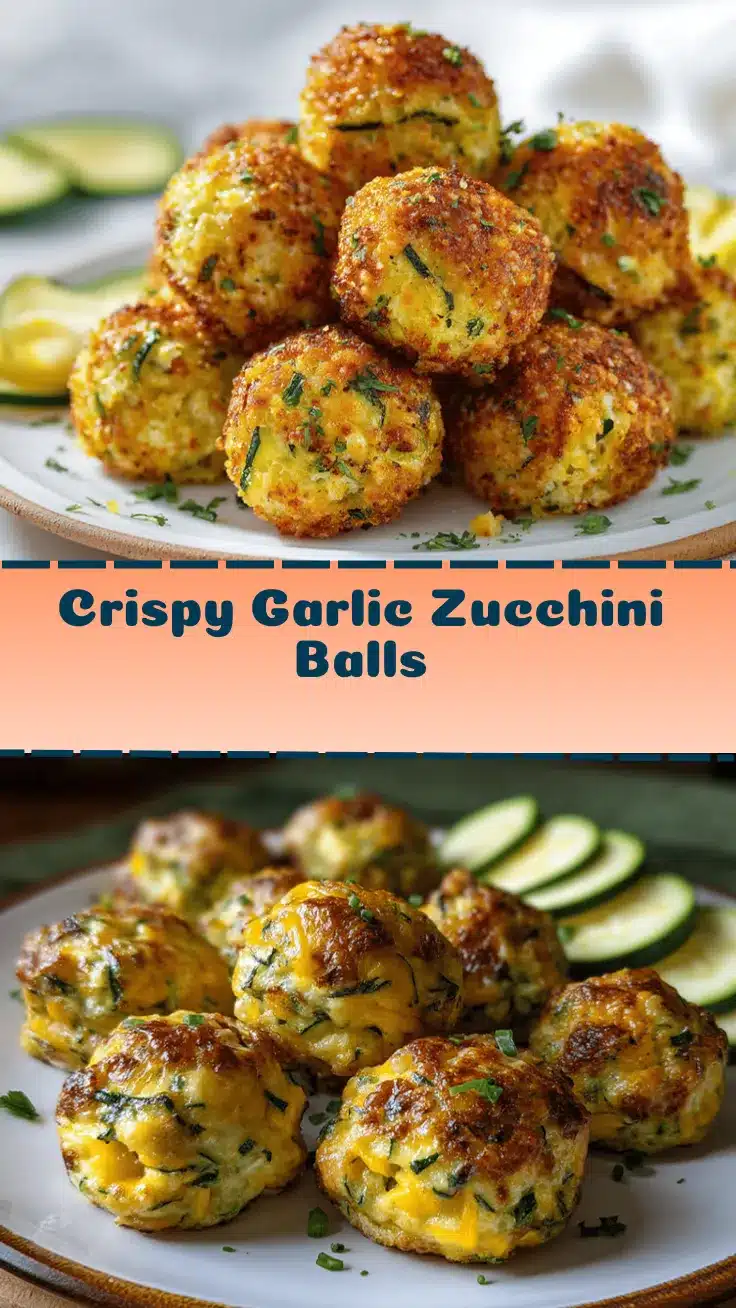
Crunch. Sizzle. That unmistakable aroma of garlic hitting the pan—if you’ve ever found yourself reaching for one more bite at a party, you’ll know exactly what I’m talking about. These crispy garlic zucchini balls started out as a happy accident in my kitchen (you know, one of those desperate “what can I do with all this zucchini?” moments). Now, they’re my go-to finger food for everything from game nights to backyard barbecues. Honestly, the first time I made these, I had no idea they’d be such a hit. My kids literally fought over the last one. The blend of fresh zucchini, punchy garlic, and a golden crunchy crust is just addictive, and you can whip them up in less than 30 minutes—no fancy gadgets required.
I’ve tested this recipe a dozen times (sometimes with shredded carrots, sometimes with cheddar instead of parmesan—so many ways to play with it), but the classic crispy garlic zucchini balls always win. They’re packed with veggies, easy to prep ahead, and ridiculously satisfying. Whether you’re feeding a crowd or just want a tasty snack for yourself, these are the kind of bites that disappear fast. Plus, they’re way healthier than most fried snacks, and you won’t even miss the meat or gluten if you make a few simple swaps. So, if you’re looking for a new party pleaser or just craving something crispy and garlicky (I mean, who isn’t?), this recipe for crispy garlic zucchini balls should be at the top of your list.
As someone who loves sneaking veggies into snacks, I promise these are anything but boring. The flavor, the crunch, the ease—they’ve earned a permanent spot in my snack rotation (and I bet they’ll become a favorite in yours too).
Why You’ll Love This Recipe
I’ve made crispy garlic zucchini balls for every occasion imaginable, and they’ve never let me down. Here’s why I think you’ll fall in love with them, too:
- Quick & Easy: You’ll have these ready in under 30 minutes—perfect for those spontaneous snack cravings or unexpected guests.
- Simple Ingredients: No need for a specialty store run; everything here is probably already in your kitchen.
- Perfect for Parties: These are the kind of bites that disappear at potlucks, birthday gatherings, or even casual movie nights.
- Crowd-Pleaser: Kids, adults, even picky eaters—everyone seems to love these crispy zucchini balls. My youngest nephew declared them “the best green food ever.”
- Unbelievably Delicious: That golden crust and savory garlic punch? Next-level comfort food, with none of the greasy regret.
This recipe stands out because I blend the zucchini with a generous dose of garlic and a handful of parmesan, then roll the mixture in panko for that signature crunch. I’ve tried other versions (oven-baked, air-fried, even gluten-free), but this pan-fried method gives the best texture—crisp on the outside, tender inside. Plus, you can make them bite-sized or bigger, depending on your crowd.
And let’s face it—sometimes you just want finger food that’s not chips or chicken nuggets. These crispy garlic zucchini balls are the answer. They’re light, yet totally satisfying, and perfect for dipping into your favorite sauce. They don’t just taste good; they feel like a little victory for anyone looking to sneak more veggies onto the plate. I’m a firm believer in snacks that make you happy and healthy, and these hit the mark every time!
Ingredients Needed
This recipe for crispy garlic zucchini balls is all about simple, wholesome ingredients coming together for bold flavor and that irresistible crunch. No fuss, no frills—just pantry staples and fresh produce:
- For the Balls:
- 2 medium zucchini (about 14 oz / 400g), grated (choose firm zucchini for less moisture)
- 1/2 teaspoon salt (to draw out moisture and boost flavor)
- 2 large eggs, room temperature (helps bind everything together)
- 1/2 cup (50g) grated parmesan cheese (for savory depth—Grana Padano works too)
- 2–3 cloves garlic, minced (fresh is best, but jarred will do in a pinch)
- 1/2 cup (60g) all-purpose flour (or use chickpea flour for gluten-free)
- 1/2 teaspoon black pepper (freshly ground adds a nice kick)
- 1/4 cup (30g) chopped fresh parsley or dill (optional, but adds a lovely herby note)
- For Coating & Frying:
- 1 cup (80g) panko breadcrumbs (for extra crispiness—regular or gluten-free)
- 1/2 cup (120ml) neutral oil for frying (canola, sunflower, or avocado; olive oil is fine but may brown faster)
- Optional Dipping Sauce:
- 1/2 cup (120g) Greek yogurt or sour cream (or dairy-free if needed)
- 1 tablespoon lemon juice (brightens everything up)
- 1 tablespoon chopped fresh herbs (your pick—dill, parsley, or chives)
- Salt & pepper, to taste
Ingredient tips from my kitchen:
- Use small-curd parmesan for smoother texture.
- If your zucchini is especially watery, squeeze it well with a clean kitchen towel—trust me, this step makes all the difference for crispy balls.
- Panko is my secret weapon for the crunch, but you can swap regular breadcrumbs if needed.
- Don’t have fresh herbs? Dried parsley or Italian seasoning works in a pinch.
Substitutions:
- Gluten-free: Use chickpea or almond flour and gluten-free panko.
- Egg-free: Try flax eggs (1 tablespoon flaxseed meal + 2.5 tablespoons water per egg).
- Dairy-free: Sub vegan parmesan and use coconut yogurt for dipping.
This recipe is super forgiving. I’ve swapped out zucchini for grated carrots or sweet potato before, and the results are still delicious. Make it your own!
Equipment Needed
- Box grater or food processor: For grating zucchini (I’ve used both, and the box grater is easier to clean).
- Large mixing bowl: To combine all your ingredients.
- Clean kitchen towel or cheesecloth: Essential for squeezing out zucchini moisture (paper towels work in a pinch).
- Measuring cups and spoons: For accuracy (I always double-check the flour and cheese for perfect texture).
- Small cookie scoop or spoon: To shape the balls evenly (hands work too, but it gets messy!).
- Shallow dish or plate: For rolling balls in panko breadcrumbs.
- Nonstick or cast iron skillet: For frying (I prefer cast iron for even browning, but nonstick keeps cleanup easy).
- Slotted spoon or tongs: To flip and remove the balls from hot oil.
- Cooling rack or paper towels: For draining excess oil.
Budget-friendly tip: Most of this equipment is standard, but you can skip the cookie scoop and use a regular spoon (the balls won’t be perfectly round, but honestly, that’s part of the charm). If you fry often, keep your cast iron well-seasoned—it lasts a lifetime! And always squeeze the zucchini thoroughly—wet zucchini leads to soggy balls (no one wants that).
Preparation Method
-
Prep the zucchini:
Grate 2 medium zucchini (14 oz / 400g) using a box grater or food processor. Sprinkle with 1/2 teaspoon salt and let sit for 10 minutes to draw out moisture. Place grated zucchini in a clean kitchen towel and squeeze out as much liquid as possible. (You’ll be surprised how much water comes out—don’t skip this step!) The zucchini should feel dry to the touch, not soggy.
-
Mix the batter:
In a large bowl, combine squeezed zucchini, 2 large eggs, 1/2 cup (50g) grated parmesan, 2–3 cloves minced garlic, 1/2 cup (60g) flour, 1/2 teaspoon black pepper, and 1/4 cup (30g) chopped parsley or dill (if using). Stir until just combined—don’t overmix or the balls can get dense. If the mixture feels too wet, add another tablespoon of flour. It should hold together when pressed.
-
Shape and coat:
Place 1 cup (80g) panko breadcrumbs in a shallow dish. Scoop out tablespoon-sized portions of the zucchini mixture (about 20g each) and roll into balls (about 1.25 inches / 3cm diameter). Roll each ball in panko, pressing gently so the crumbs stick. If they’re too sticky, wet your hands lightly or chill the mixture for 10 minutes before shaping.
-
Fry to golden perfection:
Heat 1/2 cup (120ml) oil in a nonstick or cast iron skillet over medium heat. (Oil should shimmer but not smoke.) Add balls in batches, making sure not to crowd the pan. Fry for 2–3 minutes per side, turning gently with tongs until all sides are golden brown and crispy. Transfer to a cooling rack or paper towels to drain. If they brown too fast, lower the heat—zucchini balls should be crisp but not burnt.
-
Serve with dipping sauce:
Mix 1/2 cup (120g) Greek yogurt or sour cream, 1 tablespoon lemon juice, and 1 tablespoon chopped herbs in a small bowl. Season with salt and pepper. Serve zucchini balls warm with sauce on the side. (They’re best hot, but honestly, they taste great at room temp too.)
Yield: About 18 balls (serves 4 as a snack or appetizer). Prep time: 15 minutes. Cook time: 15 minutes.
Pro tip: If your balls fall apart during frying, your mixture was too wet—add more flour next time, or squeeze the zucchini even harder. For extra crispy results, double-coat in panko!
Cooking Tips & Techniques
I’ve had my fair share of kitchen blunders with these crispy garlic zucchini balls, so let me save you the trouble:
- Squeeze zucchini thoroughly: This is the single most important step. If you skip it, the balls will be soggy and fall apart while frying. I use a clean kitchen towel and twist like I’m wringing out laundry—get it as dry as possible.
- Don’t overcrowd the pan: Fry in small batches. Too many balls at once will drop the oil temperature, making the coating greasy instead of crispy. I learned this the hard way at my daughter’s birthday party!
- Use medium heat: High heat burns the crust before the inside sets; low heat makes them oily. Keep the oil hot enough to sizzle but not smoke.
- Double-coat for extra crunch: If you want maximum crispiness, dip the shaped balls in a little beaten egg before rolling in panko.
- Test one ball first: Fry a single ball to check texture and flavor. If it’s too wet, add more flour; too dry, mix in a splash of milk or water.
- Multitasking tip: While the balls fry, prep your dipping sauce or chop fresh herbs—it’s a small time-saver that makes serving easier.
- Consistency: Use a cookie scoop for evenly sized balls, so they fry at the same rate.
Lesson learned: The first time I made these, I didn’t squeeze the zucchini. The result? A soggy mess that wouldn’t hold together. Ever since, I’ve been religious about that step (sometimes I even let the kids help—they love it!). With these tips, I promise you’ll get perfectly crispy, golden bites every single time.
Variations & Adaptations
One of the best things about crispy garlic zucchini balls is how easy they are to customize. Here are some of my favorite twists:
- Gluten-Free: Swap all-purpose flour for chickpea or almond flour, and use gluten-free panko. The balls come out just as crispy (sometimes even crunchier!).
- Cheesy Spin: Add 1/2 cup (50g) shredded cheddar or feta to the mix for a richer flavor. I tried feta last spring—it’s tangy and works beautifully with fresh dill.
- Spicy Kick: Stir in 1/2 teaspoon chili flakes or diced jalapeño for a little heat. My husband swears by the jalapeño version for game days.
- Seasonal Veggies: Substitute half the zucchini with grated carrots or sweet potato in winter, or fresh corn in summer.
- Vegan Option: Use flax eggs and vegan parmesan. The texture is slightly softer, but totally delicious.
- Baked or Air-Fried: For a lighter version, bake at 400°F (200°C) for 20 minutes, flipping halfway, or air-fry at 375°F (190°C) for 12–15 minutes.
Honestly, my personal favorite is swapping in carrots and adding a pinch of cumin for earthy warmth—it’s a hit with my family and adds a splash of color to the plate. Don’t be afraid to experiment. You’ll be surprised how well these zucchini balls adapt to whatever you have in your fridge!
Serving & Storage Suggestions
Crispy garlic zucchini balls are best served piping hot, right out of the skillet. I love piling them onto a pretty platter with a bowl of herby yogurt sauce for dipping. They’re also fantastic at room temperature—perfect for picnics or lunchboxes.
For parties, skewer them with toothpicks and garnish with extra chopped herbs or a sprinkle of parmesan. Pair with sparkling lemonade, iced tea, or a light white wine for adults!
Storage tips:
- Refrigerate leftovers in an airtight container for up to 3 days.
- To freeze, let balls cool, then arrange in a single layer on a baking sheet. Freeze until solid, transfer to a zip-top bag, and store up to 1 month.
- Reheat in a hot oven (400°F / 200°C) for 10 minutes, or air-fry for 5–7 minutes. Skip the microwave—it makes the crust soggy.
Flavors deepen a bit overnight, so leftovers are still tasty. If you like extra crunch, reheat directly on a wire rack in the oven. I sometimes pack these for school lunches—they’re just as good cold!
Nutritional Information & Benefits
Each serving (about 4 balls) contains roughly:
- Calories: 120
- Protein: 5g
- Carbs: 12g
- Fat: 6g
- Fiber: 2g
Zucchini is rich in vitamin C, potassium, and fiber—great for heart health and digestion. Garlic adds antioxidants and a natural immune boost. The recipe is vegetarian, and with simple swaps, you can make it gluten-free or dairy-free. Allergens to watch for: eggs, dairy, gluten (in standard version).
From my own wellness journey, I love that these crispy garlic zucchini balls satisfy snack cravings without the heaviness of traditional fried foods. They’re low in carbs, high in veggies, and you can feel good about serving them to your family!
Conclusion
There’s a reason crispy garlic zucchini balls have become my party staple—they’re easy, crowd-pleasing, and packed with flavor. Whether you stick to the classic recipe or customize with your favorite veggies and seasonings, you’ll love the crispy bite and savory aroma every time.
Don’t be afraid to make this recipe your own—swap cheeses, try different herbs, bake instead of fry, or sneak in extra veggies. I make these whenever I want a snack that’s both comforting and healthy (bonus points if there are leftovers for lunch!).
If you try this recipe, let me know in the comments below—share your variations, party stories, or favorite dipping sauces! Pin it for your next get-together, and trust me, your guests will be asking for the recipe. Happy snacking!
Frequently Asked Questions
How do I keep my zucchini balls from falling apart?
Squeeze the grated zucchini really well to remove moisture. If the mixture still feels wet, add a bit more flour until it holds its shape.
Can I bake these instead of frying?
Yes! Bake them at 400°F (200°C) for 20 minutes, flipping halfway. They’ll be slightly less crisp, but still delicious.
What dipping sauce goes best with crispy garlic zucchini balls?
Greek yogurt mixed with lemon juice and fresh herbs is my favorite, but ranch, tzatziki, or spicy chipotle mayo work great too.
Can I make these ahead of time?
Absolutely! Shape and coat the balls, then refrigerate for up to 24 hours before frying. You can also freeze them and fry straight from the freezer (just add a couple minutes to the cook time).
Are crispy garlic zucchini balls gluten-free?
They can be! Just swap the flour and breadcrumbs for gluten-free versions. Chickpea flour and gluten-free panko are my go-tos.
Pin This Recipe!

Crispy Garlic Zucchini Balls
- Total Time: 30 minutes
- Yield: 4 servings (about 18 balls) 1x
Description
These crispy garlic zucchini balls are a quick, crowd-pleasing vegetarian snack with a golden crunchy crust and savory garlic flavor. Perfect for parties, game nights, or healthy snacking, they come together in under 30 minutes and are easily customizable.
Ingredients
- 2 medium zucchini (about 14 oz / 400g), grated
- 1/2 teaspoon salt
- 2 large eggs, room temperature
- 1/2 cup grated parmesan cheese (or Grana Padano)
- 2–3 cloves garlic, minced
- 1/2 cup all-purpose flour (or chickpea flour for gluten-free)
- 1/2 teaspoon black pepper
- 1/4 cup chopped fresh parsley or dill (optional)
- 1 cup panko breadcrumbs (regular or gluten-free)
- 1/2 cup neutral oil for frying (canola, sunflower, avocado, or olive oil)
- Optional Dipping Sauce:
- 1/2 cup Greek yogurt or sour cream (or dairy-free)
- 1 tablespoon lemon juice
- 1 tablespoon chopped fresh herbs (dill, parsley, or chives)
- Salt & pepper, to taste
Instructions
- Grate zucchini using a box grater or food processor. Sprinkle with salt and let sit for 10 minutes to draw out moisture. Squeeze out as much liquid as possible using a clean kitchen towel.
- In a large bowl, combine squeezed zucchini, eggs, parmesan, garlic, flour, black pepper, and parsley or dill (if using). Stir until just combined. If mixture is too wet, add more flour.
- Place panko breadcrumbs in a shallow dish. Scoop tablespoon-sized portions of the mixture and roll into balls (about 1.25 inches diameter). Roll each ball in panko, pressing gently so crumbs stick.
- Heat oil in a nonstick or cast iron skillet over medium heat. Add balls in batches, frying for 2–3 minutes per side until golden brown and crispy. Transfer to a cooling rack or paper towels to drain.
- Mix Greek yogurt or sour cream, lemon juice, and chopped herbs in a small bowl. Season with salt and pepper. Serve zucchini balls warm with dipping sauce.
Notes
Squeeze zucchini thoroughly to avoid soggy balls. For gluten-free, use chickpea flour and gluten-free panko. Double-coat in panko for extra crunch. Test one ball first to check texture. Balls can be baked or air-fried for a lighter version. Store leftovers in the fridge for up to 3 days or freeze for up to 1 month.
- Prep Time: 15 minutes
- Cook Time: 15 minutes
- Category: Appetizer
- Cuisine: American
Nutrition
- Serving Size: About 4 balls per serving
- Calories: 120
- Sugar: 2
- Sodium: 250
- Fat: 6
- Saturated Fat: 2
- Carbohydrates: 12
- Fiber: 2
- Protein: 5
Keywords: zucchini balls, party snack, vegetarian appetizer, crispy, garlic, finger food, easy recipe, healthy snack, gluten-free option, kid-friendly