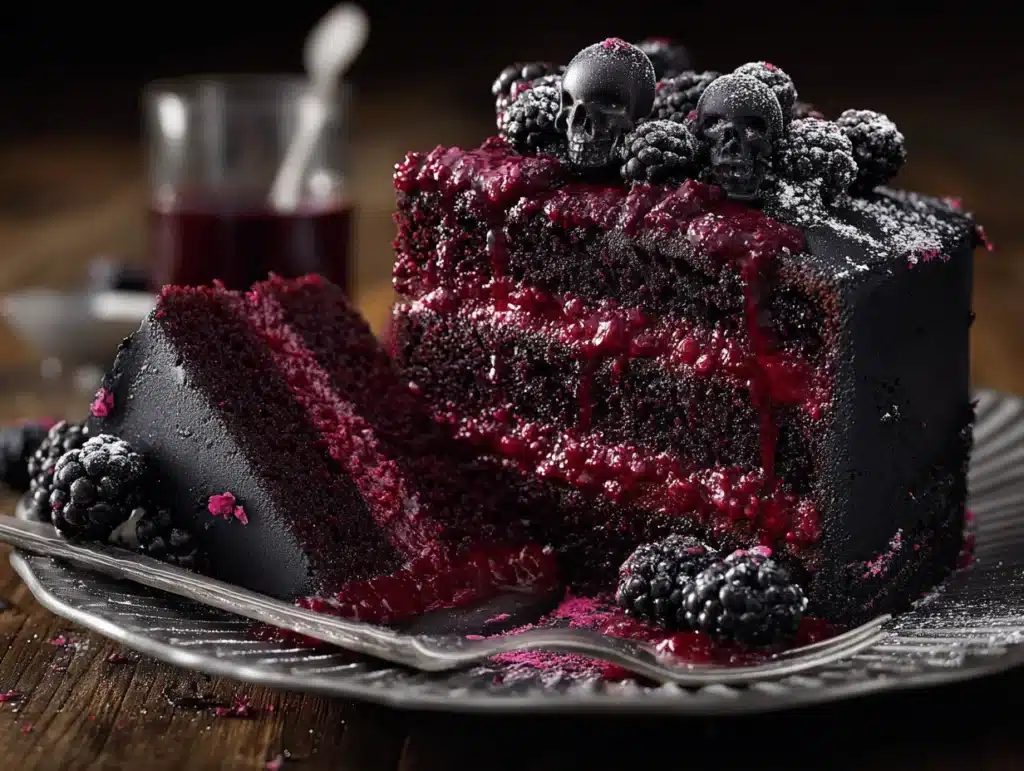
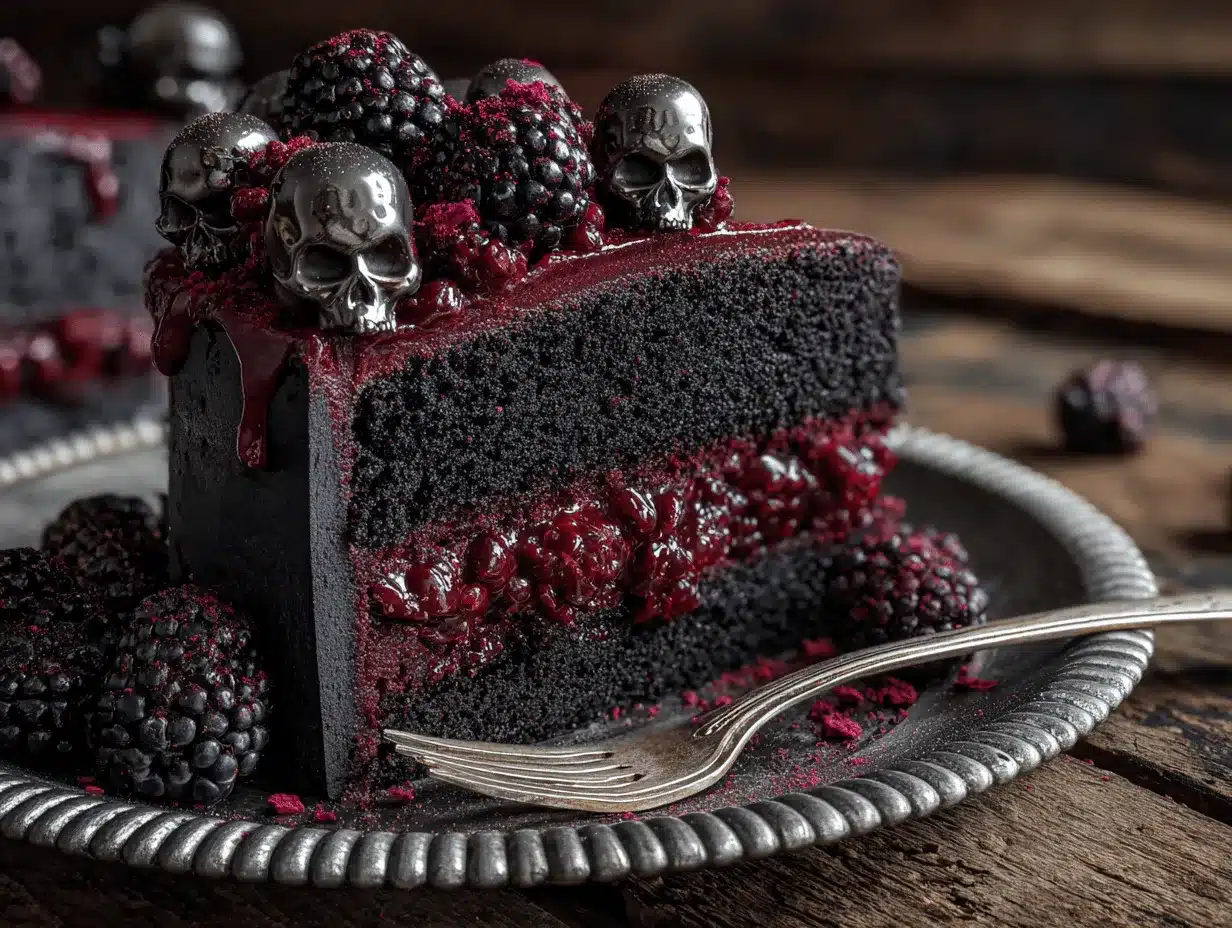
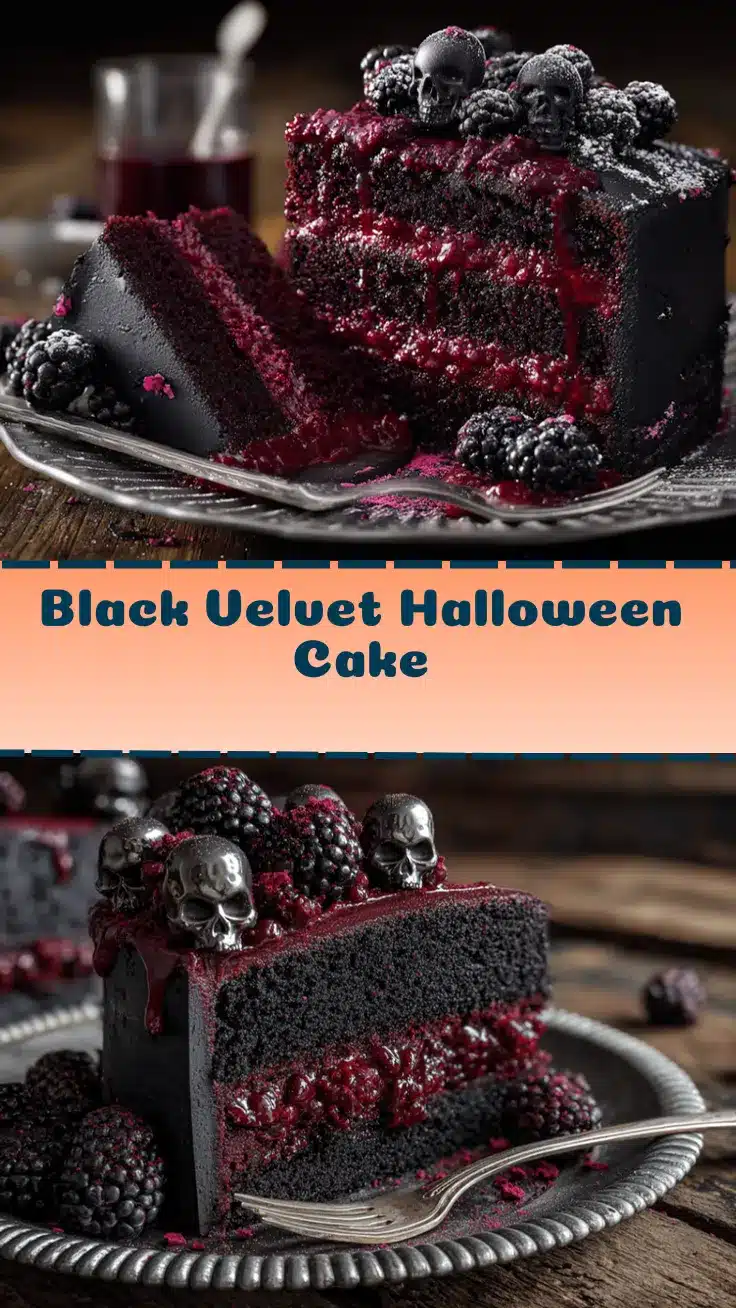
The first time I sliced into a black velvet Halloween cake, my kitchen was filled with laughter, a little bit of spooky excitement, and that unmistakable aroma of deep chocolate. Honestly, there’s just something magical about unveiling a cake that looks mysterious yet tastes like pure comfort. Black velvet cake isn’t just a twist on classic red velvet—it’s richer, darker, and the color is absolutely showstopping (especially when you’re looking to wow your guests at a Halloween bash or themed party).
I remember stumbling upon the idea for this black velvet Halloween cake during a late-night Pinterest scroll, searching for party desserts that weren’t just orange and black cookies. I wanted something dramatic, but also easy to make—because let’s face it, party prep can get wild. After a few attempts (and a couple of epic cake fails), I finally landed on a recipe that balanced moistness with that classic velvety crumb. The secret? A hint of black cocoa powder and a touch of buttermilk.
If you’re all about desserts that look amazing but don’t require a pastry chef’s skill set, this black velvet Halloween cake is your new best friend. You can make it for birthday parties, Halloween gatherings, or just when your sweet tooth is craving something a little extra. It’s ideal for busy families, fun-loving teens, or anyone who wants a cake that doubles as a centerpiece. As someone who bakes cakes year-round, I can promise you this black velvet Halloween cake is a crowd-pleaser (and the leftovers are just as good the next day, trust me). So, grab your mixing bowls—let’s make some kitchen magic together!
Why You’ll Love This Recipe
After baking this black velvet Halloween cake more times than I care to admit (I’ve even made it for fall bake sales and family game nights), I’ve picked up a few tricks that make this recipe stand out. Here’s why you’ll love it:
- Quick & Easy: This cake comes together in under an hour, including baking time. No fussy steps—just straightforward mixing and layering.
- Simple Ingredients: Most of what you need is probably already in your pantry. No need for specialty stores or rare baking powders.
- Perfect for Parties: Whether it’s Halloween, a birthday, or a moody-themed celebration, this cake steals the show. The deep black hue is a conversation starter!
- Crowd-Pleaser: Kids are always amazed by the color, and adults rave about the flavor. It’s a dessert everyone talks about long after the party’s over.
- Unbelievably Delicious: The velvety crumb, rich chocolate flavor, and creamy frosting hit all the right notes. There’s no weird aftertaste—just pure cake bliss.
What makes this black velvet Halloween cake different? For starters, I use black cocoa powder for that dramatic look and extra chocolate depth. My trick is blending the dry ingredients thoroughly before adding the wet, which gives you the most tender crumb. And if you’re like me and love a little surprise, you can add a layer of orange cream cheese frosting between the layers for a fun pop of color.
This isn’t just another chocolate cake—it’s a recipe that feels special. The kind that makes you linger over dessert, maybe even sneak a second slice. I’ve tested different cocoa powders, played around with toppings, and every time, the black velvet Halloween cake comes out looking and tasting like something you’d find at a fancy bakery (but way easier to make at home). If you want a dessert that brings excitement, comfort, and a little bit of Halloween magic, this cake is your answer.
Ingredients Needed
This recipe uses simple, tried-and-true ingredients to capture that signature black velvet look and flavor. Most of these are pantry staples, and you can swap a few things in a pinch. Here’s what you’ll need:
- For the Cake Batter:
- 1 3/4 cups (220g) all-purpose flour (sifted for extra smoothness)
- 1 cup (200g) granulated sugar
- 1/2 cup (45g) black cocoa powder (Dutch-processed, for color and richness)
- 2 tsp baking powder
- 1/2 tsp baking soda
- 1/2 tsp fine salt
- 3 large eggs, room temperature
- 3/4 cup (180ml) buttermilk (adds tang and tenderness)
- 1/2 cup (120ml) vegetable oil
- 2 tsp vanilla extract (I use Nielsen-Massey for best flavor)
- 1 cup (240ml) hot water (helps “bloom” the cocoa for deeper flavor)
- For the Frosting:
- 8 oz (225g) cream cheese, softened
- 1/2 cup (115g) unsalted butter, softened
- 3 cups (360g) powdered sugar
- 1 tsp vanilla extract
- Pinch of salt
- Optional: Orange gel food coloring (for a festive look)
- For Decorating:
- Halloween sprinkles (I love Wilton’s mix!)
- Black sanding sugar
- Candy eyes or edible glitter (optional, adds a fun touch)
If you need substitutions, swap buttermilk for regular milk plus 1 tsp vinegar, or use dairy-free cream cheese and butter for a lactose-free version. Almond flour can replace all-purpose for a gluten-free option (though the texture changes a bit, it’s still tasty!). For cocoa powder, make sure it’s Dutch-processed—natural cocoa won’t give that deep black shade. If you can’t find black cocoa, mix half Dutch-processed with activated charcoal (food grade only!) for color, but I stick with cocoa for flavor.
I always recommend sifting the flour and cocoa together—it’s a tiny step, but makes a big difference in texture. And yes, you can get creative with the frosting (orange, purple, or neon green!). I’ve tried them all, and orange is my family’s favorite.
Equipment Needed
- 9-inch round cake pans (2) – Standard size, but you can use 8-inch pans for taller layers. I’ve used disposable aluminum in a pinch, but metal pans bake more evenly.
- Electric mixer – A stand mixer makes the frosting fluffy, but a hand mixer works fine. I’ve whisked by hand on busy days (it takes longer but still works).
- Sifter or fine mesh strainer – For flour and cocoa. If you don’t have one, just stir with a fork—it helps reduce lumps.
- Mixing bowls – At least two. I use glass because they don’t hold odors, but plastic works too.
- Rubber spatula – For scraping every bit of batter (waste not, want not!).
- Offset spatula – For frosting; a butter knife is an okay substitute if you’re in a rush.
- Parchment paper – Lining the pans helps prevent sticking. You can use butter and flour if you’re out of parchment.
- Wire cooling rack – Helps cool layers evenly. If you don’t have one, just cool on a clean countertop.
If you’re on a budget, most of these tools are available at discount stores. I’ve baked this cake with dollar-store pans, and it still turned out great. For specialty equipment like the offset spatula, a regular spatula or spoon works in a pinch—just frost slowly for a smooth finish. Remember to wash your mixing bowls right after using cocoa; it stains if left too long!
Preparation Method
- Preheat the oven to 350°F (175°C). Line two 9-inch round cake pans with parchment paper and lightly grease the sides. This is your insurance against sticking—trust me, I’ve lost a few cakes to stubborn pans!
- Sift the dry ingredients. In a large bowl, combine 1 3/4 cups flour, 1 cup sugar, 1/2 cup black cocoa powder, 2 tsp baking powder, 1/2 tsp baking soda, and 1/2 tsp salt. Sift together, or whisk until thoroughly mixed. The mixture should look deep brown and uniform—no pale streaks.
- Mix the wet ingredients. In a separate bowl, whisk 3 eggs, 3/4 cup buttermilk, 1/2 cup oil, and 2 tsp vanilla extract until smooth. Don’t worry if it looks a little frothy.
- Combine wet and dry ingredients. Pour the wet ingredients into the dry mixture. Stir gently with a spatula (don’t overmix, or the cake can get tough). The batter will look thick at first—totally normal.
- Add hot water. Slowly pour in 1 cup hot water while stirring. The batter will thin out and turn glossy black. If you see lumps, just keep stirring until smooth. If you’re worried about splashing, add water in two batches.
- Divide and bake. Pour the batter evenly into the prepared cake pans. Tap the pans gently on the counter to release air bubbles. Bake in preheated oven for 28-32 minutes. Check at 28 minutes—the cakes should spring back when lightly touched and a toothpick comes out mostly clean (a few moist crumbs are perfect).
- Cool the cakes. Let the cakes cool in the pans for 10 minutes, then turn out onto a wire rack. Peel off parchment and let cool completely. If you rush this step, the frosting will melt!
- Make the frosting. Beat 8 oz cream cheese and 1/2 cup butter until fluffy (about 2 minutes). Add 3 cups powdered sugar, 1 tsp vanilla, and a pinch of salt. Beat until light and creamy. If you want orange frosting, add gel food coloring now—start with a few drops and mix until you hit that pumpkin shade.
- Frost the cake. Place one cake layer on a serving plate. Spread a generous layer of frosting, then top with the second cake layer. Cover the entire cake with remaining frosting. Use an offset spatula for extra-smooth sides (or keep it rustic—it looks great).
- Decorate. Sprinkle Halloween sprinkles, black sugar, and candy eyes on top. Get creative! My kids love making “monster faces” with the decorations.
Troubleshooting: If your cake sinks in the middle, check your baking powder freshness and oven temperature. If the frosting gets too runny, chill it for 15 minutes before spreading. If the layers stick, run a thin knife around the edge before unmolding. Sensory cues: The cake should be moist, tender, and have a rich chocolate scent. The frosting should look fluffy and hold peaks. I always taste the frosting before using—sometimes I add an extra pinch of salt for balance.
Cooking Tips & Techniques
Let’s be real: not every cake comes out perfect, but with a few pro tips, your black velvet Halloween cake will be pretty close. Here’s what I’ve learned over many (sometimes messy) baking sessions:
- Use room temperature ingredients. Eggs and buttermilk blend better, giving you a softer crumb. I’ve rushed this before and ended up with a dense cake—don’t skip this!
- Sift the cocoa and flour. This step breaks up lumps and gives the cake that signature velvety texture. Even if you’re short on time, it’s worth it.
- Don’t overmix. Stir just until the batter is smooth. Overmixing develops gluten, making the cake tough. If you see a few small lumps, that’s okay—they’ll disappear during baking.
- Bloom the cocoa with hot water. This intensifies the color and flavor. I tried skipping the hot water once—my cake was pale and tasted flat. Lesson learned!
- Chill the cake layers before frosting. If you’re in a humid climate or just impatient, popping the layers in the fridge for 20 minutes makes frosting way easier.
- Test for doneness early. Ovens run hot and cold—I always check my cake 5 minutes before the timer. If you wait too long, you risk a dry cake.
- Multitasking tip: While the cake bakes, whip up the frosting and prep your decorations. It keeps things moving and you’ll feel way ahead of schedule.
One time, I forgot to line the pans and lost half the cake to the bottom—don’t be like me! Always line with parchment. And if your frosting starts to melt, just pop it (and the cake) in the fridge. Consistency is key: stick to the measurements, use the right cocoa powder, and don’t rush the cooling step. That’s how you get a black velvet Halloween cake that’s as beautiful as it is tasty.
Variations & Adaptations
One of my favorite things about this black velvet Halloween cake is how easy it is to switch up. Whether you have dietary needs or just want to play with flavors, here are some fun ways to adapt the recipe:
- Gluten-Free: Swap all-purpose flour for a 1:1 gluten-free baking blend. The texture changes slightly, but the flavor is still rich and decadent.
- Dairy-Free: Use plant-based milk (like oat or almond) and dairy-free cream cheese and butter for the frosting. I’ve made this version for friends with allergies—no one could tell the difference!
- Seasonal Twist: Add a layer of spiced pumpkin cream cheese filling (just mix a little canned pumpkin and pumpkin pie spice into your frosting). It’s a great way to bring autumn vibes.
- Cupcake Version: Pour the batter into cupcake liners and bake for 18-20 minutes. Perfect for serving at kids’ parties or school events.
- Flavor Customization: Stir in mini chocolate chips, orange zest, or a dash of cinnamon to the batter for extra depth. My kids vote for chocolate chips every time.
If you want to avoid allergens, skip the sprinkles and use fresh berries or fruit instead. For a personal twist, I’ve tried swirling orange and purple frosting on top for a marbled effect—super fun and festive! You can also bake this cake in a bundt pan for a dramatic presentation (just adjust the cooking time to about 40-45 minutes). The options are endless—don’t be afraid to experiment!
Serving & Storage Suggestions
This black velvet Halloween cake is best served slightly chilled or at room temperature. I love placing it on a cake stand with Halloween decorations around for a Pinterest-worthy centerpiece. Slice thick pieces to show off the color contrast—trust me, people will be asking for photos!
Pair slices with hot coffee, spiced tea, or even a cold glass of milk. If you’re hosting a party, serve alongside other spooky treats like caramel apples or candy corn. For a more grown-up vibe, dark chocolate espresso drinks are a hit.
To store, cover the cake tightly and keep in the refrigerator for up to 5 days. The flavors actually deepen overnight, making leftovers even more irresistible. For longer storage, wrap slices in plastic wrap and freeze for up to 2 months—just thaw in the fridge before serving. To reheat, warm a slice in the microwave for 10 seconds (just enough to take the chill off). If you notice any frosting separation, stir gently before serving.
Pro tip: store decorated cake uncovered for the first hour to set the frosting, then cover loosely. That way, your sprinkles and decorations stay crisp!
Nutritional Information & Benefits
Here’s a quick look at the nutrition for one slice (based on 12 servings):
- Calories: about 340 per slice
- Fat: 15g
- Carbs: 48g
- Protein: 4g
- Sugar: 34g
Black cocoa powder is packed with antioxidants, and buttermilk adds a dose of calcium and probiotics. If you opt for gluten-free or dairy-free swaps, the cake remains fairly balanced, with less saturated fat. Allergen alert: contains wheat, eggs, and dairy unless substituted. As someone who watches added sugars, I reserve this cake for special occasions—it’s worth every bite! If you’re baking for a crowd, consider smaller slices or cupcakes to keep portions reasonable.
Conclusion
If you’re looking for a dessert that’s equal parts delicious and dramatic, this black velvet Halloween cake is a must-try. It’s simple enough for beginner bakers, but impressive enough to steal the spotlight at any party. You can tweak the flavors, change up the frosting, or go wild with decorations—make it your own!
I love this cake for its mix of nostalgia, playfulness, and bold flavor. It’s the kind of recipe that turns a regular night into a celebration (and makes for amazing leftovers the next morning). So, give it a whirl—and don’t forget to share your photos or leave a comment below if you try a new twist. Your kitchen is about to get a whole lot spookier (and sweeter)!
Go ahead, bake, decorate, and create memories. You’ve got this!
Frequently Asked Questions
Can I make black velvet Halloween cake ahead of time?
Absolutely! Bake the cake layers up to 2 days in advance and store them wrapped in the refrigerator. Frost and decorate the day you plan to serve for best results.
What if I can’t find black cocoa powder?
You can use regular Dutch-processed cocoa for a rich flavor, but the cake will be dark brown. For a deeper black, mix in a small amount of food-grade activated charcoal (about 1 teaspoon).
How do I prevent my cake from sticking to the pan?
Line your pans with parchment paper and lightly grease the sides. I run a knife around the edges before turning the cake out—works every time!
Can I freeze this cake?
Yes! Wrap individual slices in plastic wrap and freeze for up to 2 months. Thaw overnight in the fridge before serving.
Is it possible to make this cake without eggs?
Yes, substitute 3 eggs with 3/4 cup unsweetened applesauce or use a commercial egg replacer. The texture will be slightly different but still tasty!
Pin This Recipe!
Black Velvet Halloween Cake
- Total Time: 50 minutes
- Yield: 12 servings 1x
Description
This dramatic black velvet Halloween cake is a rich, moist twist on classic red velvet, featuring deep chocolate flavor and a showstopping color. It’s easy to make, perfect for parties, and sure to wow guests with its festive look and creamy frosting.
Ingredients
- 1 3/4 cups (220g) all-purpose flour, sifted
- 1 cup (200g) granulated sugar
- 1/2 cup (45g) black cocoa powder (Dutch-processed)
- 2 tsp baking powder
- 1/2 tsp baking soda
- 1/2 tsp fine salt
- 3 large eggs, room temperature
- 3/4 cup (180ml) buttermilk
- 1/2 cup (120ml) vegetable oil
- 2 tsp vanilla extract
- 1 cup (240ml) hot water
- 8 oz (225g) cream cheese, softened
- 1/2 cup (115g) unsalted butter, softened
- 3 cups (360g) powdered sugar
- 1 tsp vanilla extract
- Pinch of salt
- Orange gel food coloring (optional)
- Halloween sprinkles
- Black sanding sugar
- Candy eyes or edible glitter (optional)
Instructions
- Preheat the oven to 350°F (175°C). Line two 9-inch round cake pans with parchment paper and lightly grease the sides.
- In a large bowl, sift together flour, sugar, black cocoa powder, baking powder, baking soda, and salt until thoroughly mixed.
- In a separate bowl, whisk eggs, buttermilk, vegetable oil, and vanilla extract until smooth.
- Pour the wet ingredients into the dry mixture and stir gently with a spatula until just combined.
- Slowly pour in hot water while stirring. Mix until the batter is smooth and glossy black.
- Divide the batter evenly between the prepared cake pans. Tap pans gently to release air bubbles.
- Bake for 28-32 minutes, or until cakes spring back when lightly touched and a toothpick comes out mostly clean.
- Let cakes cool in pans for 10 minutes, then turn out onto a wire rack. Remove parchment and cool completely.
- For the frosting, beat cream cheese and butter until fluffy (about 2 minutes). Add powdered sugar, vanilla, and salt. Beat until light and creamy. Add orange gel food coloring if desired.
- Place one cake layer on a serving plate. Spread a generous layer of frosting, then top with the second layer. Cover the entire cake with remaining frosting.
- Decorate with Halloween sprinkles, black sanding sugar, and candy eyes or edible glitter as desired.
Notes
Use room temperature eggs and buttermilk for a softer crumb. Sift flour and cocoa for velvety texture. Don’t overmix the batter. Bloom cocoa with hot water for deeper flavor. Chill cake layers before frosting for easier assembly. For gluten-free or dairy-free adaptations, substitute flour and dairy products as needed. Store cake tightly covered in the refrigerator for up to 5 days or freeze slices for up to 2 months.
- Prep Time: 20 minutes
- Cook Time: 30 minutes
- Category: Dessert
- Cuisine: American
Nutrition
- Serving Size: 1 slice (1/12 of cake)
- Calories: 340
- Sugar: 34
- Sodium: 320
- Fat: 15
- Saturated Fat: 8
- Carbohydrates: 48
- Fiber: 2
- Protein: 4
Keywords: Halloween cake, black velvet cake, party dessert, chocolate cake, easy cake recipe, spooky dessert, festive cake, cream cheese frosting