Introduction
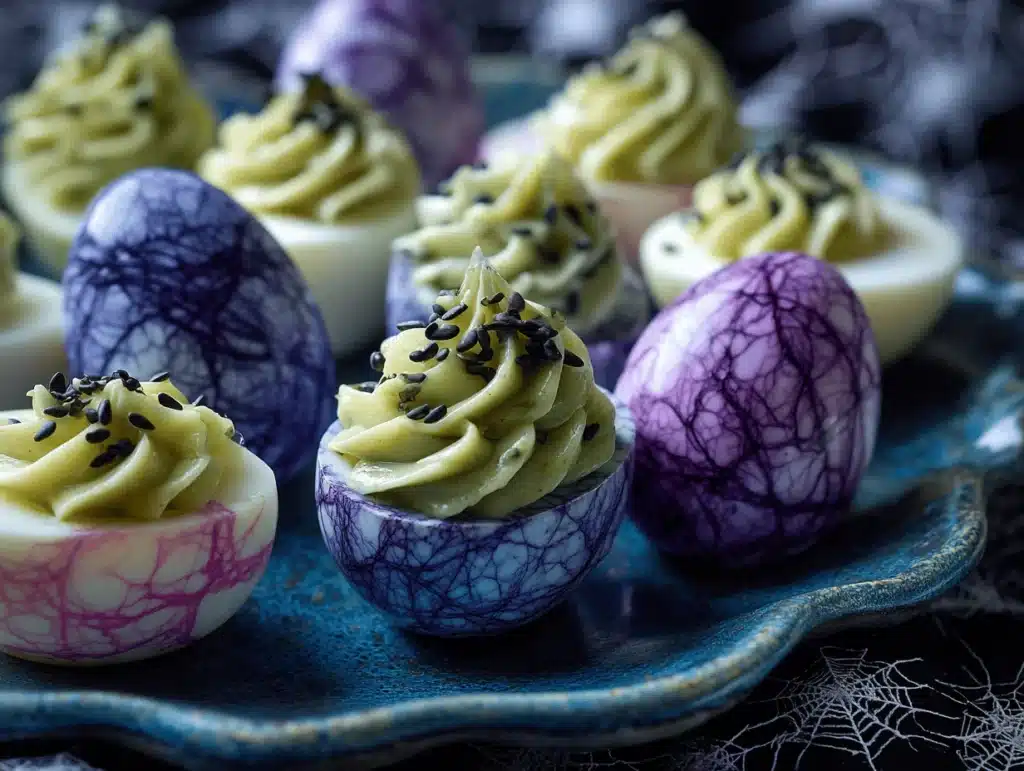
Green yolks, olive “eyeballs,” and a shiver up your spine—yep, these creepy deviled eggs are my go-to Halloween witch snack idea! Honestly, the first time I made them, I was just trying to get my kids excited about eating something besides candy on Halloween. Let’s face it: there’s only so much chocolate you can sneak before you start craving something savory. The smell of hard-boiled eggs mixing with spooky food coloring always brings me back to those late October afternoons, prepping for our family witch-themed party.
I discovered this creepy deviled eggs recipe after seeing a photo of eerie green eggs on Pinterest. It looked so weirdly delicious, I just had to give it a go. After a few kitchen experiments (and more than a few laughs), I nailed the method for getting that bright, witchy green yolk without the colors running everywhere. The best part? These eggs aren’t just a visual trick—they’re a treat for your taste buds too. Who knew you could make deviled eggs look so ghoulish and still keep them tasty?
Whether you’re hosting a big Halloween bash or just want a snack that’ll get a giggle from your family, creepy deviled eggs are perfect. They’re packed with protein, super easy to make, and honestly, you’ll get so many compliments on your creativity. I’ve made these for school parties, neighborhood potlucks, and even a witch-inspired movie night. Each time, they disappear faster than you can say “abracadabra!” As someone who’s tested this recipe more than a dozen times (with different fillings, colors, and toppings), I can promise you—these deviled eggs are a Halloween hit.
Why You’ll Love This Recipe
I’ve made countless Halloween snacks, but these creepy deviled eggs always stand out. They’re not just creepy—they’re the kind of memorable treat people talk about long after the party ends. Here’s why you’ll want to whip up a batch:
- Quick & Easy: Comes together in under 35 minutes, so even last-minute planners can pull these off.
- No Fancy Ingredients: You probably have everything already—eggs, mayo, mustard, and a few fun extras for decorating.
- Perfect for Halloween Parties: These are the ultimate witch snack idea—great for kids, adults, and anyone who loves a good fright.
- Crowd-Pleaser: I’ve never seen leftovers; even picky eaters gobble them up (maybe it’s the spooky vibe?).
- Unbelievably Tasty: The filling is tangy, creamy, and just a little smoky thanks to paprika—classic deviled egg flavor with a Halloween twist.
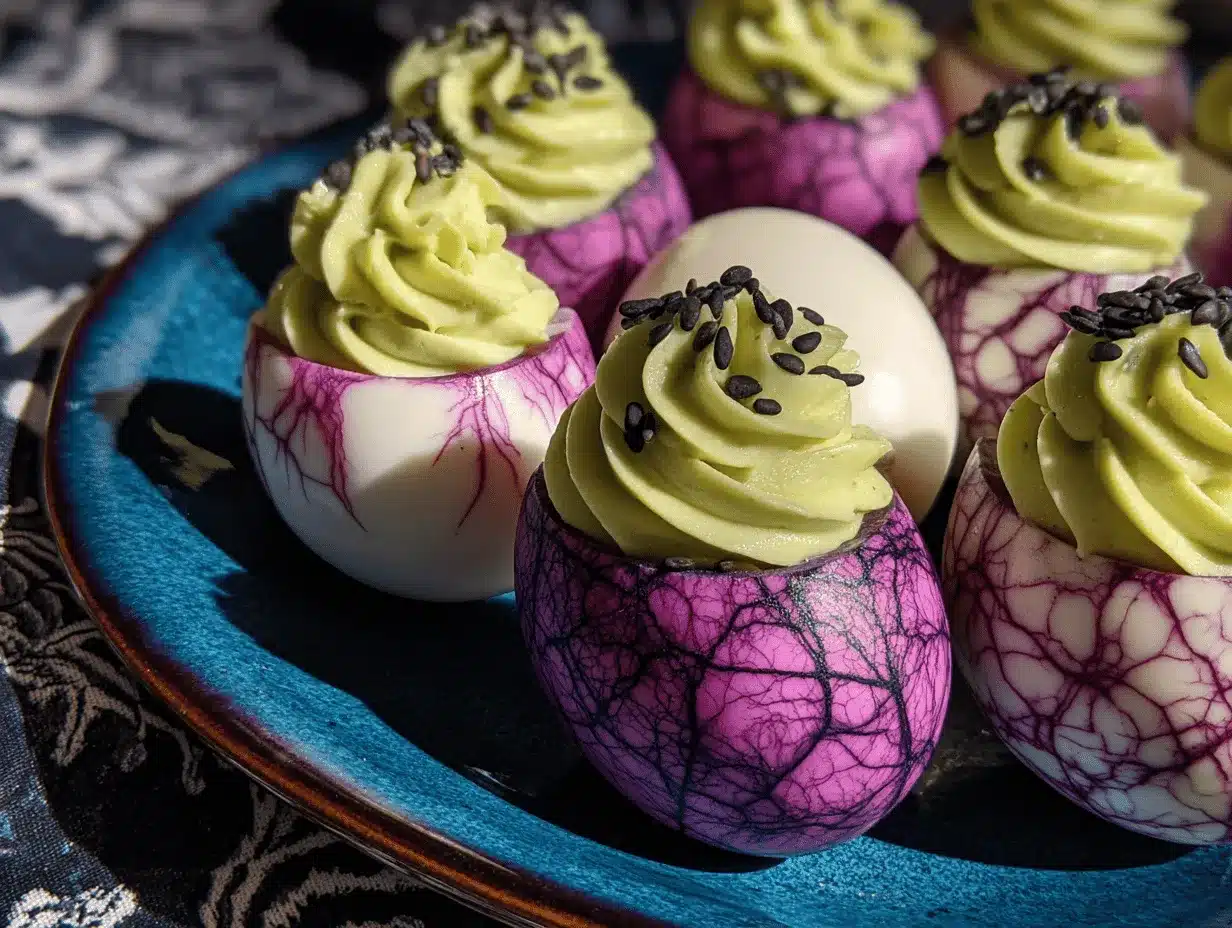
What makes this recipe different from other deviled eggs? First, the yolks get a bright green hue without any bitter taste—thanks to gel food coloring and a simple blending trick. Second, the “witchy” toppings are fun to customize. You can make olive spiders, chive “witch hair,” or use red pepper for a bloody effect. The look is so convincing, you’ll have everyone snapping photos for Pinterest before they eat!
This isn’t just another deviled egg—this is the one that gets gasps and giggles. Honestly, it’s comfort food reimagined for Halloween: still creamy, still savory, but with a dash of spooky fun. I love serving these up because they make people smile (and maybe squirm a little). If you want an easy Halloween witch snack idea that’s both delicious and Instagram-worthy, you’ve found it!
Ingredients Needed
This recipe uses simple, wholesome ingredients to deliver bold flavor and a satisfyingly creepy look without fuss. Most of these are pantry staples, and you can swap things out as needed. Here’s what you’ll need for your batch of creepy deviled eggs:
- For the eggs:
- 12 large eggs (room temperature works best for boiling evenly)
- Water (for boiling)
- Ice (for shocking eggs after boiling)
- For the filling:
- 1/3 cup mayonnaise (I like Hellmann’s for creaminess)
- 2 teaspoons yellow mustard (adds tang—Dijon works if you prefer)
- 1/4 teaspoon garlic powder (optional, but gives a subtle kick)
- 1/4 teaspoon smoked paprika (for flavor and a “dusty” look)
- Salt and pepper to taste
- Green gel food coloring (liquid works, but gel gives brighter color)
- For the “creepy” decorations:
- Black olives (whole and sliced, for “witch eyes” or “spiders”)
- Chives or green onions (for “witch hair” or slime effect)
- Roasted red pepper strips (for “bloody veins”) – optional
- Poppy seeds or sesame seeds (for extra texture, optional)
If you need to adapt for allergies: swap regular mayo for vegan mayo, skip paprika if you don’t like smoke, and use gluten-free mustard if needed. For a low-carb version, these eggs are naturally low in carbs—just check your mayonnaise label. I’ve used both chicken and duck eggs, and honestly, either works (duck is a bit richer). You can swap the filling for avocado if you want a “greener” witch look, but classic deviled eggs always win in our house.
If you’re missing a topping, just get creative! Radish slices make great “monster eyes,” and thinly sliced bell peppers can be twisted into all sorts of spooky shapes. The ingredients are flexible, so don’t stress if you’re one olive short—you know, that’s just part of Halloween fun.
Equipment Needed
- Large saucepan or pot: For boiling the eggs. Any sturdy pot works—just make sure it fits all your eggs in a single layer.
- Mixing bowl: For mashing the yolks and mixing the filling. Glass or stainless steel is easiest for cleaning food coloring stains.
- Fork or potato masher: For breaking up yolks. I prefer a fork for more control, but a masher is quicker if you’re making a big batch.
- Spoon: For scooping fillings into the egg whites. If you want to get fancy, use a piping bag, but a spoon works fine.
- Knife: For slicing eggs and toppings. A small paring knife gives the best precision.
- Cutting board: For prepping olives and other decorations. Plastic boards clean up food coloring stains better than wood.
- Piping bag or zip-top bag (optional): For neat, decorative filling—also great if you want to pipe “witch hats” or “monster mouths.”
Don’t worry if you don’t have a piping bag; you can always snip the corner off a zip-top bag. If you’re using older utensils, just soak them in warm, soapy water after—you know, food coloring can be stubborn! Budget tip: Most of this gear comes cheap at a dollar store, and you don’t need anything fancy to make creepy deviled eggs look amazing.
Preparation Method
- Boil the Eggs (12-14 minutes): Place eggs in a single layer in your saucepan. Cover with cold water by about an inch. Bring to a gentle boil over medium-high heat. Once boiling, reduce heat and simmer for 12-14 minutes. (A gentle boil prevents rubbery whites.)
- Shock and Peel (5 minutes): Use a slotted spoon to transfer eggs to a bowl of ice water. Let sit for 5 minutes—this stops cooking and makes peeling a breeze. Tap each egg gently to crack the shell, then peel under cool running water.
- Halve and Remove Yolks (3 minutes): Slice each egg lengthwise. Pop out yolks and place in your mixing bowl. Set whites aside on a platter (I like to line mine with lettuce leaves for a witchy look).
- Mash Yolks (1 minute): Use a fork to mash yolks until fine and crumbly. If you see large lumps, press with the back of the fork or a potato masher.
- Mix Filling (2-3 minutes): Add mayonnaise, mustard, garlic powder, smoked paprika, salt, and pepper. Mix until creamy and smooth. Taste and adjust seasoning—sometimes I add a pinch more paprika for extra “smokiness.”
- Dye the Filling (1-2 minutes): Add green gel food coloring, a little at a time, until the mixture is a bright witchy green. (Tip: It’s easier to start light and add more as needed. Gel coloring is potent, so go slow!)
- Fill the Whites (5 minutes): Spoon or pipe the green filling into the egg whites. For a neat “witch hat” look, use a piping bag or zip-top bag with the corner snipped off.
- Decorate (5-10 minutes): Top each egg with sliced black olives (for “witch eyes” or “spiders”), chive strands (for “witch hair”), and roasted red pepper strips (for “bloody veins”). Press toppings gently so they stick. Get creative—this is the fun part!
- Chill (optional, 10-20 minutes): If you have time, chill the eggs in the fridge before serving. It helps the flavors meld. If you’re in a rush, just serve right away—no one will mind!
Troubleshooting tips: If your yolks turn dry, add a bit more mayo. If the whites split, use two spoons to carefully fill. If the color looks dull, add another drop of gel coloring. For “extra” creep factor, drizzle a tiny bit of beet juice for blood-red streaks. Trust me, kids love the gross-out factor!
I’ve found the best efficiency comes from prepping your toppings while the eggs boil. That way, you’re ready to decorate as soon as the filling is done. If you’re making a big batch, recruit some helpers—decorating is a blast, especially with little ones.
Cooking Tips & Techniques
After years of Halloween parties, I’ve learned a few tricks to make sure your creepy deviled eggs turn out perfect every time:
- Don’t Overcook the Eggs: Overcooked eggs get gray yolks and rubbery whites. Stick to 12-14 minutes and use an ice bath—it makes all the difference.
- Use Gel Coloring: Liquid food coloring works, but gel gives a brighter, less streaky result. Mix it in slowly to avoid accidental “Swamp Monster” shades.
- Pipe for Precision: If you want a super-neat look, pipe the filling. If you’re after “witchy mess,” spooning works fine. Sometimes, a little imperfection adds charm!
- Decorate Just Before Serving: Olives and peppers can bleed into the filling if left too long. I decorate within an hour of serving for the best look.
- Common Mistakes: Don’t skip the ice bath—peeling warm eggs is a nightmare. If you add too much coloring, lighten with extra mayo or a little mashed avocado.
My own failures? Oh, I’ve had my share. More than once, I’ve accidentally used too much food dye and ended up with eggs that looked radioactive. Lesson learned: add color slowly! Another time, I tried to use a fancy piping tip and ended up splattering filling everywhere. Honestly, a simple spoon works just fine.
Multitasking helps—while eggs boil, prep your toppings. If you want consistent results, make sure your eggs are all roughly the same size (jumbo eggs sometimes split). And if you’re serving a big crowd, make a few “plain” deviled eggs for less adventurous eaters. Creepy deviled eggs are all about fun, so embrace a little mess and don’t stress!
Variations & Adaptations
One of the best things about creepy deviled eggs is how easily you can customize them for any crowd. Here are a few fun twists I’ve tried:
- Dietary Adaptations: Use vegan mayo and skip egg yolks for a plant-based version (fill with mashed avocado and green peas).
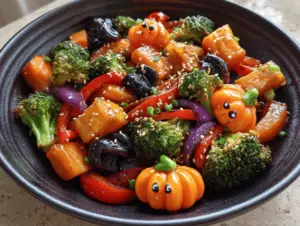
- Seasonal Flavor: Add a bit of pumpkin puree to the filling for an autumnal twist—just a spoonful for color and sweetness.
- Spicy Version: Mix in a dash of hot sauce or a pinch of cayenne for “devilish” heat. Jalapeño slices make great spooky toppings!
- Cooking Methods: Try steaming the eggs instead of boiling for a silkier texture. You can also make these in an Instant Pot—7 minutes on high pressure, quick release, and ice bath.
- Allergen Substitutions: For mustard allergies, swap in a little white vinegar for tang. For egg allergies, use mini bell peppers as “boats” for your filling instead.
My favorite personal variation? I once made these with a filling of mashed peas and feta cheese—super green, super tasty, and perfect for a group of vegetarian friends. You can also use pickled onions or capers for “monster warts.” If your crowd loves garlic, add a little extra. Don’t be afraid to get weird—Halloween is the best time for kitchen experiments!
Serving & Storage Suggestions
Creepy deviled eggs are best served chilled, straight from the fridge. The filling holds its shape, and the decorations stay crisp. For presentation, set them on a black platter or arrange them in a “witches’ cauldron” bowl lined with lettuce leaves. Sprinkle a little extra paprika or edible glitter for a magical effect.
Pair these with other Halloween snacks—think “mummy” hot dogs, pumpkin soup, or a spooky punch. They go great with apple cider or even a green smoothie (for a health-conscious crowd). If you’re serving adults, a smoky cocktail or bloody mary is a fun match.
To store, cover eggs tightly with plastic wrap or place in an airtight container. They’ll keep in the fridge for up to 2 days. For longer storage, you can prep the filling and whites separately, then assemble just before serving. I don’t recommend freezing—the texture gets weird. To reheat, let eggs sit at room temp for 10-15 minutes (don’t microwave). The flavors deepen overnight, so leftovers (if any!) taste even better the next day.
Nutritional Information & Benefits
Each creepy deviled egg (with standard filling and toppings) has about 70 calories, 5g fat, 1g carbs, and 4g protein. Eggs are a fantastic source of protein, vitamin D, and B vitamins. The olives and peppers add a little fiber and antioxidants—plus, they’re fun to eat!
This recipe is naturally low-carb and gluten-free. For keto eaters, just double-check your mayo label. If you’re watching sodium, use low-sodium olives and skip extra salt. Allergens: eggs, mustard, and sometimes mayonnaise (if it contains soy). Honestly, these eggs fit most diets and give a nice break from all the sugary Halloween treats.
From my own wellness journey, I love having a protein-rich snack at parties—it keeps energy up and helps balance out all the sweets. Creepy deviled eggs are scare-worthy for looks, but friendly for nutrition!
Conclusion
If you’re looking for the ultimate Halloween witch snack idea, creepy deviled eggs are where it’s at. They’re easy, crowd-pleasing, and give your party a spooky wow-factor without hours in the kitchen. From their ghoulish green yolks to the edible “eyeballs,” they’re the kind of treat that makes Halloween magical for kids and adults.
Honestly, I love how flexible this recipe is—you can switch up the flavors, go wild with decorations, or keep it classic. Every time I make these, I get a little more creative (and a little more daring with the toppings). If you try them, let me know your favorite twist!
Ready to make your own batch of creepy deviled eggs? Leave a comment with your best witchy decoration idea, share pics on Pinterest, or tag me if you serve them at your party. Happy haunting, and may your Halloween snacks be as fun as your costumes!
FAQs
How far in advance can I make creepy deviled eggs?
You can boil and peel the eggs up to 2 days ahead. Store whites and filling separately, then assemble and decorate the day of your party for the freshest look.
What’s the best way to get bright green filling?
Gel food coloring works best—start with a few drops and add more as needed. Mix well to avoid streaks. If you want a natural option, blend in a little cooked spinach or avocado.
Can I make these deviled eggs without mayonnaise?
Absolutely! Swap mayo for Greek yogurt, mashed avocado, or vegan mayo. The texture will change a bit, but the taste is still delicious.
How do I keep the decorations from sliding off?
Press toppings gently into the filling right after piping. Chill the eggs for 10-15 minutes to set the filling before serving—this helps everything stick.
Are creepy deviled eggs safe for kids with food allergies?
These are gluten-free and low-carb, but contain eggs and mustard. Always check ingredient labels and consider substitutions for allergies—use vegan mayo or skip mustard if needed.
Pin This Recipe!
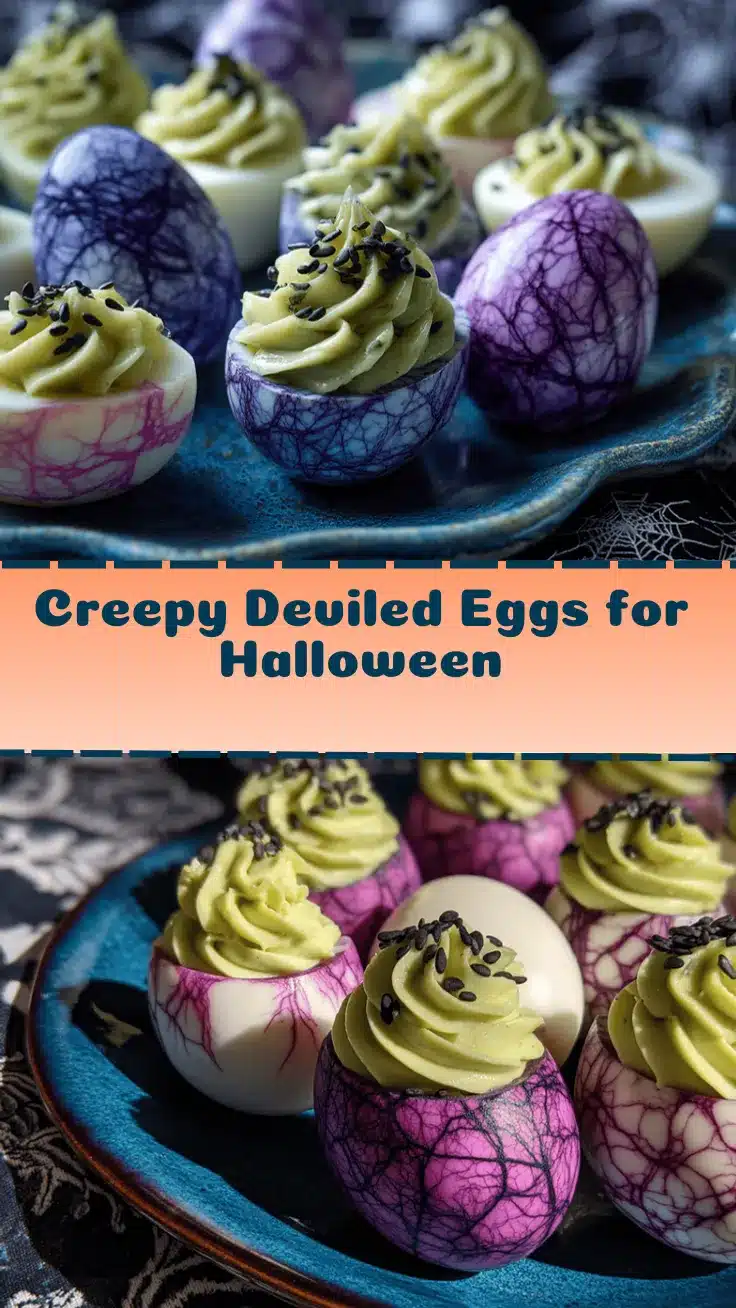

Creepy Deviled Eggs – Easy Halloween Witch Snack Idea
- Total Time: 35 minutes
- Yield: 24 deviled egg halves 1x
Description
These creepy deviled eggs feature bright green yolks, olive ‘eyeballs,’ and spooky toppings for a fun and savory Halloween treat. Perfect for parties, potlucks, or witch-themed gatherings, they’re easy to make and sure to impress kids and adults alike.
Ingredients
- 12 large eggs
- Water (for boiling)
- Ice (for shocking eggs after boiling)
- 1/3 cup mayonnaise
- 2 teaspoons yellow mustard
- 1/4 teaspoon garlic powder (optional)
- 1/4 teaspoon smoked paprika
- Salt and pepper to taste
- Green gel food coloring
- Black olives (whole and sliced, for decoration)
- Chives or green onions (for decoration)
- Roasted red pepper strips (optional, for decoration)
- Poppy seeds or sesame seeds (optional, for decoration)
Instructions
- Place eggs in a single layer in a large saucepan. Cover with cold water by about an inch.
- Bring to a gentle boil over medium-high heat. Once boiling, reduce heat and simmer for 12-14 minutes.
- Transfer eggs to a bowl of ice water and let sit for 5 minutes to stop cooking. Peel eggs under cool running water.
- Slice each egg lengthwise and remove yolks. Place yolks in a mixing bowl and set whites aside on a platter.
- Mash yolks with a fork until fine and crumbly.
- Add mayonnaise, mustard, garlic powder, smoked paprika, salt, and pepper. Mix until creamy and smooth. Adjust seasoning as needed.
- Add green gel food coloring a little at a time, mixing until the filling is a bright green color.
- Spoon or pipe the green filling into the egg whites.
- Decorate each egg with sliced black olives, chive strands, and roasted red pepper strips as desired. Press toppings gently to stick.
- Chill eggs in the fridge for 10-20 minutes before serving, if desired.
Notes
For best results, use gel food coloring for vibrant green yolks. Decorate just before serving to prevent toppings from bleeding. If making ahead, store whites and filling separately and assemble the day of your event. Adapt toppings and filling for dietary needs—vegan mayo, avocado, or Greek yogurt can be used instead of mayonnaise.
- Prep Time: 15 minutes
- Cook Time: 14 minutes
- Category: Appetizer
- Cuisine: American
Nutrition
- Serving Size: 1 deviled egg half
- Calories: 70
- Sugar: 0.5
- Sodium: 120
- Fat: 5
- Saturated Fat: 1.5
- Carbohydrates: 1
- Fiber: 0.2
- Protein: 4
Keywords: Halloween, deviled eggs, witch snack, spooky appetizer, party food, creepy eggs, kid-friendly, protein snack, gluten-free, low-carb