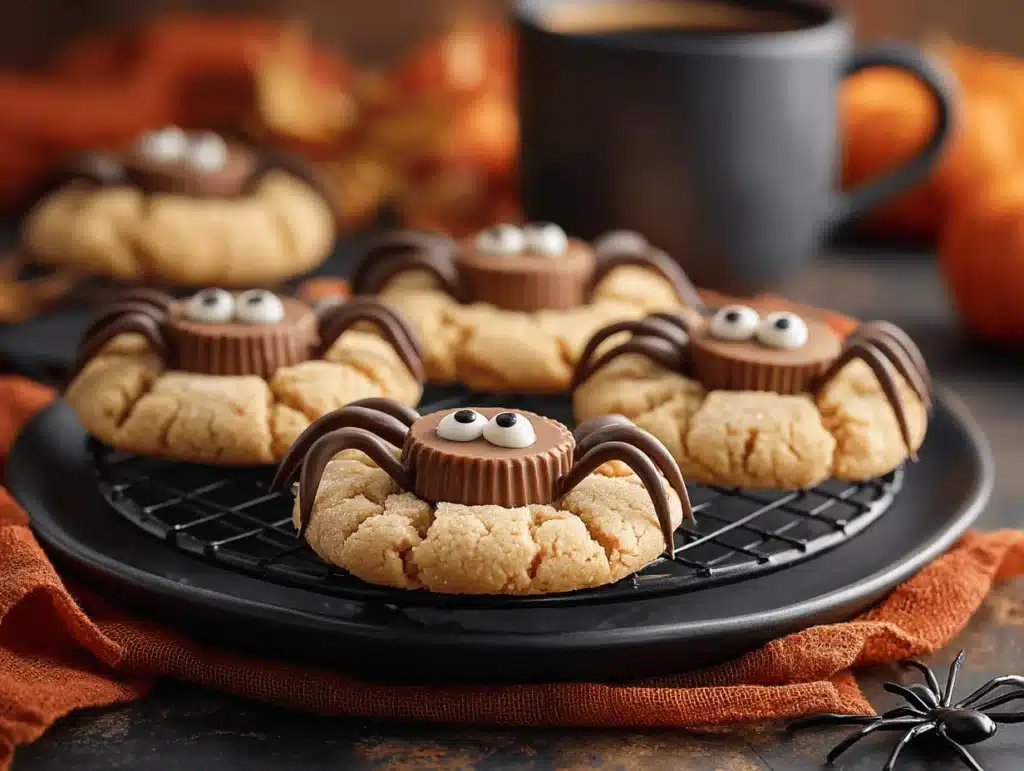
Chocolate legs wiggling, candy eyes staring—these peanut butter spider cookies are the kind of Halloween treat that turns your kitchen into a monster lab (in the best way!). The first time I baked these, my kids couldn’t stop giggling at the silly spiders crawling across the cooling rack. Honestly, I never thought peanut butter cookies could be so much fun. If you’re searching for a Halloween recipe that’s both adorable and ridiculously easy, peanut butter spider cookies are your ticket. The rich peanut butter base delivers that classic sweet-salty goodness, and transforming each cookie into a “spider” is just plain delightful.
I came across this idea while flipping through old holiday magazines—back when Pinterest was just a twinkle in our eyes. Now, these cookies pop up everywhere around Halloween, but I like to think my version is extra special. I’ve tweaked the classic peanut butter cookie recipe to hold up under the weight of chocolate candies (those spiders need sturdy bodies!). Plus, you won’t need any fancy equipment or hard-to-find ingredients—just a little creativity and maybe a steady hand for the icing legs. Whether you’re a Halloween party planner, a parent looking for a kid-friendly kitchen activity, or someone who loves peanut butter anything, these peanut butter spider cookies will make you a holiday hero.
Trust me, I’ve baked dozens of batches and tested every leg-drawing method (to varying degrees of success). These cookies are now a staple at our spooky gatherings, and they always disappear faster than you’d expect. So, if you want a treat that’s as fun to make as it is to eat, grab your peanut butter and let’s get into the creepy-crawly magic!
Why You’ll Love This Recipe
- Quick & Easy: Whips up in under 30 minutes—seriously, you can make these even after work!
- Simple Ingredients: Peanut butter, sugar, and chocolate candies—nothing complicated here.
- Perfect for Halloween: These cookies are basically made for spooky parties and school events. You know, the ones that sneak up on you.
- Crowd-Pleaser: Kids love decorating the spiders, and adults love eating them. They’re always the first treat gone at gatherings.
- Unbelievably Delicious: Soft, chewy peanut butter cookies topped with chocolate and candy—what’s not to love?
What really sets these peanut butter spider cookies apart is the balance of flavors. That deep, nutty peanut butter base is sweet enough for dessert but not so sugary that it overwhelms the chocolate spider “bodies.” I blend creamy peanut butter (never crunchy—it messes with the spider shape) with just enough flour to keep the cookies soft but sturdy. The trick is pressing the chocolate candy into the warm cookie so it melts slightly and anchors those “legs.” And, honestly, the decorating part is half the fun. I’ve tried this with my own kids, my nieces, even a skeptical neighbor or two—it always turns into a laugh-filled decorating session.
This recipe isn’t just a cookie—it’s an activity, a memory-maker, a little bit of edible art. If you want to surprise your family or wow your party guests, peanut butter spider cookies are the way to go. No stress, no complicated steps, just pure holiday joy (and a little bit of peanut butter magic). Let’s face it: Halloween is better with cookies that stare back at you!
Ingredients Needed
This recipe uses simple, wholesome ingredients to deliver bold flavor and satisfying texture without the fuss. Most of these are probably already in your pantry, and if not, substitutions are easy.
- For the Peanut Butter Cookie Base:
- Creamy peanut butter (about 1 cup / 240 g) (smooth texture is key for shaping)
- Granulated sugar (3/4 cup / 150 g) (adds sweetness and helps cookies spread)
- Light brown sugar (1/4 cup / 50 g) (for extra chewiness; optional but recommended)
- All-purpose flour (1 cup / 120 g)
- Baking soda (1/2 tsp / 2 g)
- Salt (1/4 tsp / 1 g) (balances the sweet and nutty flavors)
- Unsalted butter, softened (1/2 cup / 113 g) (adds richness)
- Large egg (1, room temperature)
- Vanilla extract (1 tsp / 5 ml) (boosts the flavor—don’t skip!)
- For the Spider Decoration:
- Chocolate candies (e.g., Reese’s Peanut Butter Cups Minis or Lindt truffles; about 18 pieces)
- Mini chocolate chips (for extra “body” detail, optional)
- Candy eyes or white chocolate chips (for the eyes; Wilton candy eyes are great)
- Chocolate icing or melted semisweet chocolate (for piping the legs; about 1/3 cup / 70 g)
- Small piping bag or a zip-top bag with the corner snipped
If you’re short on something, here are a few swaps I’ve tried:
- Use dairy-free butter for a lactose-free version—Earth Balance sticks work well.
- Substitute almond flour (same amount) for a gluten-free alternative, but cookies will be a bit softer.
- No candy eyes? Tiny chocolate chips or dots of white icing work as a backup.
- Crunchy peanut butter can work, but spiders get lumpy…kids don’t seem to mind though!
- For a nut-free version, sunflower seed butter works, but the flavor is earthier.
When it comes to brands, I usually reach for Skippy or Jif for the peanut butter—never let me down. And for the chocolate, Reese’s Minis have the perfect round shape for spider bodies, but any dome-shaped chocolate will do the trick. If Halloween sneaks up on you, don’t sweat the details—these cookies are forgiving, and even wonky spiders taste amazing.
Equipment Needed
- Large mixing bowl (for combining wet and dry ingredients)
- Hand mixer or stand mixer (makes creaming butter and sugar a breeze, but a sturdy spoon works too)
- Baking sheet (standard size, lined with parchment paper for easy cleanup)
- Small cookie scoop or tablespoon (for even cookie sizes—trust me, uniform cookies bake best!)
- Wire cooling rack (helps set decorations without melting)
- Piping bag or zip-top bag (for chocolate legs—if you don’t have one, snip the corner of a sturdy sandwich bag)
- Spatula (for transferring cookies)
I’ve used cheap, nonstick baking sheets for years, and they work just fine. If you’re new to piping chocolate, a zip-top bag is actually easier for beginners (less mess, more control). My small cookie scoop is a hand-me-down from my grandma, and it’s still going strong—so don’t worry about splurging on fancy gadgets. Just keep your mixing tools clean (especially if swapping between peanut butter and chocolate), and your spiders will come out picture-perfect.
If you don’t have a wire rack, let cookies cool right on the parchment. For piping, wash your bag (if reusable) with warm soapy water—chocolate can get stubborn! Kids love helping with the piping, so extra bags mean more fun and less fighting over who decorates what.
Preparation Method
-
Preheat & Prep:
Preheat your oven to 350°F (175°C). Line a baking sheet with parchment paper. Set out all ingredients—trust me, this saves a lot of scrambling! -
Cream Butter & Sugars:
In a large bowl, beat 1/2 cup (113 g) unsalted butter, 3/4 cup (150 g) granulated sugar, and 1/4 cup (50 g) light brown sugar together until light and fluffy (about 2 minutes). If using a hand mixer, start on low and slowly ramp up to medium speed. You want a pale, creamy mixture. -
Add Peanut Butter, Egg & Vanilla:
Mix in 1 cup (240 g) creamy peanut butter, 1 large egg (room temp), and 1 tsp (5 ml) vanilla extract. Beat until smooth—scrape down the bowl sides to make sure everything blends. The batter should smell nutty and look a little glossy. -
Combine Dry Ingredients:
In a separate bowl, whisk 1 cup (120 g) all-purpose flour, 1/2 tsp (2 g) baking soda, and 1/4 tsp (1 g) salt. Gradually add to the wet ingredients, stirring on low until just combined. Don’t overmix—this keeps cookies soft! -
Shape & Bake:
Scoop dough into balls about 1 tablespoon (15 g) each. Place 2 inches (5 cm) apart on the baking sheet. Bake for 9-11 minutes, until edges are set but centers look slightly underdone (they’ll finish setting as they cool). If you want extra chewy cookies, bake closer to 9 minutes. -
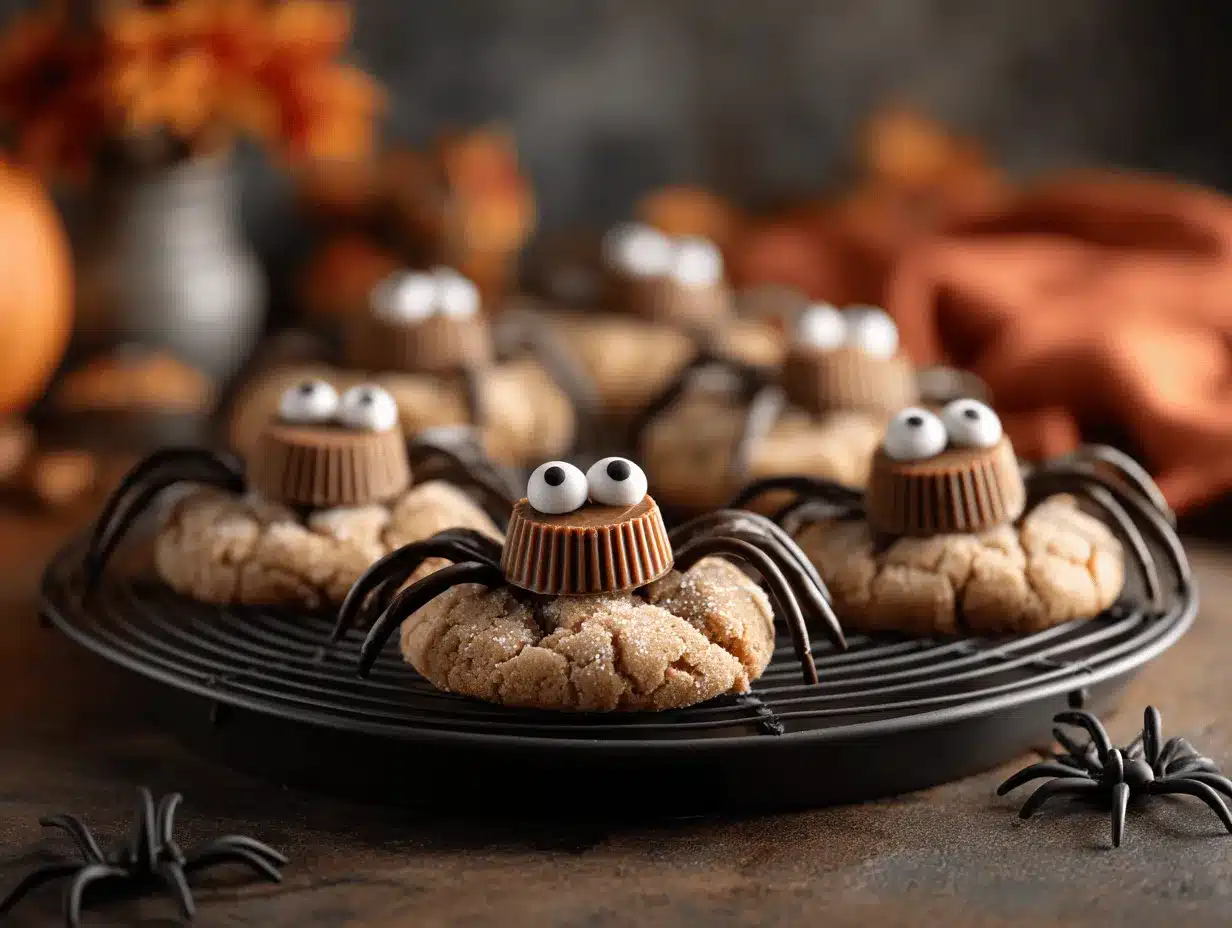
Spider Body Placement:
Immediately after removing cookies from the oven, press a chocolate candy (Reese’s Mini or similar) gently into the center of each cookie. Don’t wait—this helps the candy “stick!” Let cookies cool on the sheet for 5 minutes, then transfer to a wire rack. -
Decorate Spider Legs:
Once cookies are cool (about 20 minutes), fill a piping bag or zip-top bag with melted chocolate or chocolate icing. Pipe 4 legs on each side of the candy body—wiggly, straight, or curly, it’s up to you! If the chocolate is too thick, microwave it for 10 seconds to soften. -
Add Eyes:
Dot a tiny bit of melted chocolate or icing on the candy and press on candy eyes or white chocolate chips. Tip: Use tweezers if you want precise placement, but fingers work fine (just a little sticky!). -
Set & Serve:
Let decorated cookies sit until chocolate legs are firm (about 15 minutes). If you’re in a hurry, pop the rack in the fridge for 5 minutes.
Troubleshooting: If cookies spread too much, chill dough for 20 minutes before baking. If chocolate legs smudge, wait until cookies are completely cool. (I’ve had a few spiders with “melty” legs—still delicious!). For best results, don’t skip the parchment paper—it makes clean-up a breeze and keeps cookies from sticking.
Personal tip: Make a double batch if you’re baking for a crowd—these disappear fast! And, honestly, don’t worry about perfect spiders. Lopsided legs and goofy eyes just add to the Halloween spirit.
Cooking Tips & Techniques
After making these peanut butter spider cookies countless times—sometimes in a rush, sometimes with “help” from my kids—I’ve picked up a few tricks that make the process smoother and the cookies tastier.
- Chill the Dough: If you want thicker, chewier cookies, chill the dough for 30 minutes before baking. Warm dough tends to flatten out too much.
- Don’t Overbake: The cookies might look a tad soft when you pull them out of the oven. That’s perfect! They’ll firm up as they cool. Overbaking makes them crumbly.
- Use Room Temperature Ingredients: Butter and egg blend smoother when they’re not cold. This helps the dough come together nicely.
- Piping Chocolate Legs: Melted chocolate can be finicky. If it’s too runny, let it cool a little. If it’s too thick, microwave for a few seconds. Practice a couple of legs on parchment before decorating the cookies!
- Common Mistakes: I once made these with chunky peanut butter—cute, but the spider legs looked more like squiggles. Stick to creamy for best results.
- Multitasking: While cookies bake, melt your chocolate and prep the candy eyes. That way, you’re ready to decorate as soon as they come out of the oven.
- Consistency: Use a small cookie scoop for even sizes. That way, all your spiders bake at the same rate (no burnt legs!).
Honestly, my first batch was a bit of a mess—the legs were everywhere, and the eyes kept sliding. But, even the “worst” cookies got rave reviews (and lots of laughs). The main thing is to have fun and not stress over perfection. A little imperfection just makes each spider unique!
Variations & Adaptations
Peanut butter spider cookies are super flexible—here’s how you can make them your own:
- Dietary Variations:
- Gluten-Free: Swap the all-purpose flour for a gluten-free blend. Almond flour works too but makes the cookies softer.
- Nut-Free: Use sunflower seed butter instead of peanut butter. The flavor changes a bit, but the cookies still taste great.
- Dairy-Free: Use a plant-based butter and check that your chocolate candies are dairy-free.
- Seasonal Twists:
- Add orange or purple sprinkles to the spider bodies for a Halloween pop.
- Try making “snowman” cookies for Christmas by swapping the candy eyes and drawing hats instead of legs!
- Flavor Adaptations:
- Mix in 1/4 cup (25 g) mini chocolate chips to the cookie dough for double chocolate fun.
- Use dark chocolate candies for a richer flavor or white chocolate for “albino” spiders (kids love the weirdness!).
- Swap vanilla extract for almond extract for a subtle twist.
My personal favorite adaptation is adding a pinch of cinnamon to the dough—makes the spiders smell like fall! Don’t be afraid to let your kids go wild with decorations. Sometimes, the “wrong” eyes or crooked legs are the ones everyone remembers most.
Serving & Storage Suggestions
Serve these peanut butter spider cookies at room temperature for the best texture. The chocolate legs stay firm, and the cookie base is perfectly chewy. Arrange the cookies on a festive platter or a bed of Halloween sprinkles for extra flair. If you’re feeling fancy, tuck a few plastic spiders among the cookies—just warn guests first!
Pair with cold milk, hot cocoa, or even a pumpkin spice latte. They make a great centerpiece for Halloween parties, school bake sales, or cozy movie nights. For lunchbox treats, wrap cookies individually in wax paper—they travel well and stay fresh.
Storage: Place cookies in an airtight container at room temperature for up to 4 days. If you need to keep them longer, freeze undecorated cookies for up to 2 months. Just thaw and add the spider decorations before serving. To refresh cookies, microwave for 5 seconds—don’t overdo it, or the chocolate legs get melty!
Over time, flavors deepen—the peanut butter gets richer, and the chocolate settles into the cookie. Honestly, day-two spider cookies are my favorite!
Nutritional Information & Benefits
Each peanut butter spider cookie has approximately:
- Calories: 150
- Fat: 8g
- Carbohydrates: 18g
- Protein: 3g
- Sugar: 10g
Peanut butter adds a boost of plant-based protein and healthy fats (good for energy and keeping you full). The cookies are naturally higher in protein than most Halloween treats, which is nice if you want something more satisfying. They can be adapted for gluten-free or dairy-free diets—just watch out for allergen labels on your chocolate candies and peanut butter. If you’re keeping an eye on sugar, you can use a sugar substitute (like coconut sugar or a blend) though the texture changes a bit.
Personally, I love that these cookies feel indulgent but are still made with real, simple ingredients. They’re a treat you can feel good about sharing!
Conclusion
If you want a Halloween treat that’s as fun to make as it is to eat, peanut butter spider cookies are the answer. They’re easy, cute, and packed with peanut buttery goodness. Whether you’re baking with kids, surprising coworkers, or just treating yourself, these cookies are a guaranteed hit. Don’t worry about getting the legs perfect—embrace the goofy spiders and the smiles they bring.
I make these every year, and they’ve become a family tradition. Each batch is a little different, but the laughter and excitement never change. Feel free to get creative, swap ingredients, and make these spiders your own. If you try this recipe, let me know in the comments—share your decorating wins, your cookie fails, or your own spooky adaptations!
Happy Halloween, and may your cookies always crawl off the platter faster than you can bake them!
Frequently Asked Questions
Can I make peanut butter spider cookies ahead of time?
Absolutely! Bake and freeze the cookie bases up to 2 months ahead. Decorate with chocolate and eyes after thawing for best results.
What’s the best peanut butter for these cookies?
Creamy peanut butter works best—it gives a smooth texture and holds the shape well. Natural peanut butter can be a bit oily, so I stick with brands like Skippy or Jif.
How do I get the chocolate legs to look neat?
Let cookies cool completely before piping the legs. Practice on parchment paper if you’re new to piping. Use a zip-top bag for more control.
Can I use other candies for the spider bodies?
Yes! Any round chocolate candy works—Reese’s Minis, Lindt balls, or even Rolos. Just make sure they’re sturdy enough to press into the warm cookie.
Are these cookies safe for nut allergies?
Not with peanut butter, but you can substitute sunflower seed butter for a nut-free version. Always check candy labels for cross-contamination warnings.
Pin This Recipe!
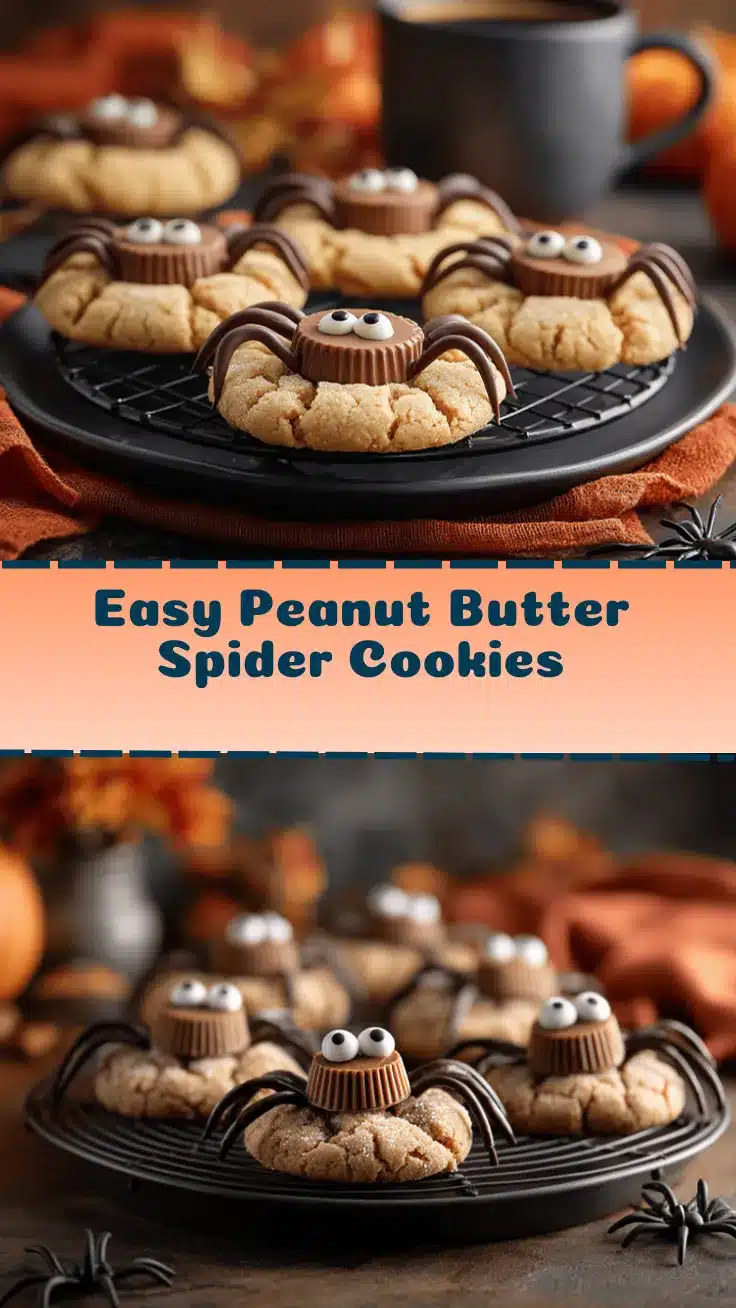

Peanut Butter Spider Cookies
- Total Time: 30 minutes
- Yield: 18 cookies 1x
Description
These adorable peanut butter spider cookies are a quick and easy Halloween treat featuring a soft, chewy peanut butter base topped with chocolate candies and candy eyes. Perfect for parties or baking with kids, they’re as fun to decorate as they are to eat.
Ingredients
- 1 cup creamy peanut butter
- 3/4 cup granulated sugar
- 1/4 cup light brown sugar (optional but recommended)
- 1 cup all-purpose flour
- 1/2 teaspoon baking soda
- 1/4 teaspoon salt
- 1/2 cup unsalted butter, softened
- 1 large egg, room temperature
- 1 teaspoon vanilla extract
- 18 chocolate candies (e.g., Reese’s Peanut Butter Cups Minis or Lindt truffles)
- Mini chocolate chips (optional, for body detail)
- Candy eyes or white chocolate chips (for eyes)
- 1/3 cup chocolate icing or melted semisweet chocolate (for piping legs)
- Small piping bag or zip-top bag with corner snipped
Instructions
- Preheat oven to 350°F (175°C). Line a baking sheet with parchment paper.
- In a large bowl, beat unsalted butter, granulated sugar, and light brown sugar together until light and fluffy (about 2 minutes).
- Mix in creamy peanut butter, egg, and vanilla extract. Beat until smooth.
- In a separate bowl, whisk together flour, baking soda, and salt. Gradually add to wet ingredients, stirring on low until just combined.
- Scoop dough into balls about 1 tablespoon each. Place 2 inches apart on the baking sheet.
- Bake for 9-11 minutes, until edges are set but centers look slightly underdone.
- Immediately after removing cookies from the oven, press a chocolate candy gently into the center of each cookie. Let cookies cool on the sheet for 5 minutes, then transfer to a wire rack.
- Once cookies are cool (about 20 minutes), fill a piping bag or zip-top bag with melted chocolate or chocolate icing. Pipe 4 legs on each side of the candy body.
- Dot a tiny bit of melted chocolate or icing on the candy and press on candy eyes or white chocolate chips.
- Let decorated cookies sit until chocolate legs are firm (about 15 minutes). For faster setting, refrigerate for 5 minutes.
Notes
For thicker, chewier cookies, chill the dough for 30 minutes before baking. Use creamy peanut butter for best results. Practice piping chocolate legs on parchment before decorating cookies. Cookies can be made gluten-free or nut-free with substitutions. Imperfect spiders add to the Halloween fun!
- Prep Time: 15 minutes
- Cook Time: 11 minutes
- Category: Dessert
- Cuisine: American
Nutrition
- Serving Size: 1 cookie
- Calories: 150
- Sugar: 10
- Sodium: 80
- Fat: 8
- Saturated Fat: 3
- Carbohydrates: 18
- Fiber: 1
- Protein: 3
Keywords: Halloween, peanut butter cookies, spider cookies, kid-friendly, party treats, easy dessert, chocolate, holiday baking